Fall always inspires me to get more active in the kitchen. I recently shared this AMAZEBALLS risotto dish on IG and was (happily) overwhelmed with DMs asking for this recipe. So I figure I’d share it here!
Can I first start off with the fact that this particular recipe is VEGETARIAN & DAIRY-FREE!? Normally risotto dishes involve some sort of cream-base & this one doesn’t. However, this recipe does call for a smidge of butter in the beginning steps, so best advised to substitute with a DF butter option like Smart Balance if you’re super lactose-intolerant, dairy sensitive, or straight-up ‘team no dairy.’
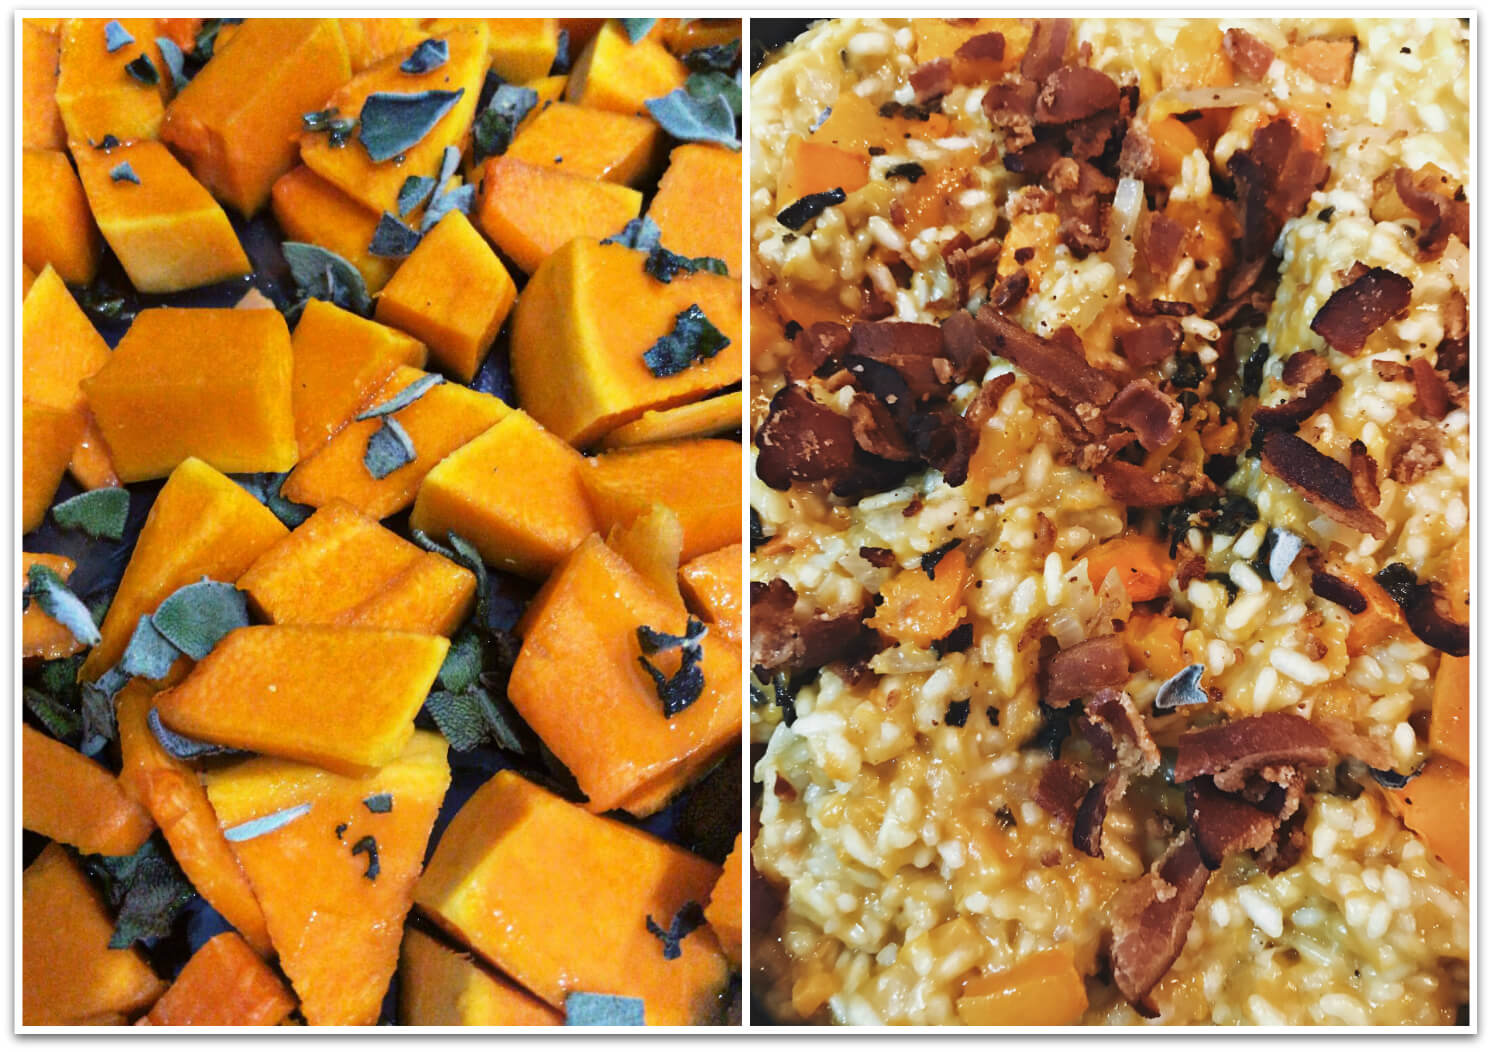
*You’ll see that I added bacon & grated parmesan to the dish, but clearly those are optional last minute additions to the plated meal.
RECIPE LEVEL
…
Easy-peasy but if you haven’t cooked risotto before, then you’ll be in for a patience-test. So best advise you get that stirring wrist prepared & start cooking an hour earlier than you intend to have this ready to eat. Risotto is wonderful comfort food but can be a b*tch to make because it likes to take its sweet, sweet time soaking in the goodness.
WHAT YOU’LL NEED
*This recipe feeds (4) people; Halve the ingredients if making dish for (2)
…
(1) Butternut Squash, peeled & cut into bite-size chunks
(3) tbsp Olive Oil
(1) Bunch Sage, leaves picked & chopped
(6) cups Vegetable Stock
(1/4) cup Butter/Smart Balance (or other DF butter substitute)
(1) Onion (white or yellow), finely chopped/diced (HIGHLY suggest getting one of these)
(1.5) cups Plain Risotto Rice
(1) glass of White Wine, amount poured to your discretion (I was generous with mine)
(OPTIONAL) Grated Parmesan & Bacon Bits, amount added to your discretion
HOW IT’S MADE
…
STEP ONE
Pre-heat oven to 392°F. Toss chopped squash with olive oil together with chopped sage into a shallow oven-safe pan (I used this glass one). Personally, I eye-balled the amount of olive oil I added (original recipe called for 1 tbsp) but gently coating the squash worked perfectly for final roasted result.
Make sure one layer of squash is scattered evenly in pan & roast in oven for 30 min. My oven is a little slow so it took close to 45-50 minutes to get perfect. I suggest checking in on it every 5 minutes past the 30 minute mark if it takes more time. Once done, I turned oven off and let dish sit in there to keep warm while doing other steps for the risotto.
STEP TWO
While squash is roastin’, pour the vegetable stock into a mid-deep pot and bring to a boil. Set on low simmer once boiled. In a separate skillet pan (make sure it’s deep/large enough to hold the final risotto meal), melt butter/butter substitute over medium heat & add chopped onion once melted. Stir together gently for 8-10 min before adding the risotto. Stir everything together until everything is coated in the butter & when grain edges of the risotto rice begins to look transparent.
**At this point, you should be in the habit of stirring consistently & prepared to continue until meal is complete. Sorry folks, no breaks.
STEP THREE
Pour that glass of white wine and let it simmer into the mix of risotto & onions until evaporated entirely (yes, you’re still stirring!) Once evaporated, begin to add the vegetable broth (which has been boiled, then lowered to low simmer heat to keep warm) one ladleful at a time.
**Here’s the trick to getting the perfect risotto – DO NOT add another ladle of broth until the current one is evaporated entirely. You’ll drown the risotto by pouring ladle after ladle into it, as well as overflow your skillet pan. It’s a tedious process because 1) it takes a little bit to evaporate, and 2) you have to keep stirring the entire time, with every ladle pour. You can cheat the time by GENTLY increasing the heat from medium to medium-high, but be mindful of stirring even more-so (especially around the edges of the pan) or else the risotto will burn.
STEP FOUR
Once all the broth has been ladled into the skillet & you’ve gained muscle in your stirring arm, the risotto should start to appear creamy and slightly soupy. Taste test will determine if the risotto is soft enough to consume & I highly suggest tasting it before calling it done – looks can be deceiving and risotto is the queen of appearances; it looks soft but comes with a rude crunch upon taste. If that’s the case, then just keep stirring, just keep stirring, just keep stirring stirring stirring…
STEP FIVE
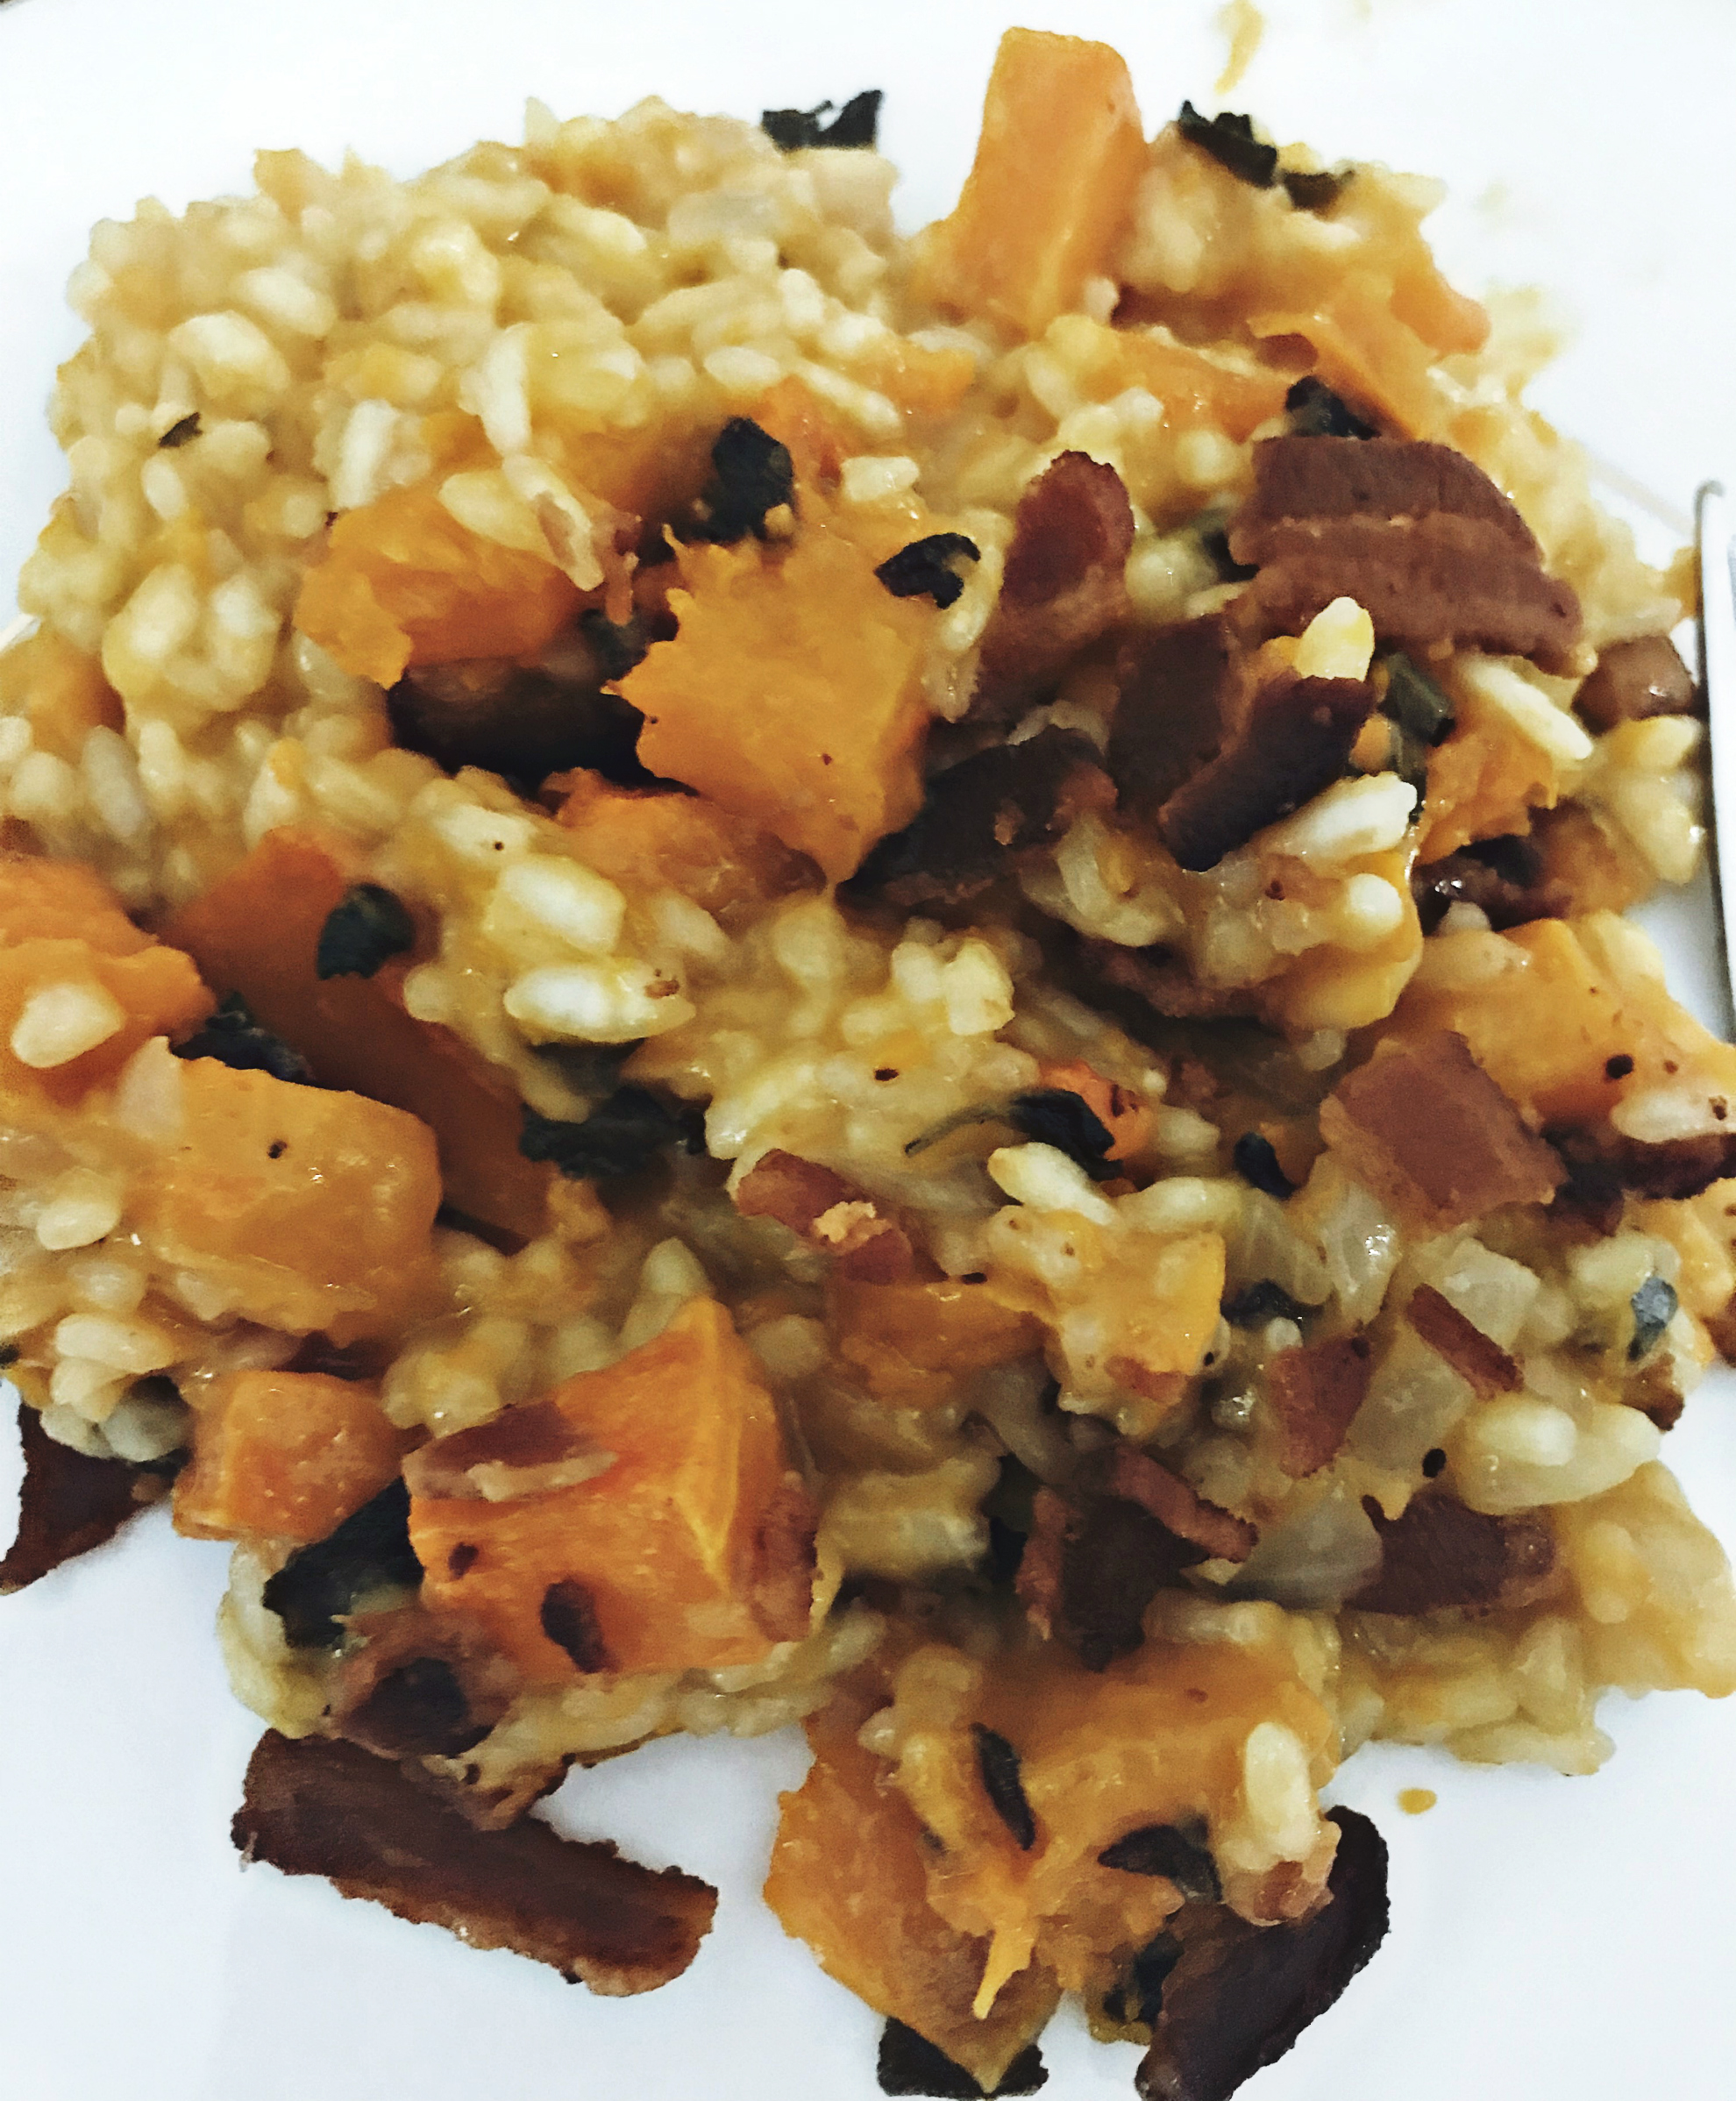
Remember the squash!? At this point, I trust you’ve monitored it during the risotto steps & kept it in the warm (OFF) oven until now. Take a spoon or potato masher and mash up half of the pan, keeping the other half in original form. Stir the mashed up squash into the risotto until it blends naturally as an orange masterpiece. At this point, you can now add the optional cheese &/or bacon bits and stir together into the mix as well.
STEP SIX
Grab a plate, get some risotto on there, and add some of the whole roasted chunks of squash you have leftover – VOILA! You’ve successfully made an amazing fall-inspired comfort food dish that will help you appreciate the phrase, “With time comes reward” or whatever that saying is.
NOW TIME TO ENJOY!
You can also see some behind-the-scenes making of this recipe on my IG Stories ‘Recipes’ Highlight!

I love butternut squash! I think my boyfriend is going to try a new recipe this weekend.
YAY!! Let me know how you guys like it! xx