There used to be a time when your images uploaded to Instagram had to fit certain dimensions. Today the app has become more flexible and allows you to post larger-size photos to your ‘gram (which is very nice, thank you Instagram!)
However some of you, like myself, might prefer the old school way of posting to fit the Insta-square format. For starters, it looks nicer and more consistent if the rest of the images in your grid follow suit.
Personally I try to post all my images to Instagram using the original settings as often as I can. But there are times I come across the dilemma of sacrificing an image I really like for one that fits the dimensions better.
So I had to think of a strategy to make every image I wanted to post Insta-size worthy & here are some tricks I came up with:
(iPhone Photos) USE THE SQUARE FORMAT ON CAMERA
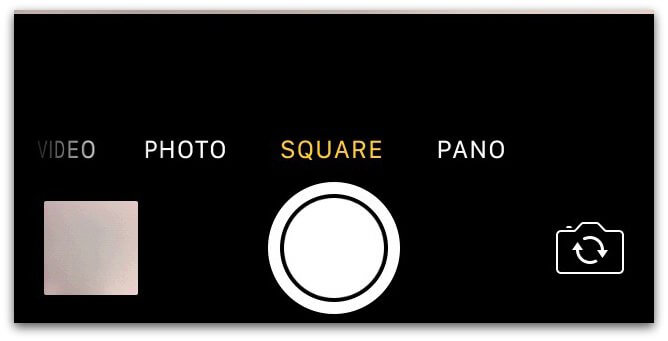
When you go to take a picture on your iPhone, set your camera to shoot on the Square format rather than the Photo option. This allows you to take an image that is perfectly matched with the dimensions of Instagram.
For example, if you’re taking an outfit post or one that requires you to capture the entire setting, you’ll know for sure it will make the shot if you take it on square.
(DSLR Photos) SHOOT HORIZONTALLY
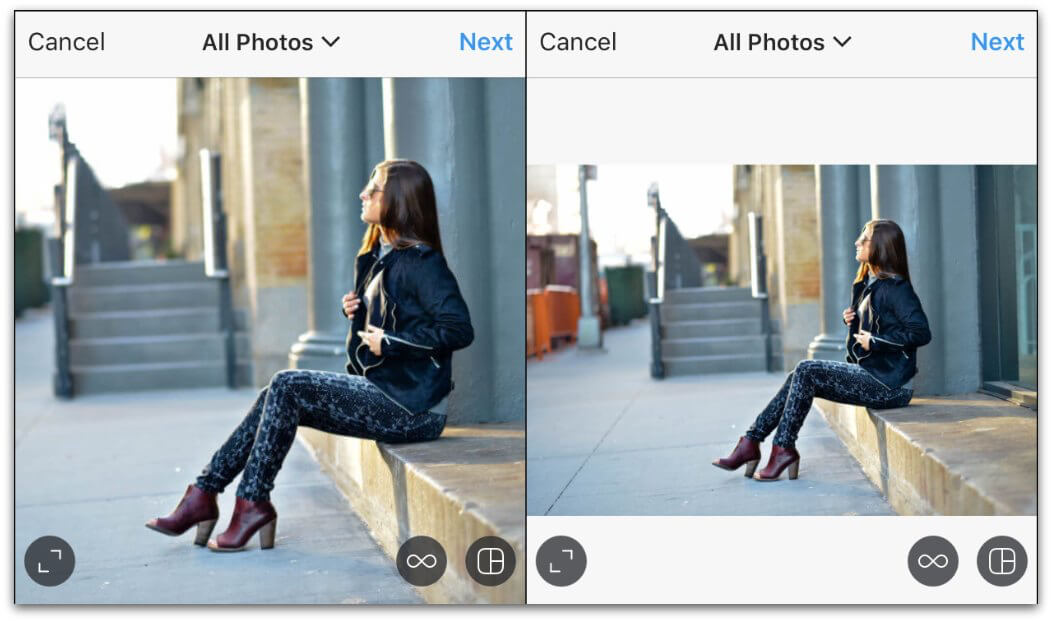
Original Horizontal Image Uploaded vs Resized Horizontal Dimensions For Instagram (Auto Feature: Tap < > Icon)
Simply taking images horizontally rather than vertically on your camera gives your images a greater chance of being Instagram worthy, size wise. You can easily upload high-quality images to your Instagram without having to compromise on any details because the entire look/setting made the shot originally.
(My Secret Tip) RE-SIZING WITH PHOTO APPS & EDITING TOOLS
Let’s say you’ve tried the above two pre-posting strategies but either the photo quality was bad/fuzzy or it just straight up didn’t work in your favor. You have a perfectly edited image, in vertical format, that you posted to your website and you would like to use the same image for your Instagram post.
Here’s how you can cheat the system & post it as a square rather than as an oversized photo:
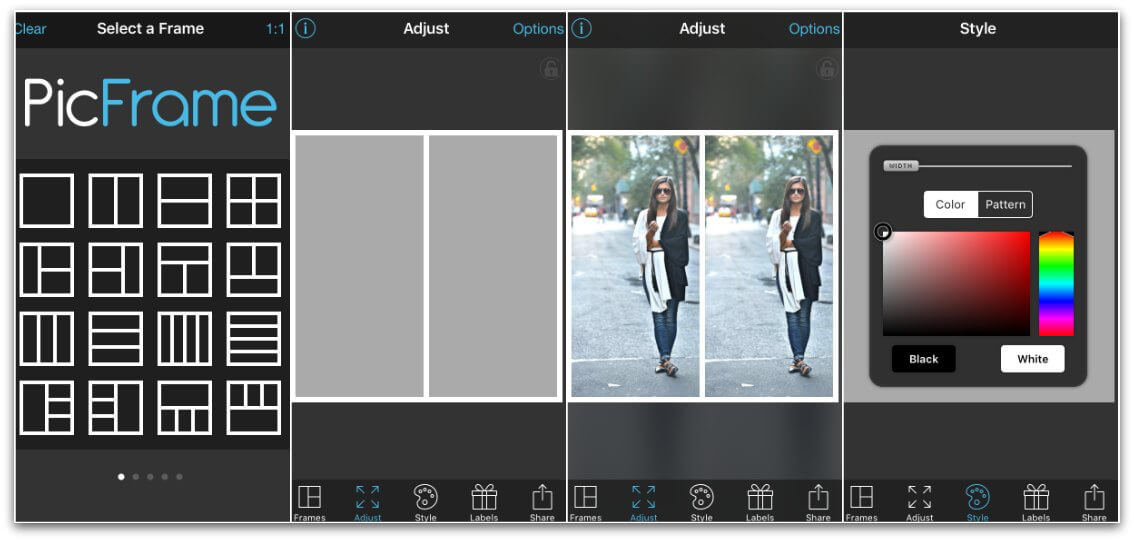
- Using the PicFrame app (iPhone) Upload your chosen image to the frame layout with (2) vertical columns
- Tap one of the grey boxes outlined and select the Camera Roll option; upload your chosen image
- Do the same for the other grey box on the opposite side; you should have the same image on each side of the white border
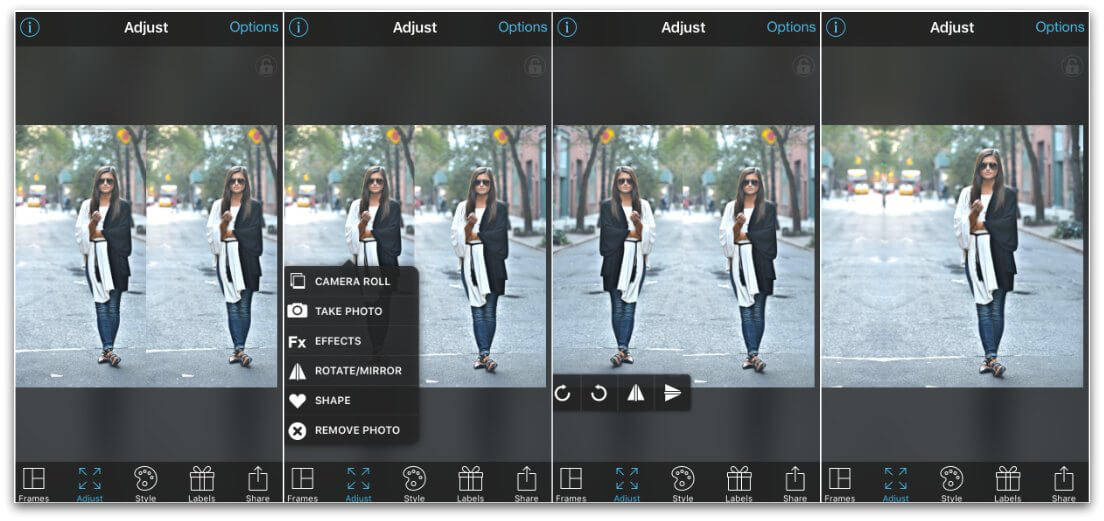
- Tap one of the images and select the Rotate/Mirror option; you’ll get a choice of 4 ways to edit, select the icon that looks like a right side up triangle with the line down the middle
- This “mirrors” and flips the image to its other side
- Select the STYLE icon and slide the width of the frame border all the way to the left, removing the border all together
- At this point you can drag one side of an image towards the other one, making one of them larger than the other and taking over the space of the smaller one – essentially you’re scaling the original image to fit in the square using the same background, making editing a lot easier when complete
- Hit the SHARE icon on the bottom right and select SAVE on the top left; it should then appear in your photo library on your phone.
Occasionally you get a perfect square of the shot and don’t need to further edit – you can post it right to Instagram. However, sometimes remnants of the mirrored image can make the square shot and should be removed before posting to Instagram.
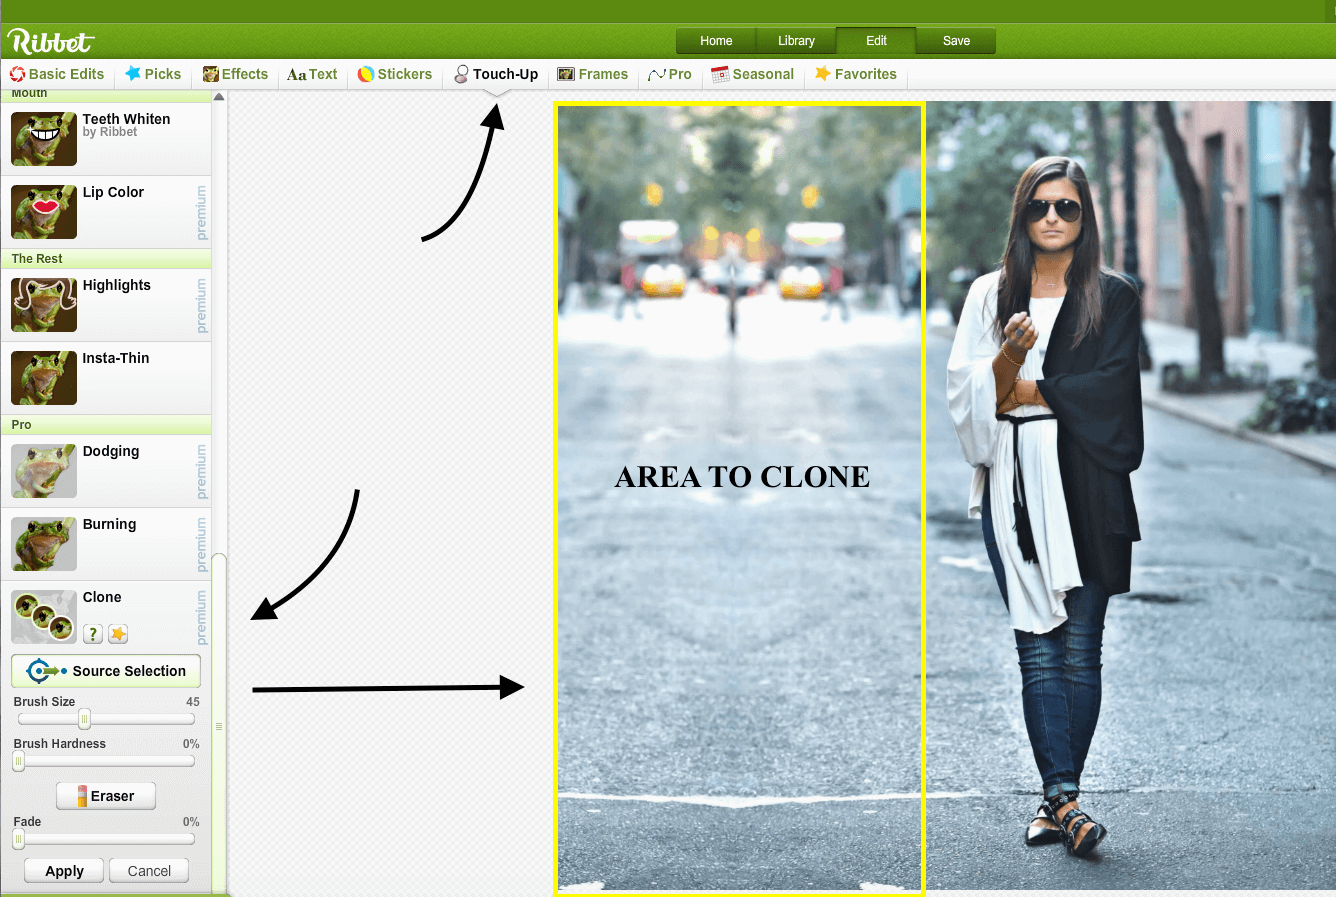
- Using the photo editing site Ribbet, upload your newly created square image from PicFrame to your library (I email the photo to myself from my phone to my desktop – I suggest you use a computer for this editing process)
- Click the Touch Up tab on the top bar above your uploaded image and scroll all the way down until you see the CLONE tool on the left sidebar that appears
- Using the CLONE tool, you can eliminate the remnants of the mirrored image by selecting parts of the photo to cover it with. My suggestion is to make the selecting button smaller and click on an area close to the part you’re trying to cover, so you can match the colors to the best of your ability.
- When done, save & email the newly edited/cloned photo back to yourself so you can post to Instagram!
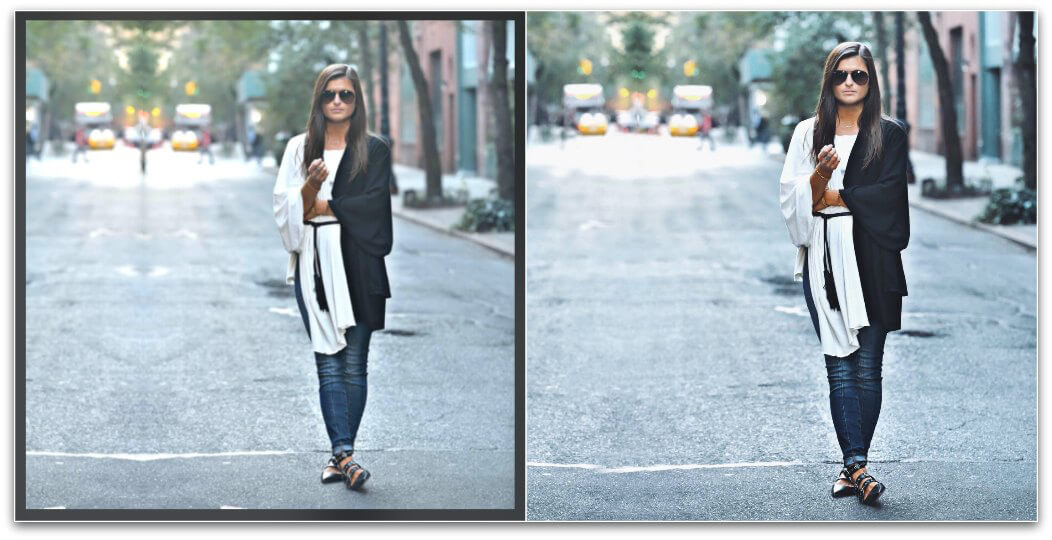
Before & After Using Clone Tool
*Ribbet is a fantastic editing tool for sprucing up your images – including the basic editing tools plus personal touch up tools including airbrush, teeth whiten, self-tanner, & more! To access these tools, you’ll need to sign up for a premium account & it’s totally worth it! Only $5 a month and you get full access to everything on the editing site!
A little lengthy in detail but this strategy has allowed me to post all the images I’ve ever wanted to share to Instagram despite their original sizes. It can be a tedious process but it’s nice to know there’s a backup plan to sharing your images if you forget or don’t manage to use the first two shooting techniques.
BE SURE TO SIGN UP FOR MY NEWSLETTER SO YOU NEVER MISS A BLOGGING TIP OR OUTFIT POST!