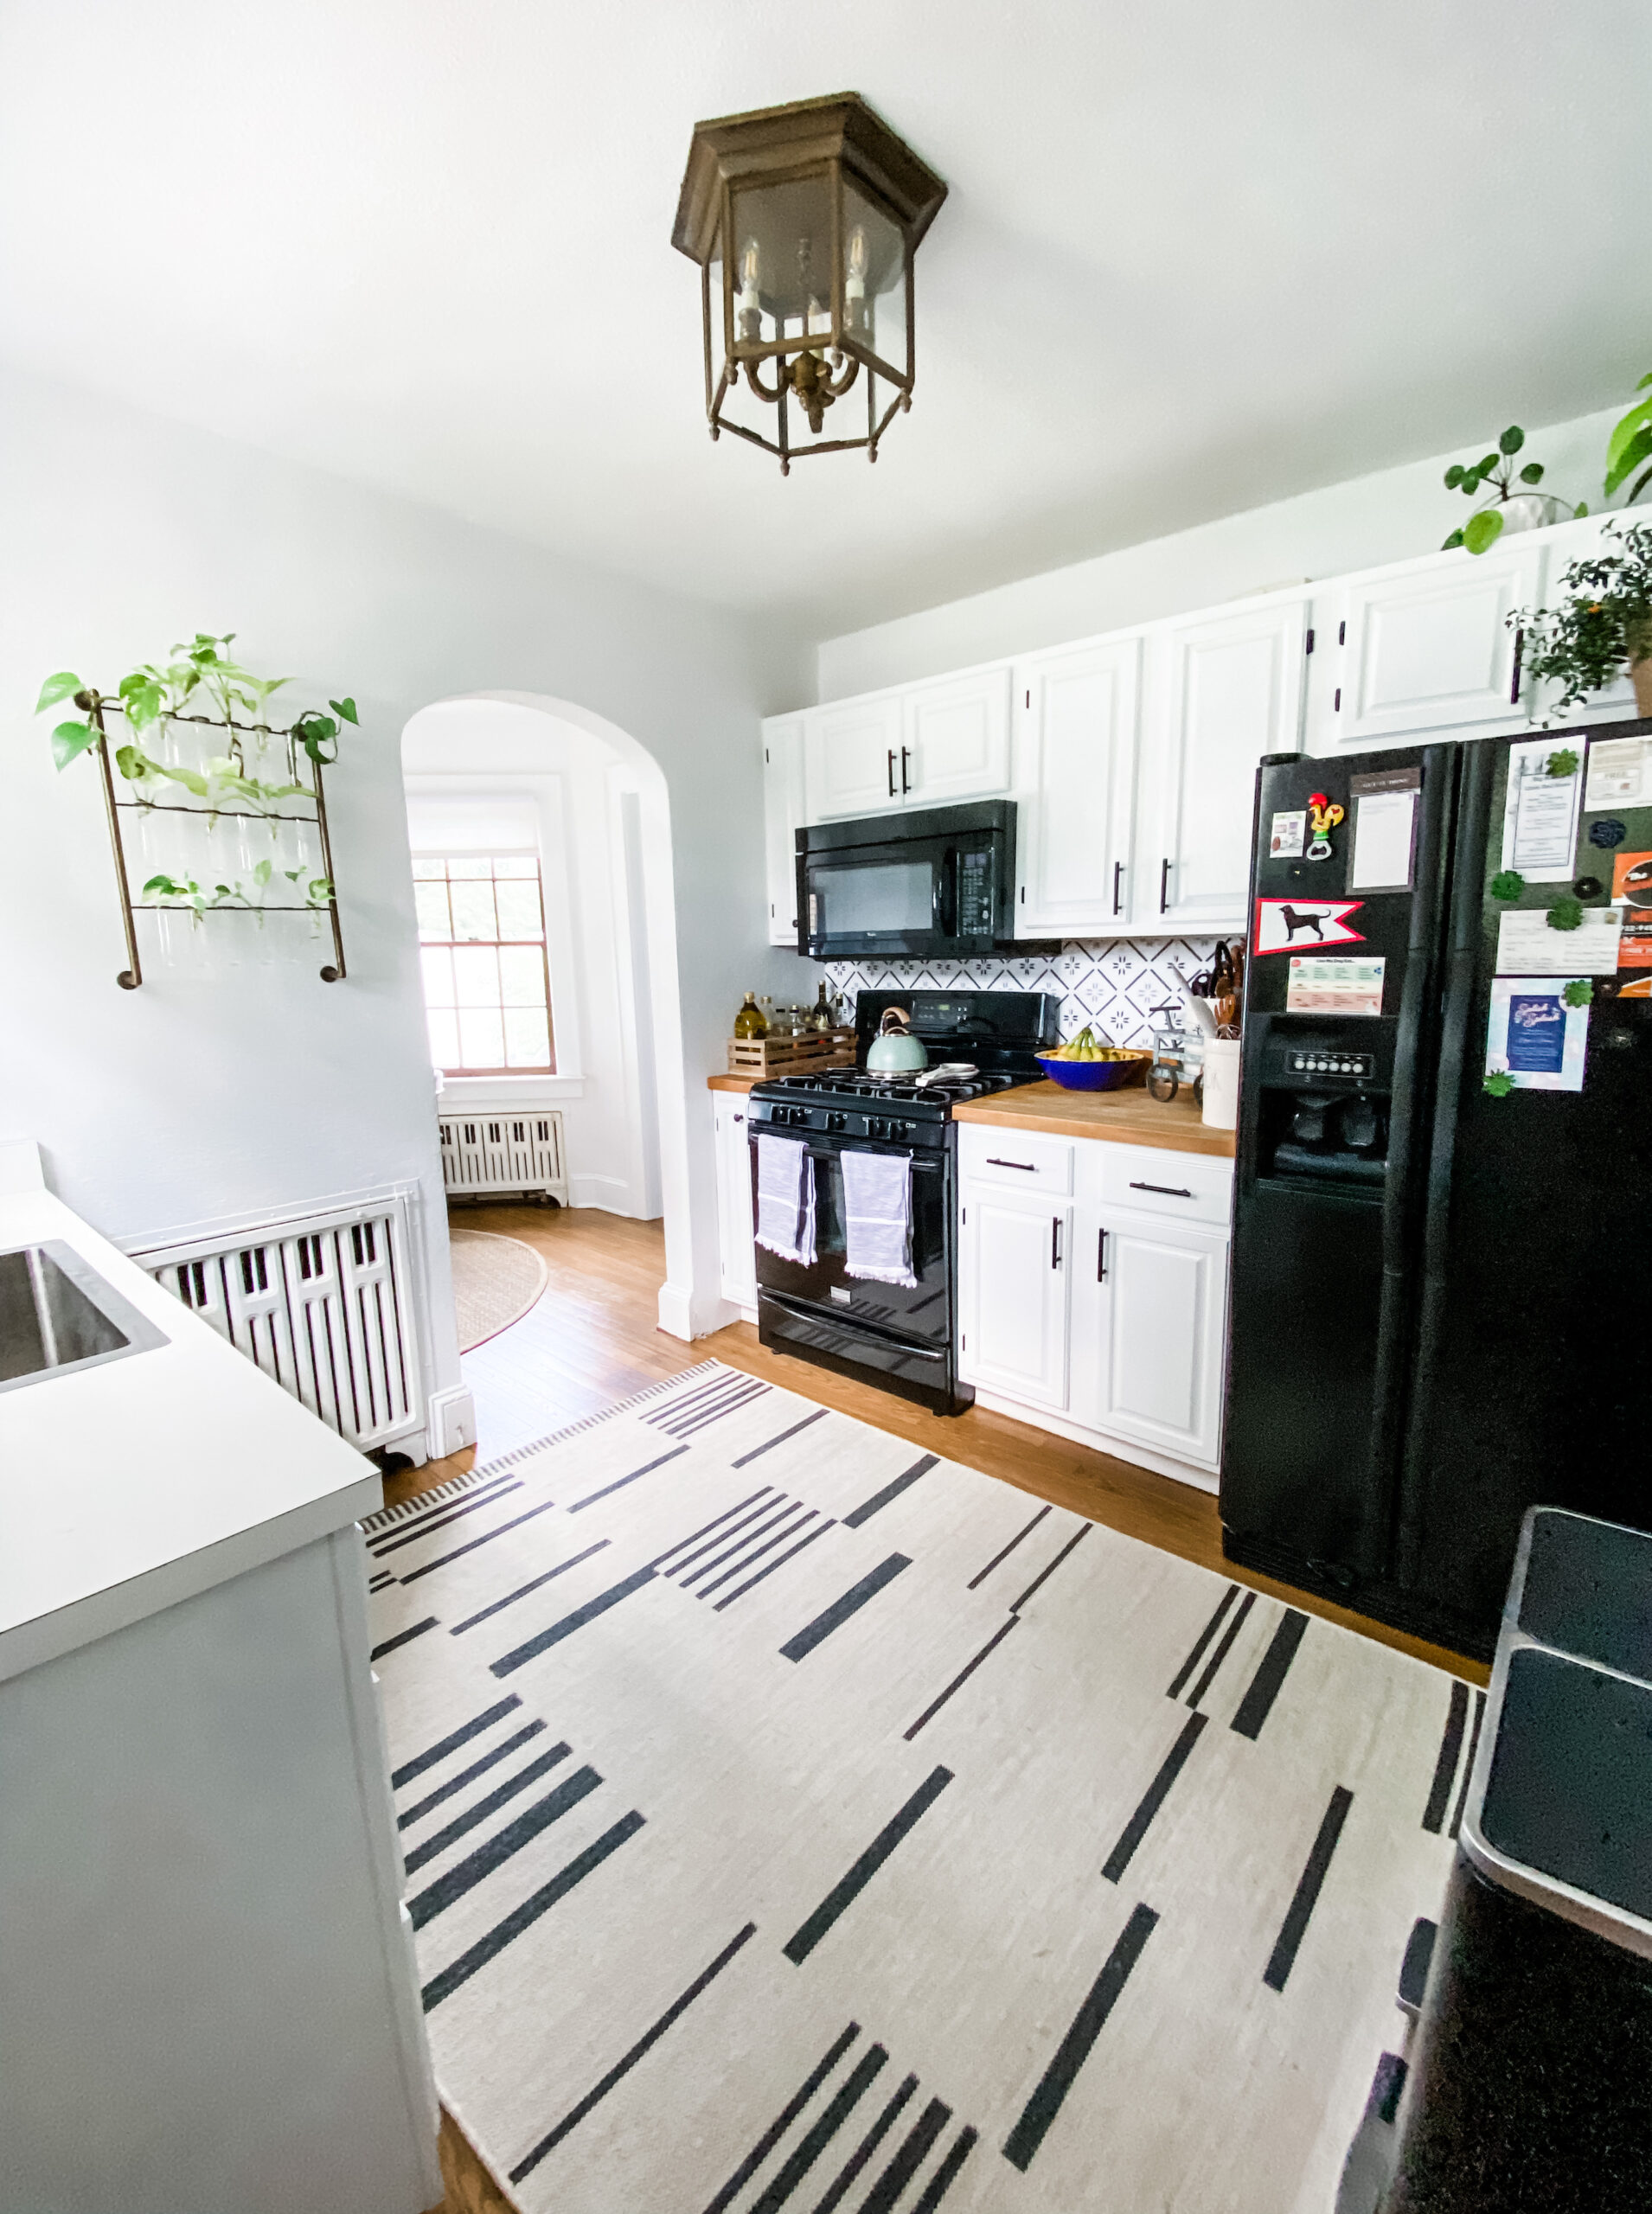
I can’t begin to tell you how excited I am to be FINALLY sharing our completed Kitchen Space here on the blog! Since before we moved in last fall, we’ve been hard at work updating this tiny yet mighty heart of the home; taking it from head-to-toe wood cabinets & peel-and-stick tile flooring to what you see in these photos above & below – clean, white & bright. Naturally, many lessons were learned along the way in this room transformation – like to never assume installing hardware would be a quick 1-2 hour job or think a new dishwasher installation would be smooth sailing with a professional plumber handling the situation…HA! (more on that later in this post.) But like any mini reno/DIY project for the home, always expect something to be utter chaos until completion. That’s what makes it fun, right? Well, maybe that depends at what risk/cost at the end of the day lol.
So it’s been awhile since I’ve shared an update like this of our home – remember these early before & afters? It’s amazing how much we’ve accomplished here, both inside & out, since moving last October. For those who aren’t familiar with the story behind our ‘Set Sail Cottage’ — click here to catch up.
Ultimately, the updates we decided to make for our Kitchen Space (as well as the rest of our home) are those that make sense for what this small home is currently. We know the time will come where we’ll outgrow it & need to decide whether to move or renovate (we’re far from making a decision at this time, after all there’s a wedding to get through first.) But in the meantime, the updates we’ve made to this small, limited kitchen space are those that make it much more functional. Should we opt to keep this property as a rental, at least we’ve made the necessary upgrades to the most important room of the home.
I should also mention that a majority of decorative items shown in this post are from HomeGoods, antique stores, or simply old/OOS. But I’ve done my best to link similar styles & include information on most everything you see below – of course, feel free to comment if I’ve missed anything you’d like more information about / would like to know where to get something like it, etc.
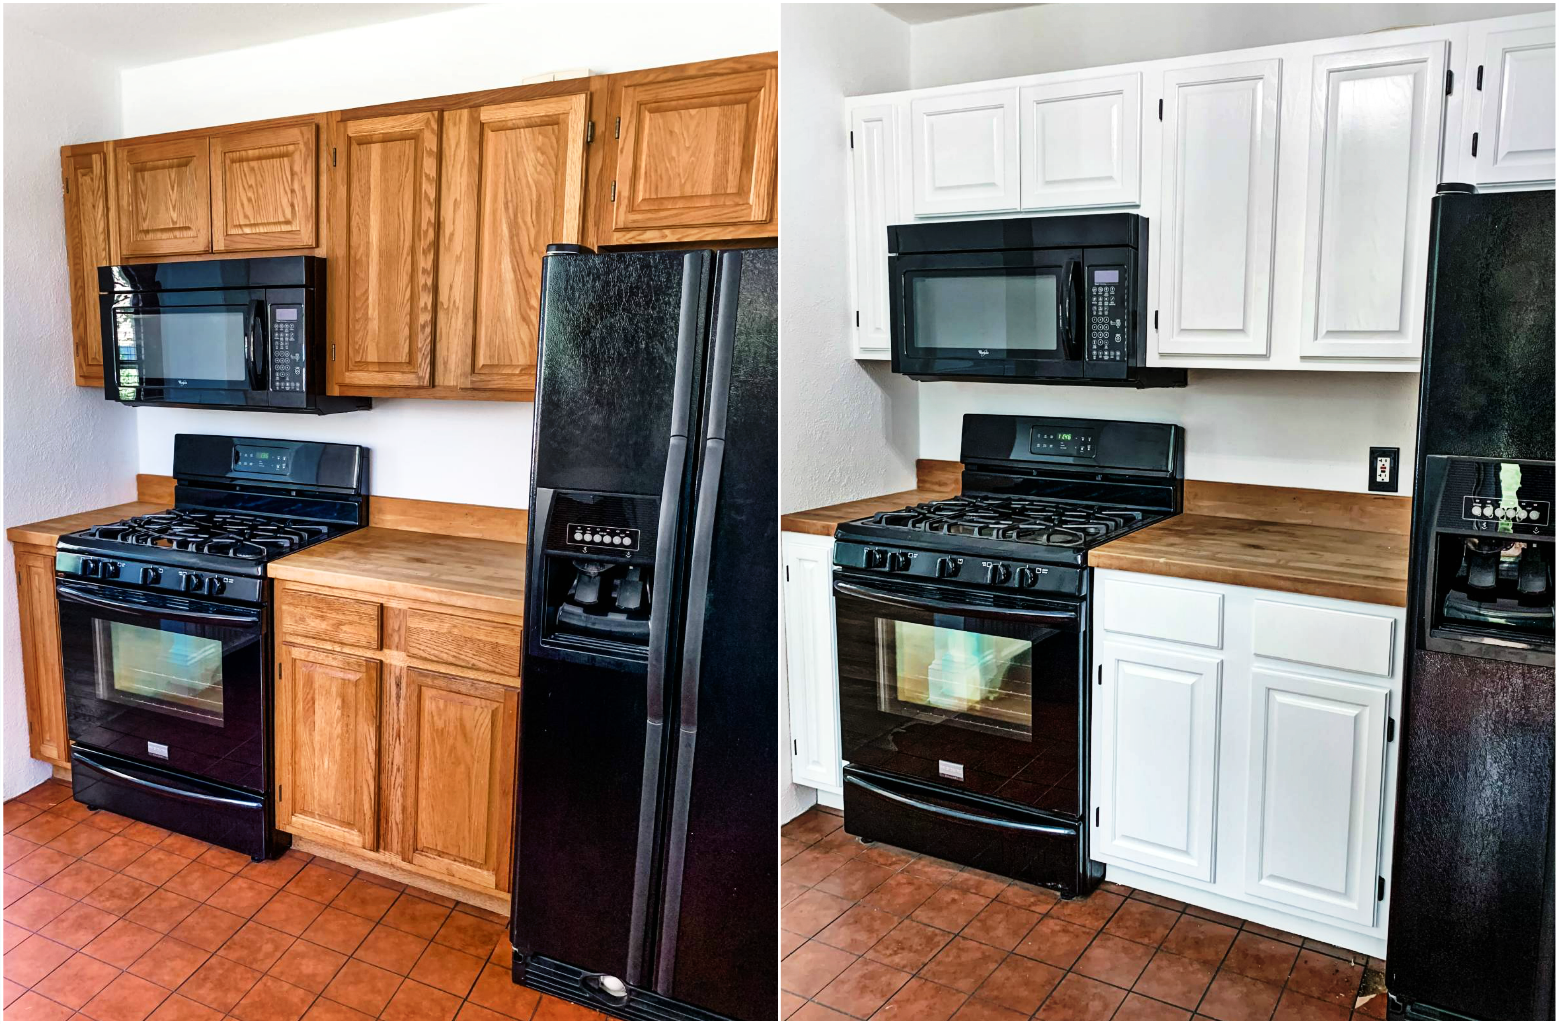
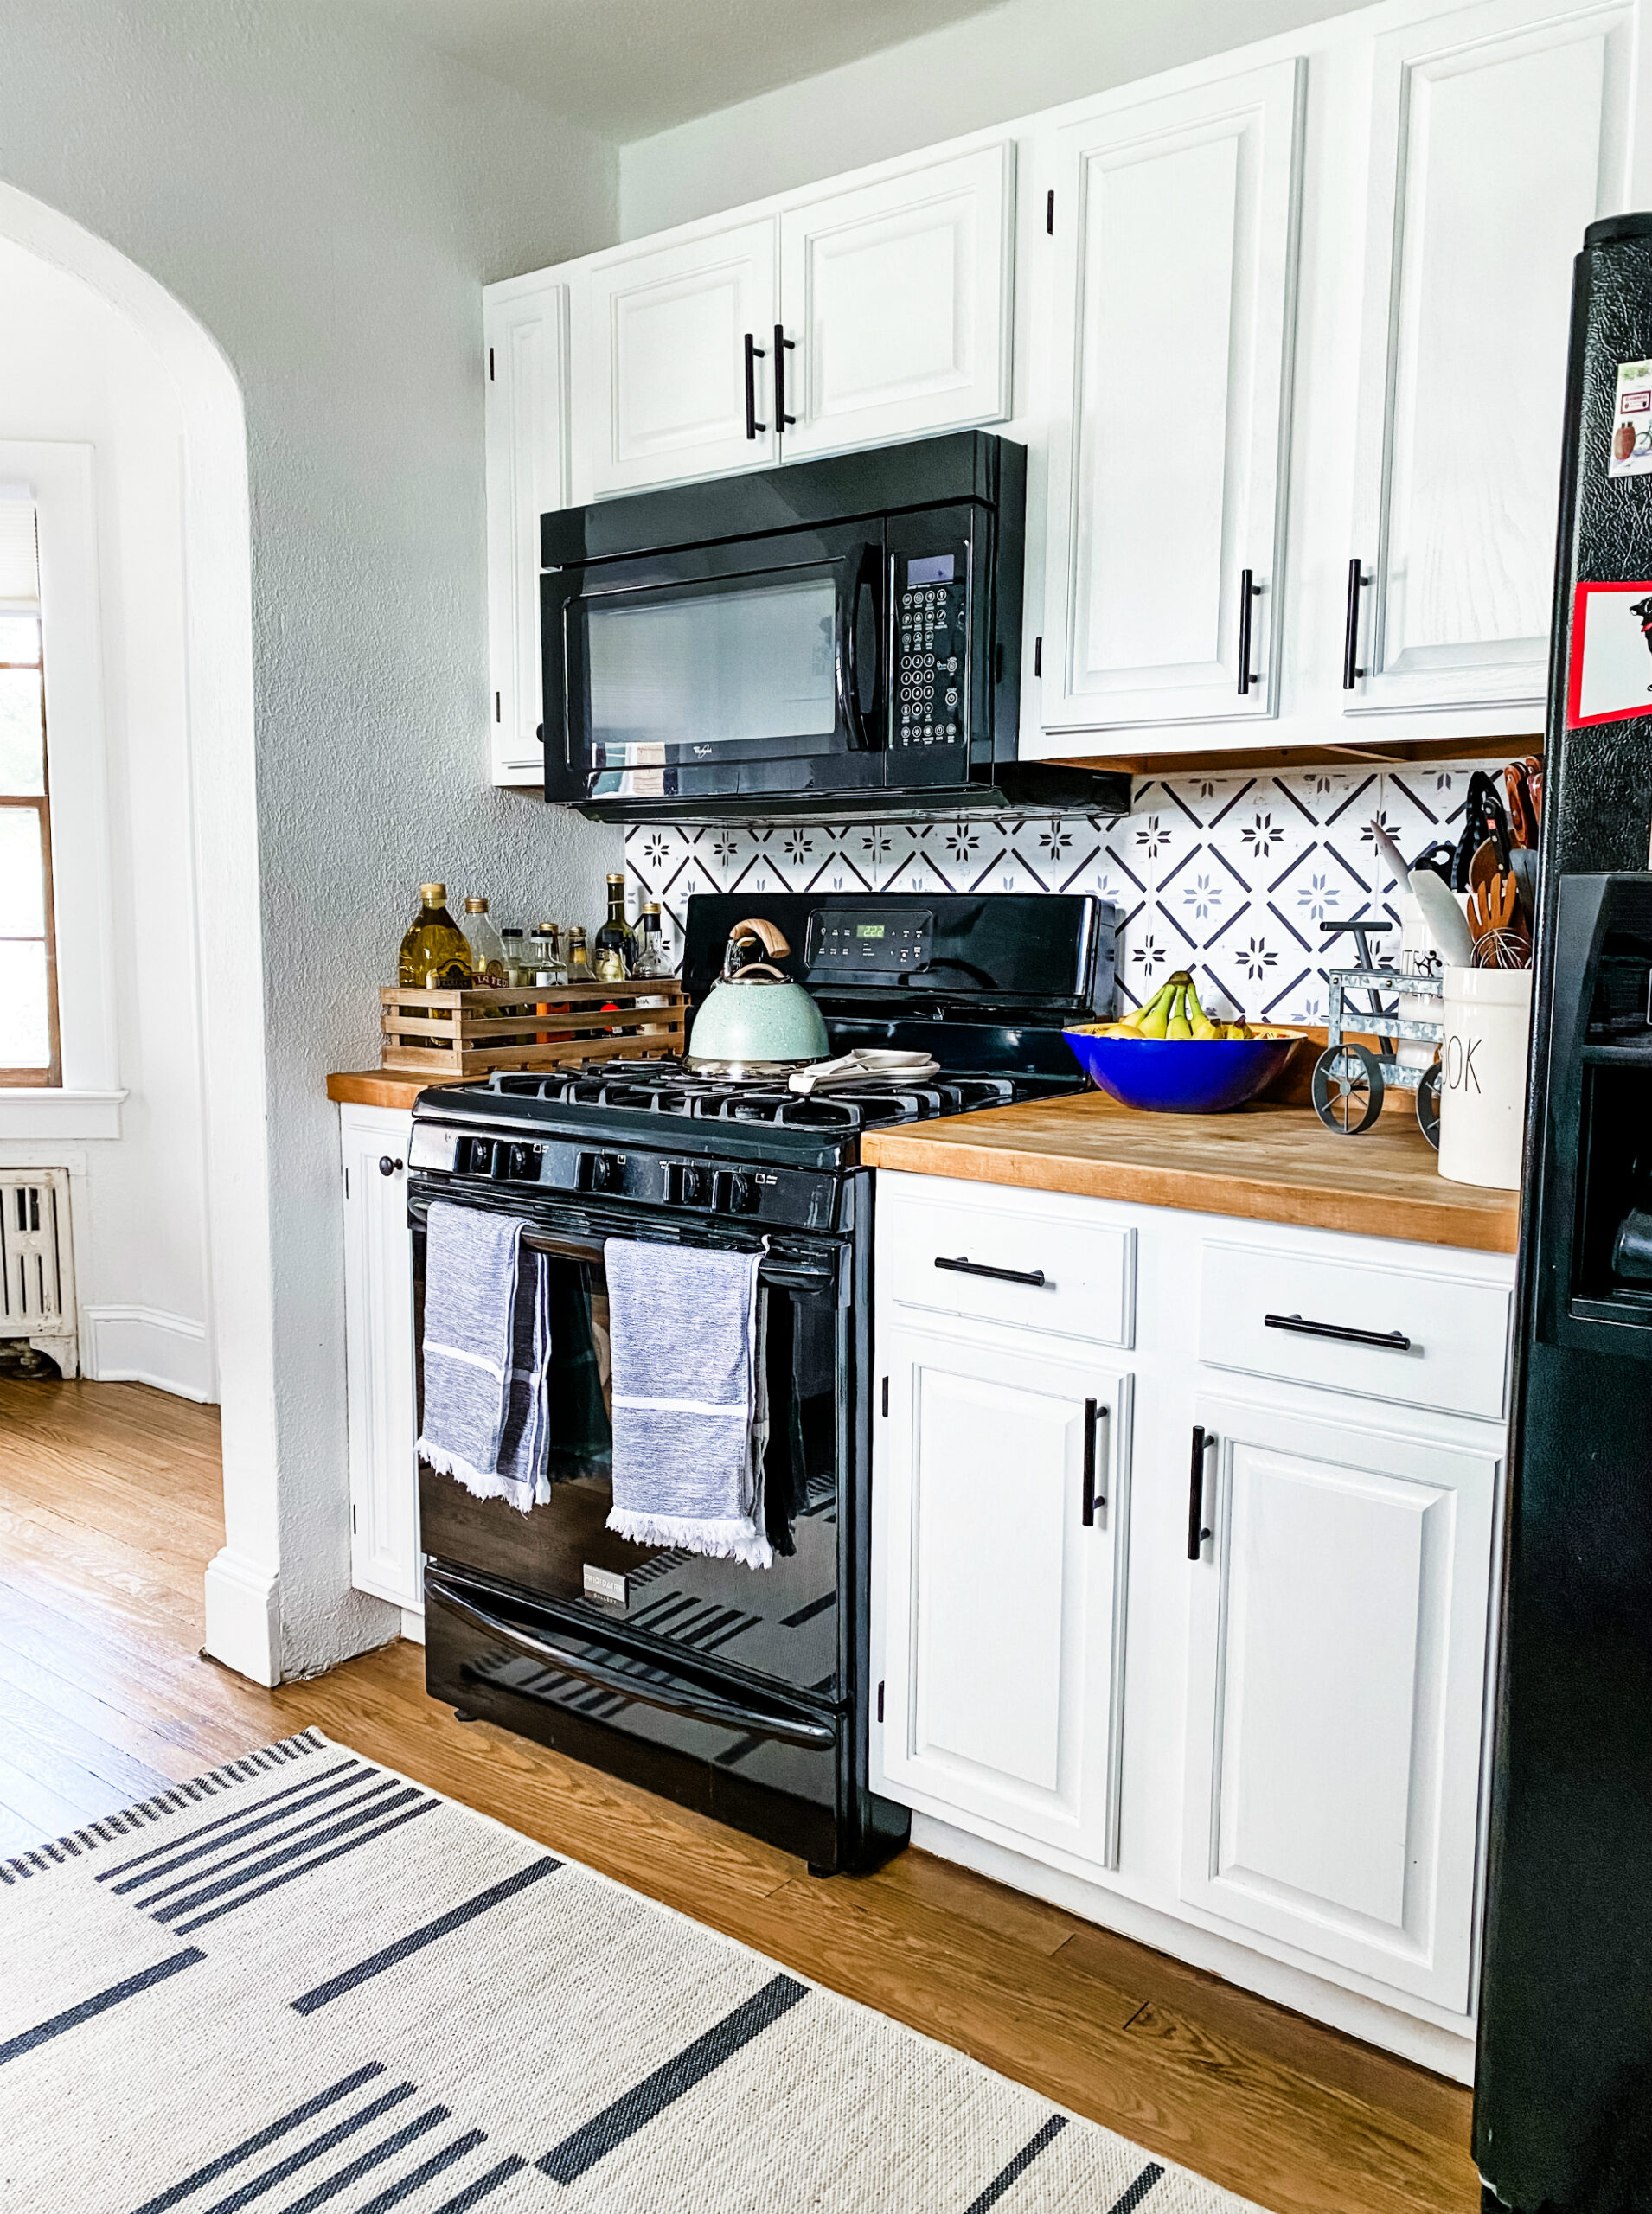
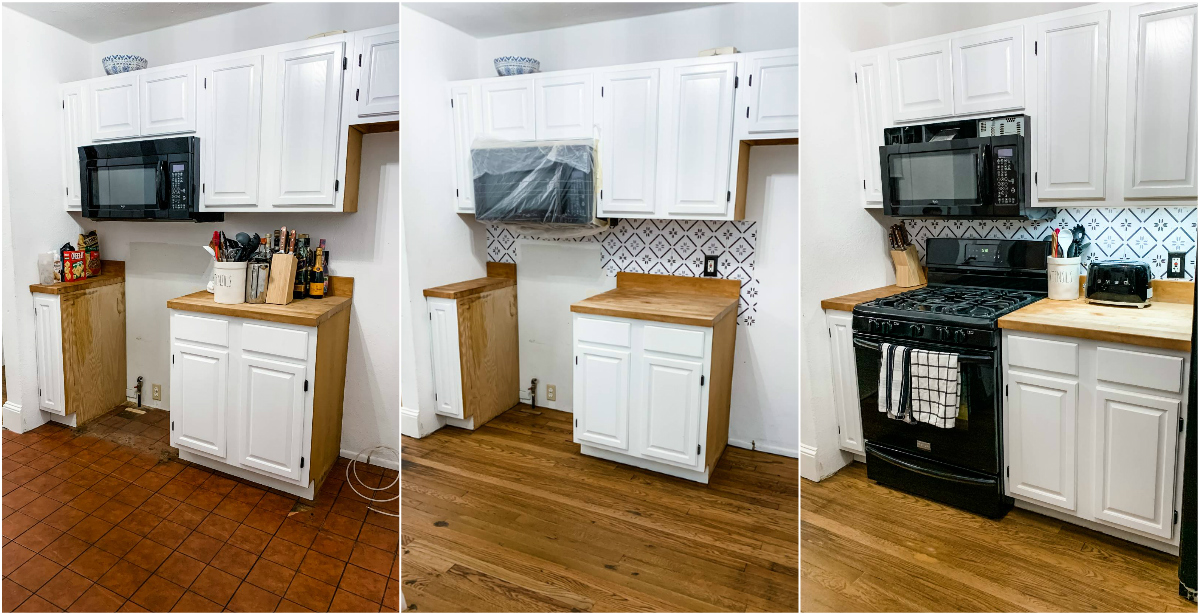
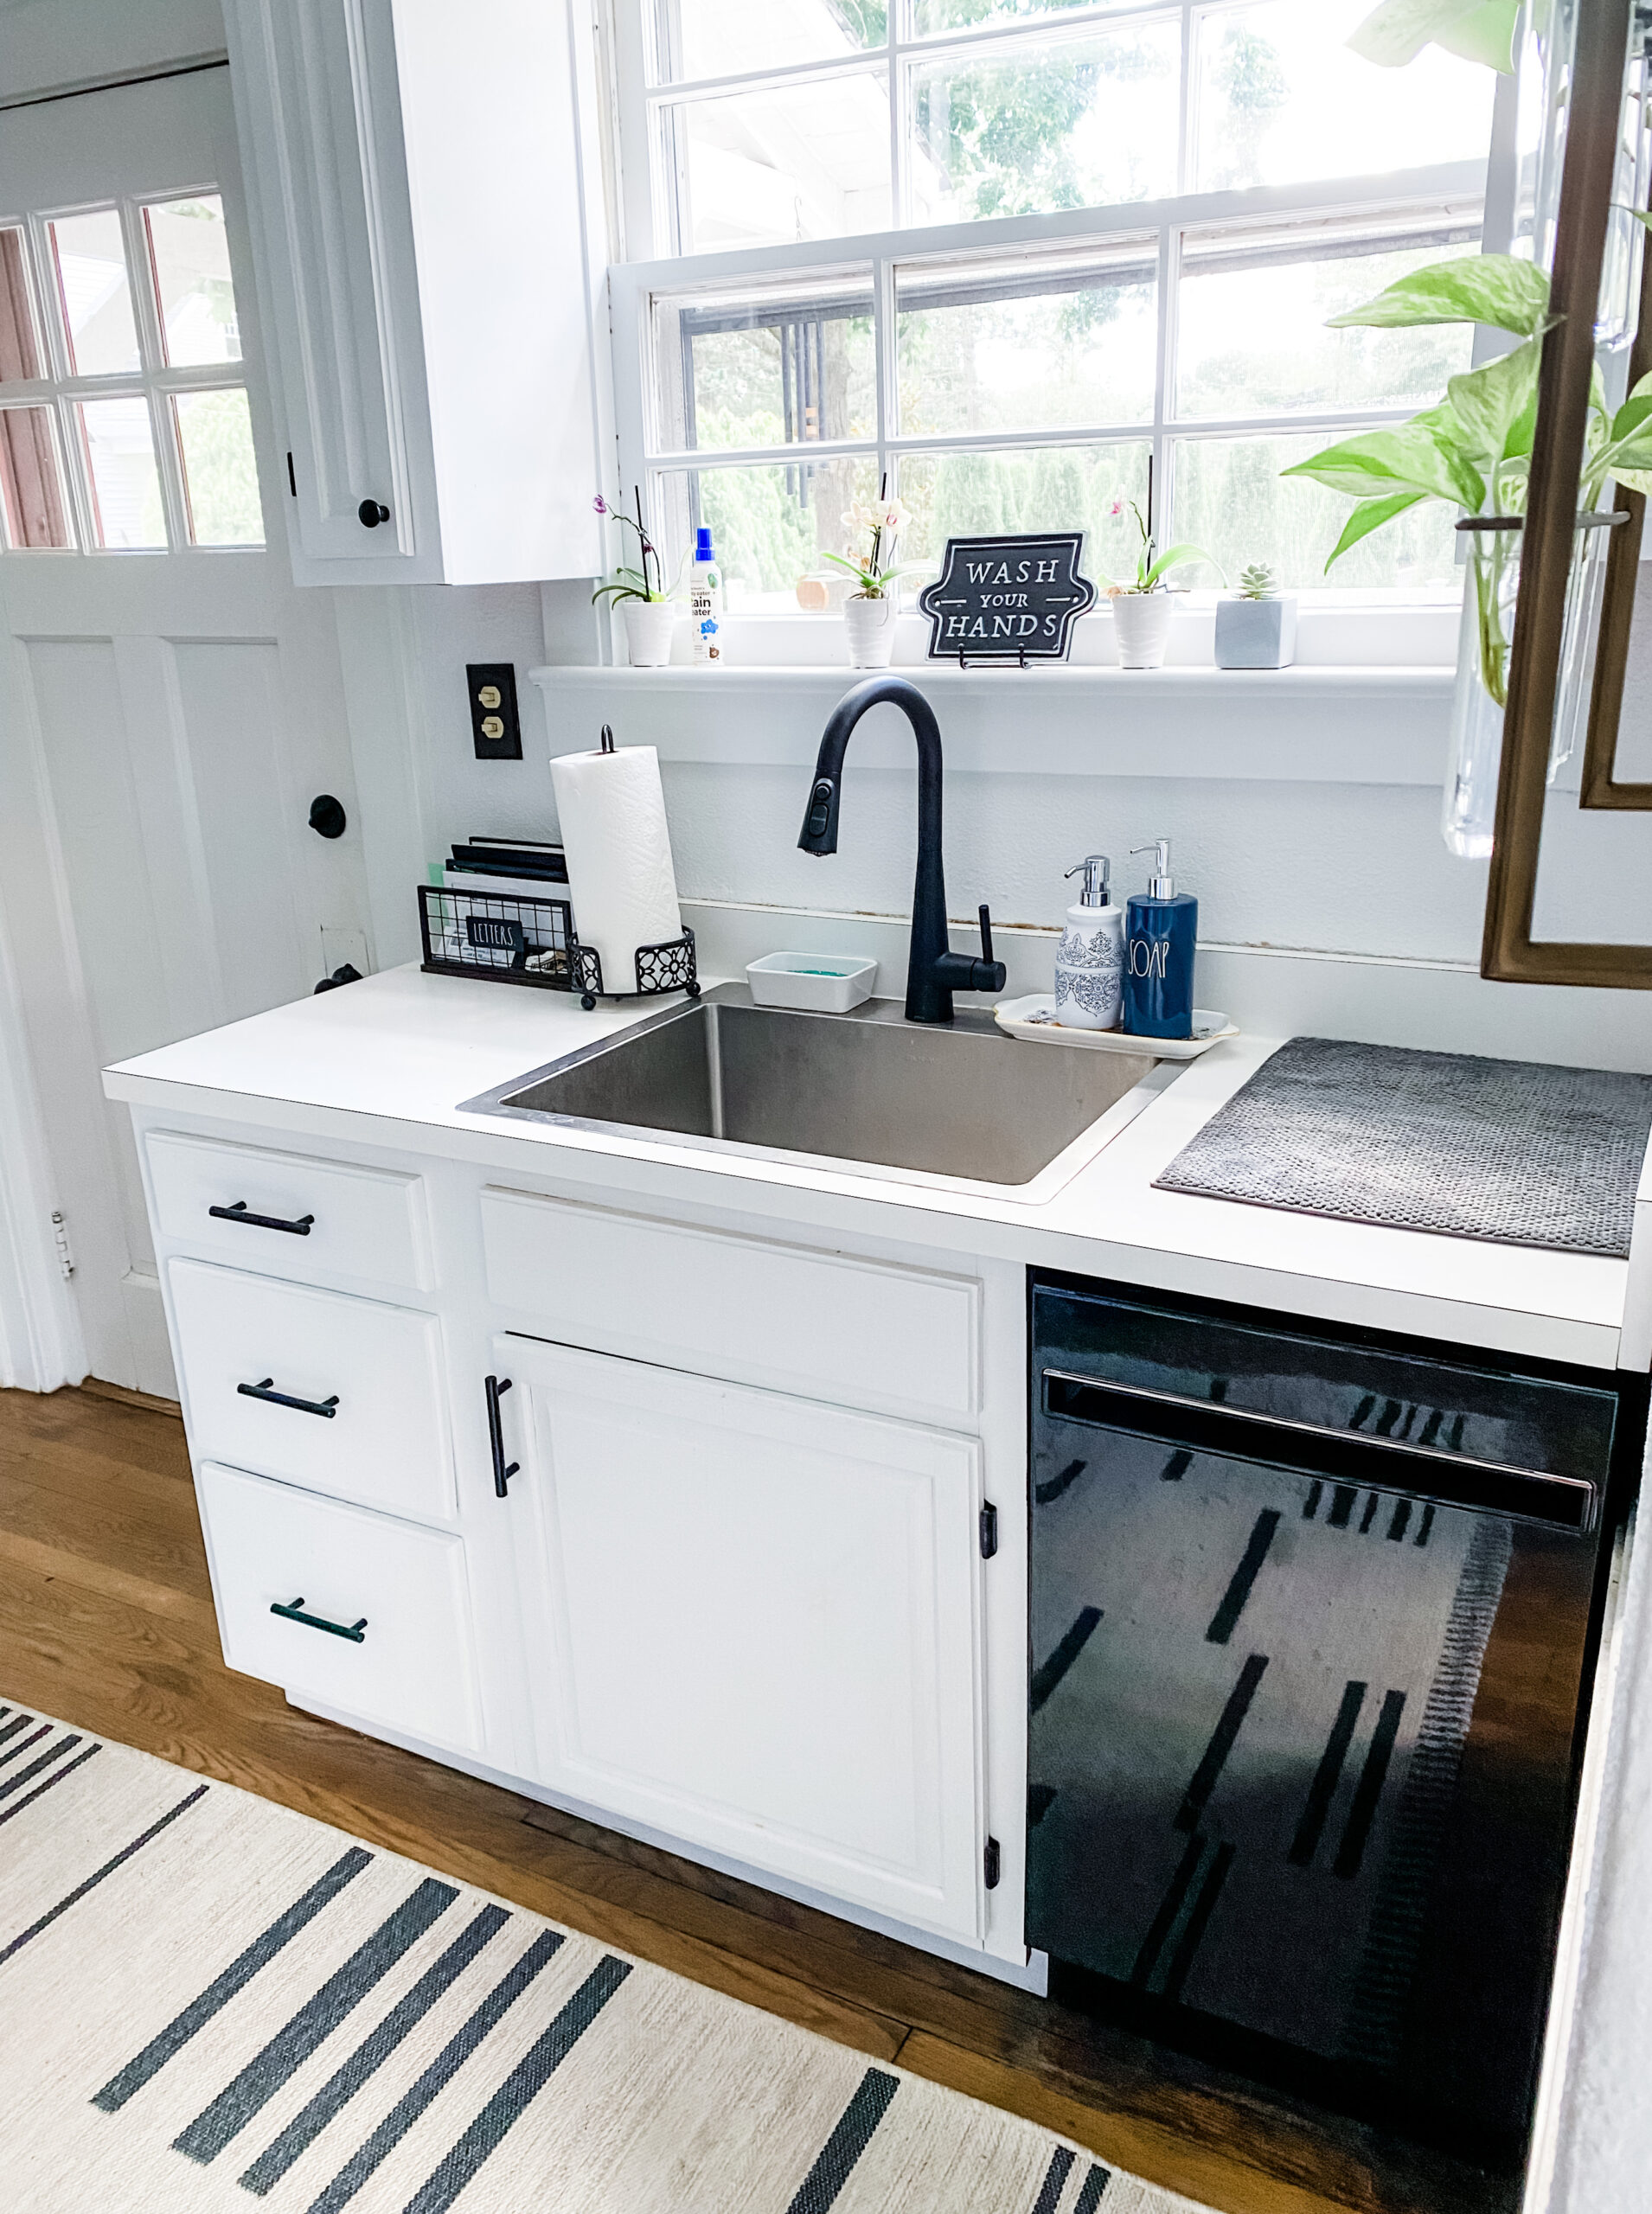
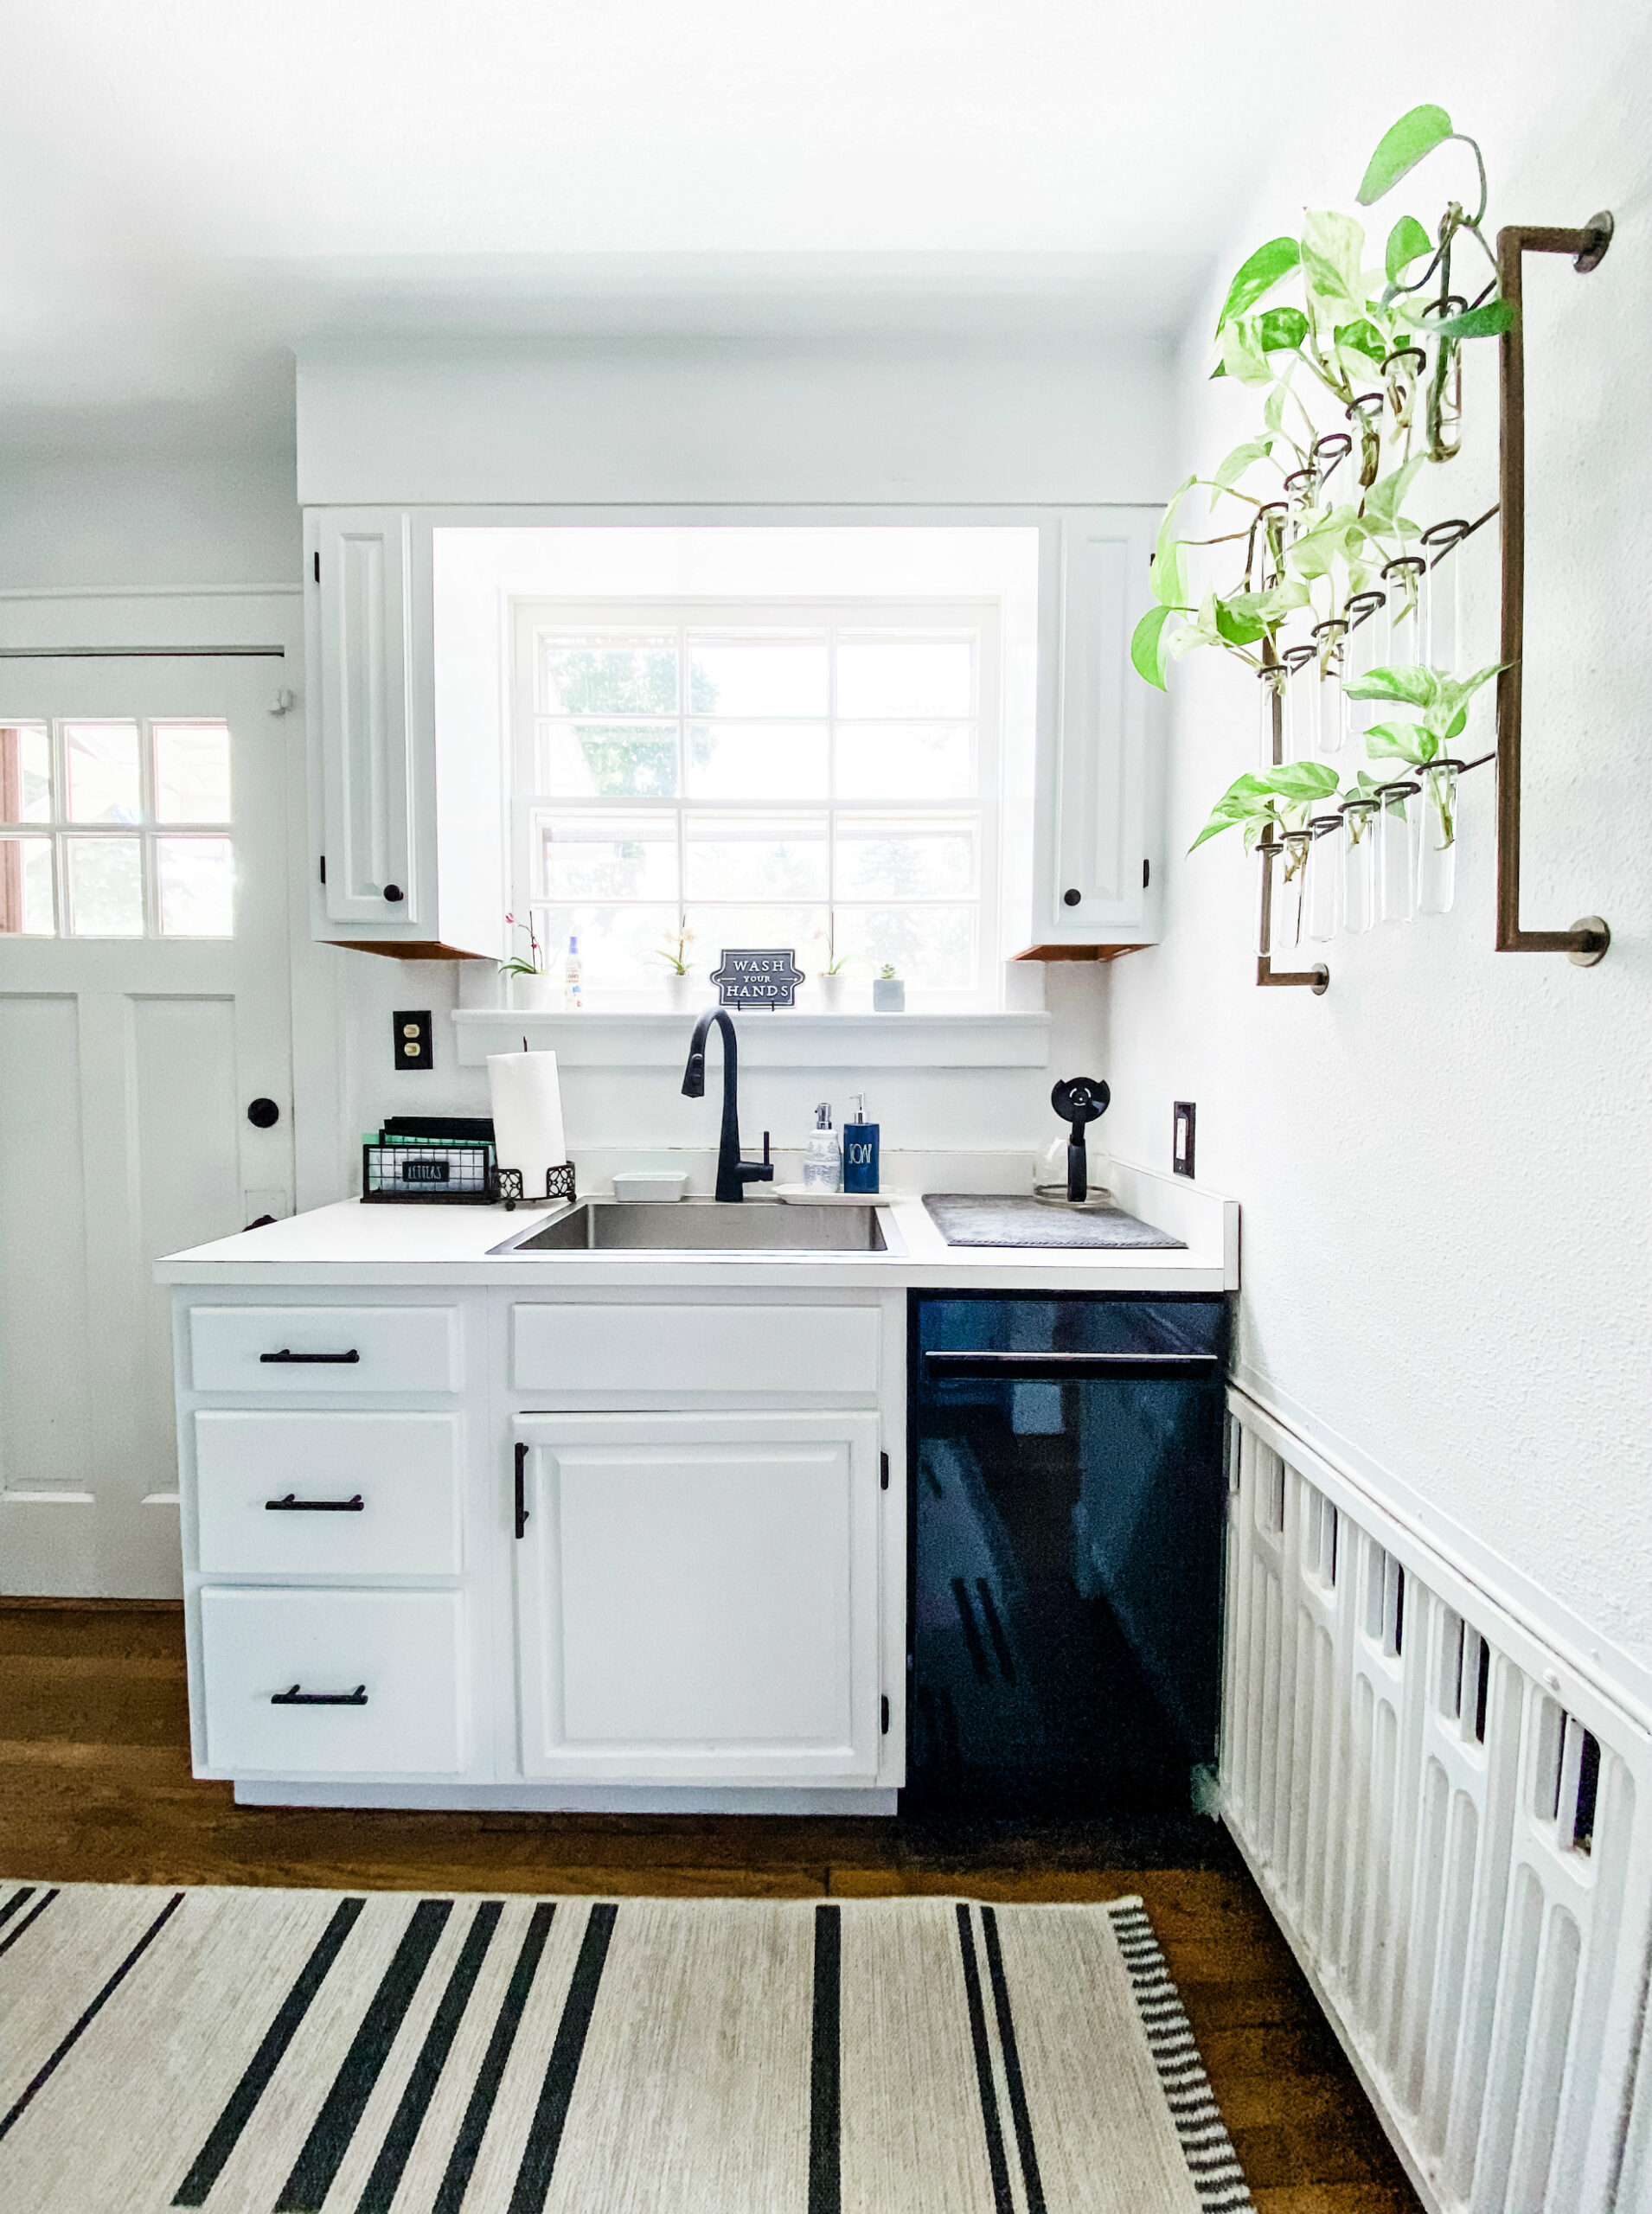
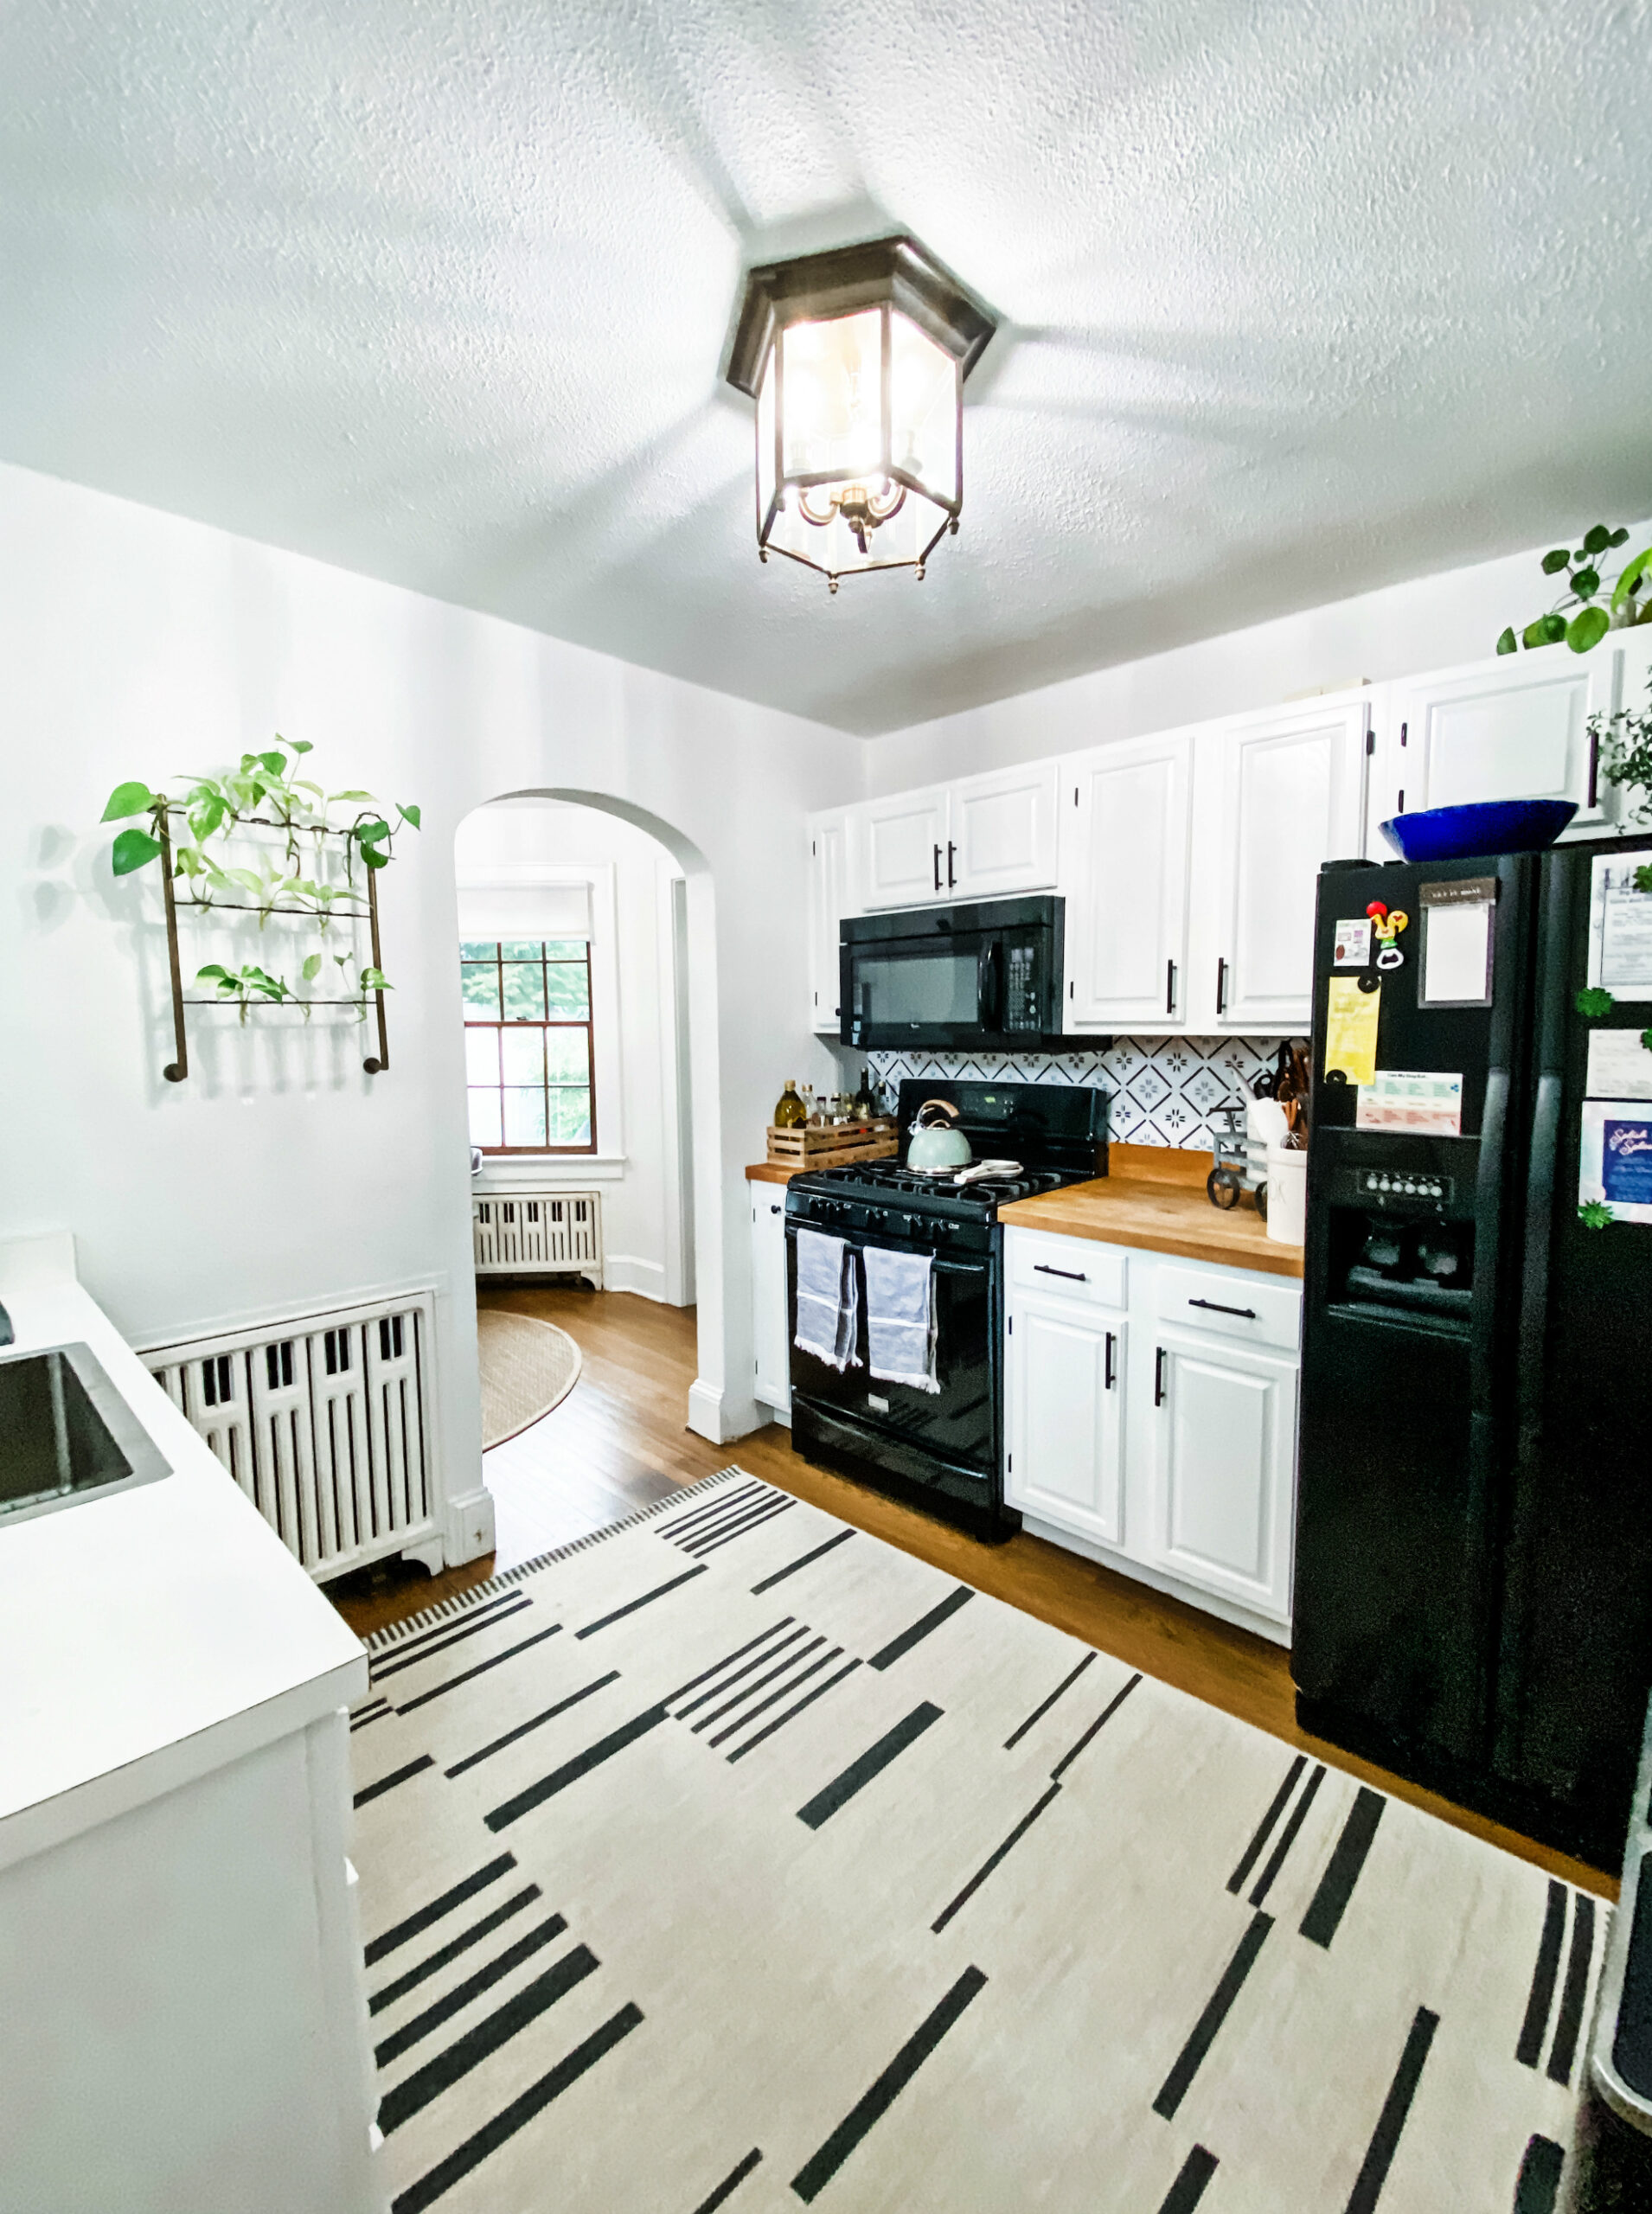
As you can see from the above before photos, this kitchen was in dire need of a facelift. Thankfully, all the work we had done was cosmetic with the exception of two installations (I’ll get into those next.) The first thing we did was paint the chestnut cabinets and surrounding wood trim white to help brighten up the space and help it appear more spacious to the naked eye. The cabinets didn’t have any hardware and proved annoying to open without a handle, so I picked up these sleek, matte black bar pulls along with a couple small, matte black knobs for the narrow cabinets. We also sprayed the once-brass hinges on the cabinets with matching matte black Rust-Oleum.
Cabinet Paint Color: ‘Paper White‘ by Benjamin Moore
While painting, we noticed the ugly terracotta tile was peeling off in a corner by the dishwasher. Upon further inspection & difficult removal of two more tiles, we discovered the floor underneath was hardwood just like the rest of the house! Why someone would cover hardwood with peel & stick tile…? Beats me but wow what a discovery & blessing. Now we didn’t have to go forward with our initial plan to cover it with a more appealing stick tile. Instead, we hired a professional to remove the remaining tiles and treat/ finish/stain the hardwood underneath to match the rest of the house’s floor plan.
The only peel & stick project I was happy about approaching was for the makeshift backsplash, applying this peel & stick printed tile behind the oven & butcher’s block cabinets. Since all the updates were made with the intention of being temporary but functional, I couldn’t think of a better solution to have the look for much much less. The best part is that we haven’t had to reapply ANY of the printed tiles since sticking them on last year (woo!)

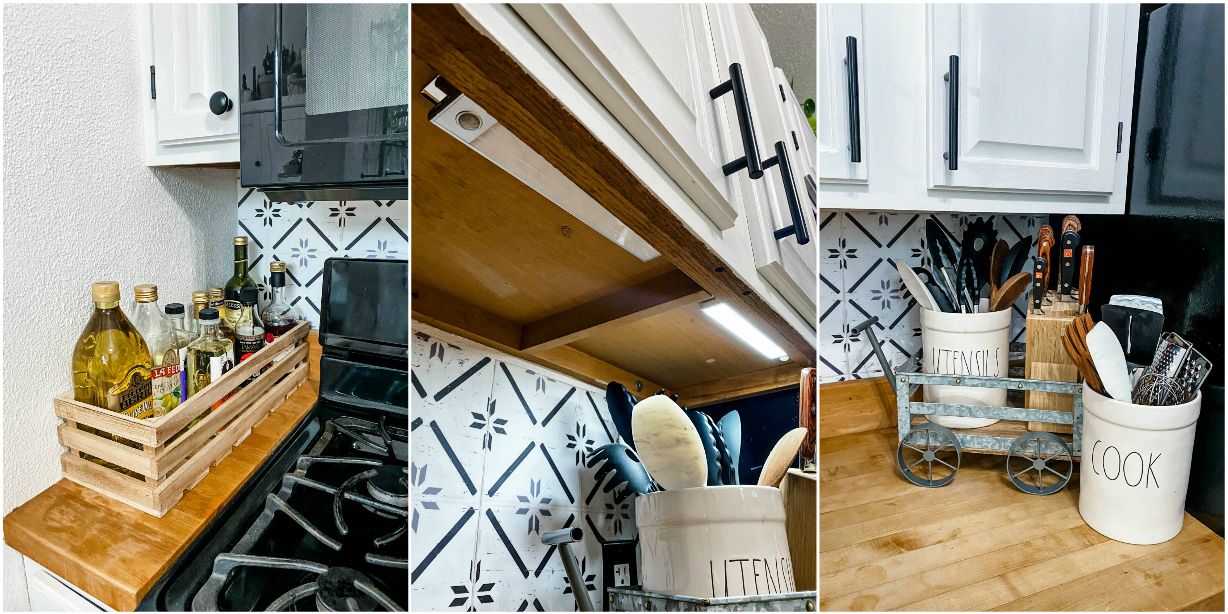
And speaking of temporary solutions, how about these motion-activated lights under the cabinets? I grabbed these off Amazon and love how great they are in providing substantial light for late night water glass refills in the dark. A much more budget-friendly approach to necessary cabinet lighting.
Because our cabinets/drawers are considered ‘senior’ in style, that also means they aren’t entirely deep nor tall enough to store most of our cooking utensils & standing ingredients. So we had to get clever with storage solutions for everything on the counter that not only made for an aesthetically-pleasing display but could also be easily picked up & moved out of the way as needed, for the available counter space for meal prep itself is, too, limited.
‘Utensils’ Ceramic Crock Container | ‘Cook’ Ceramic Crock Container | Similar Decorative Tabletop Storage | Wood Storage Crate
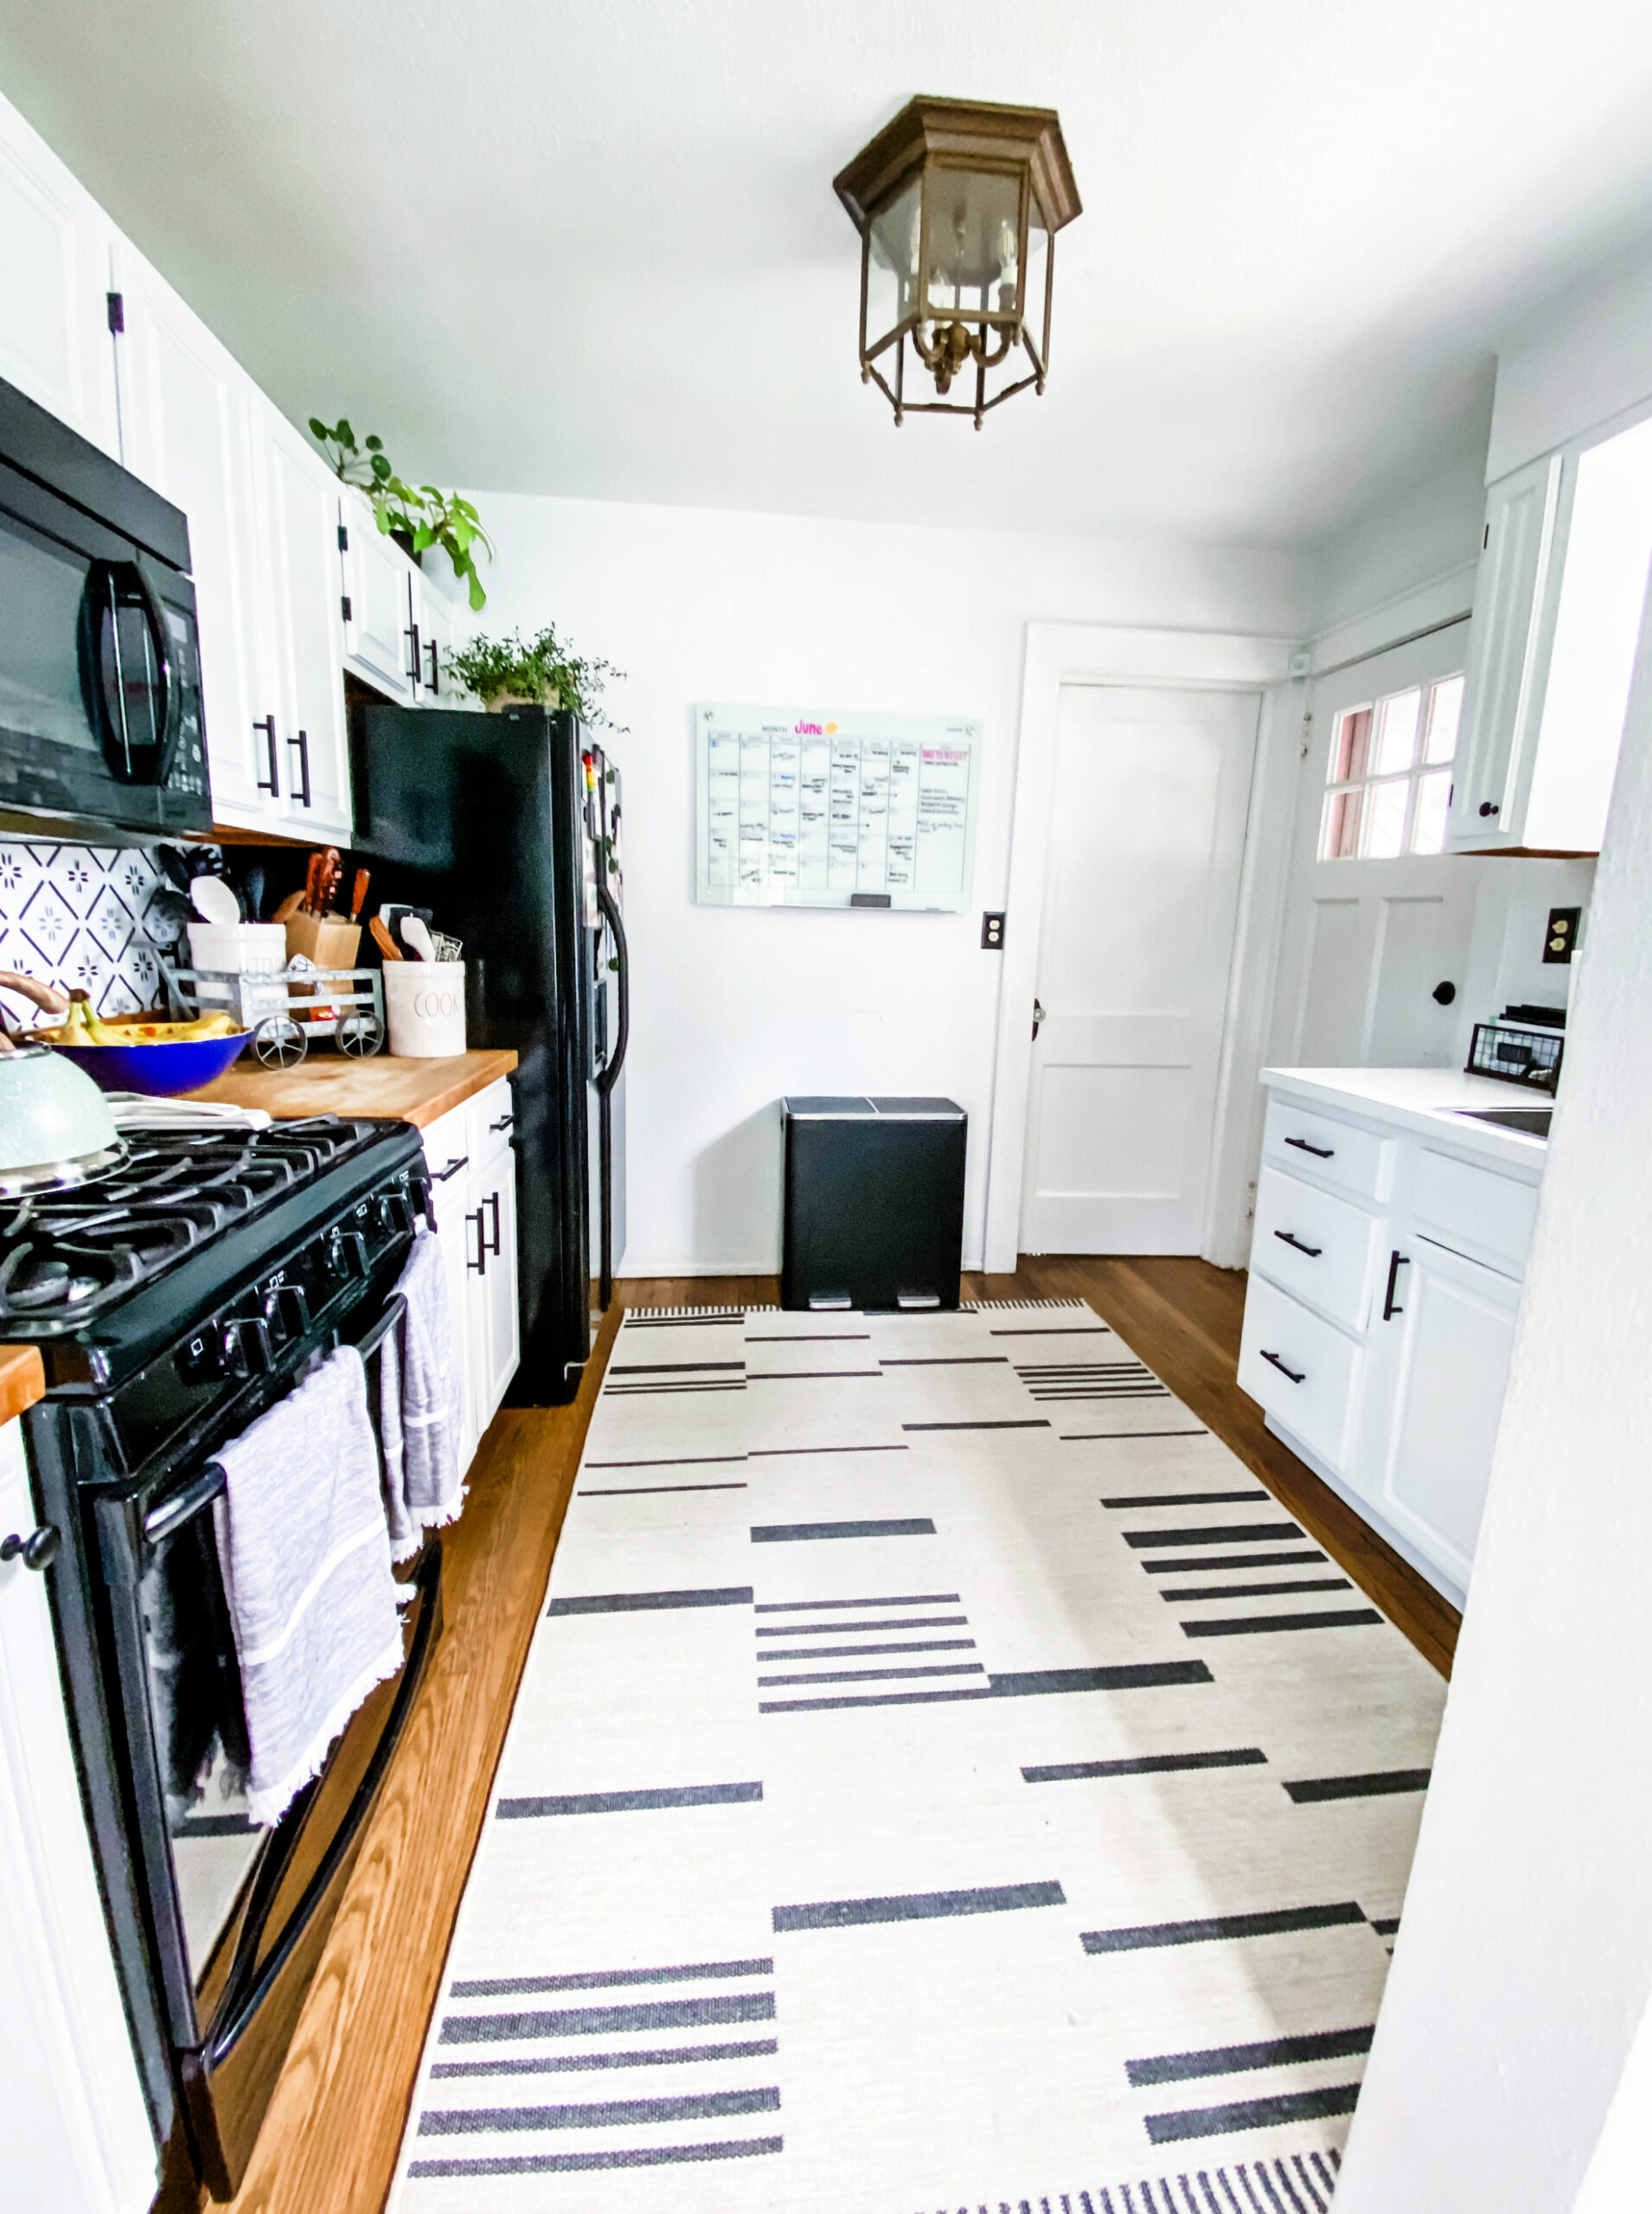
Similar Striped Area Rug | Glass Dry Erase Monthly Calendar (we have the 3′ x 2′ size) | Dual Trash & Recycling Bin (great for small spaces)
—
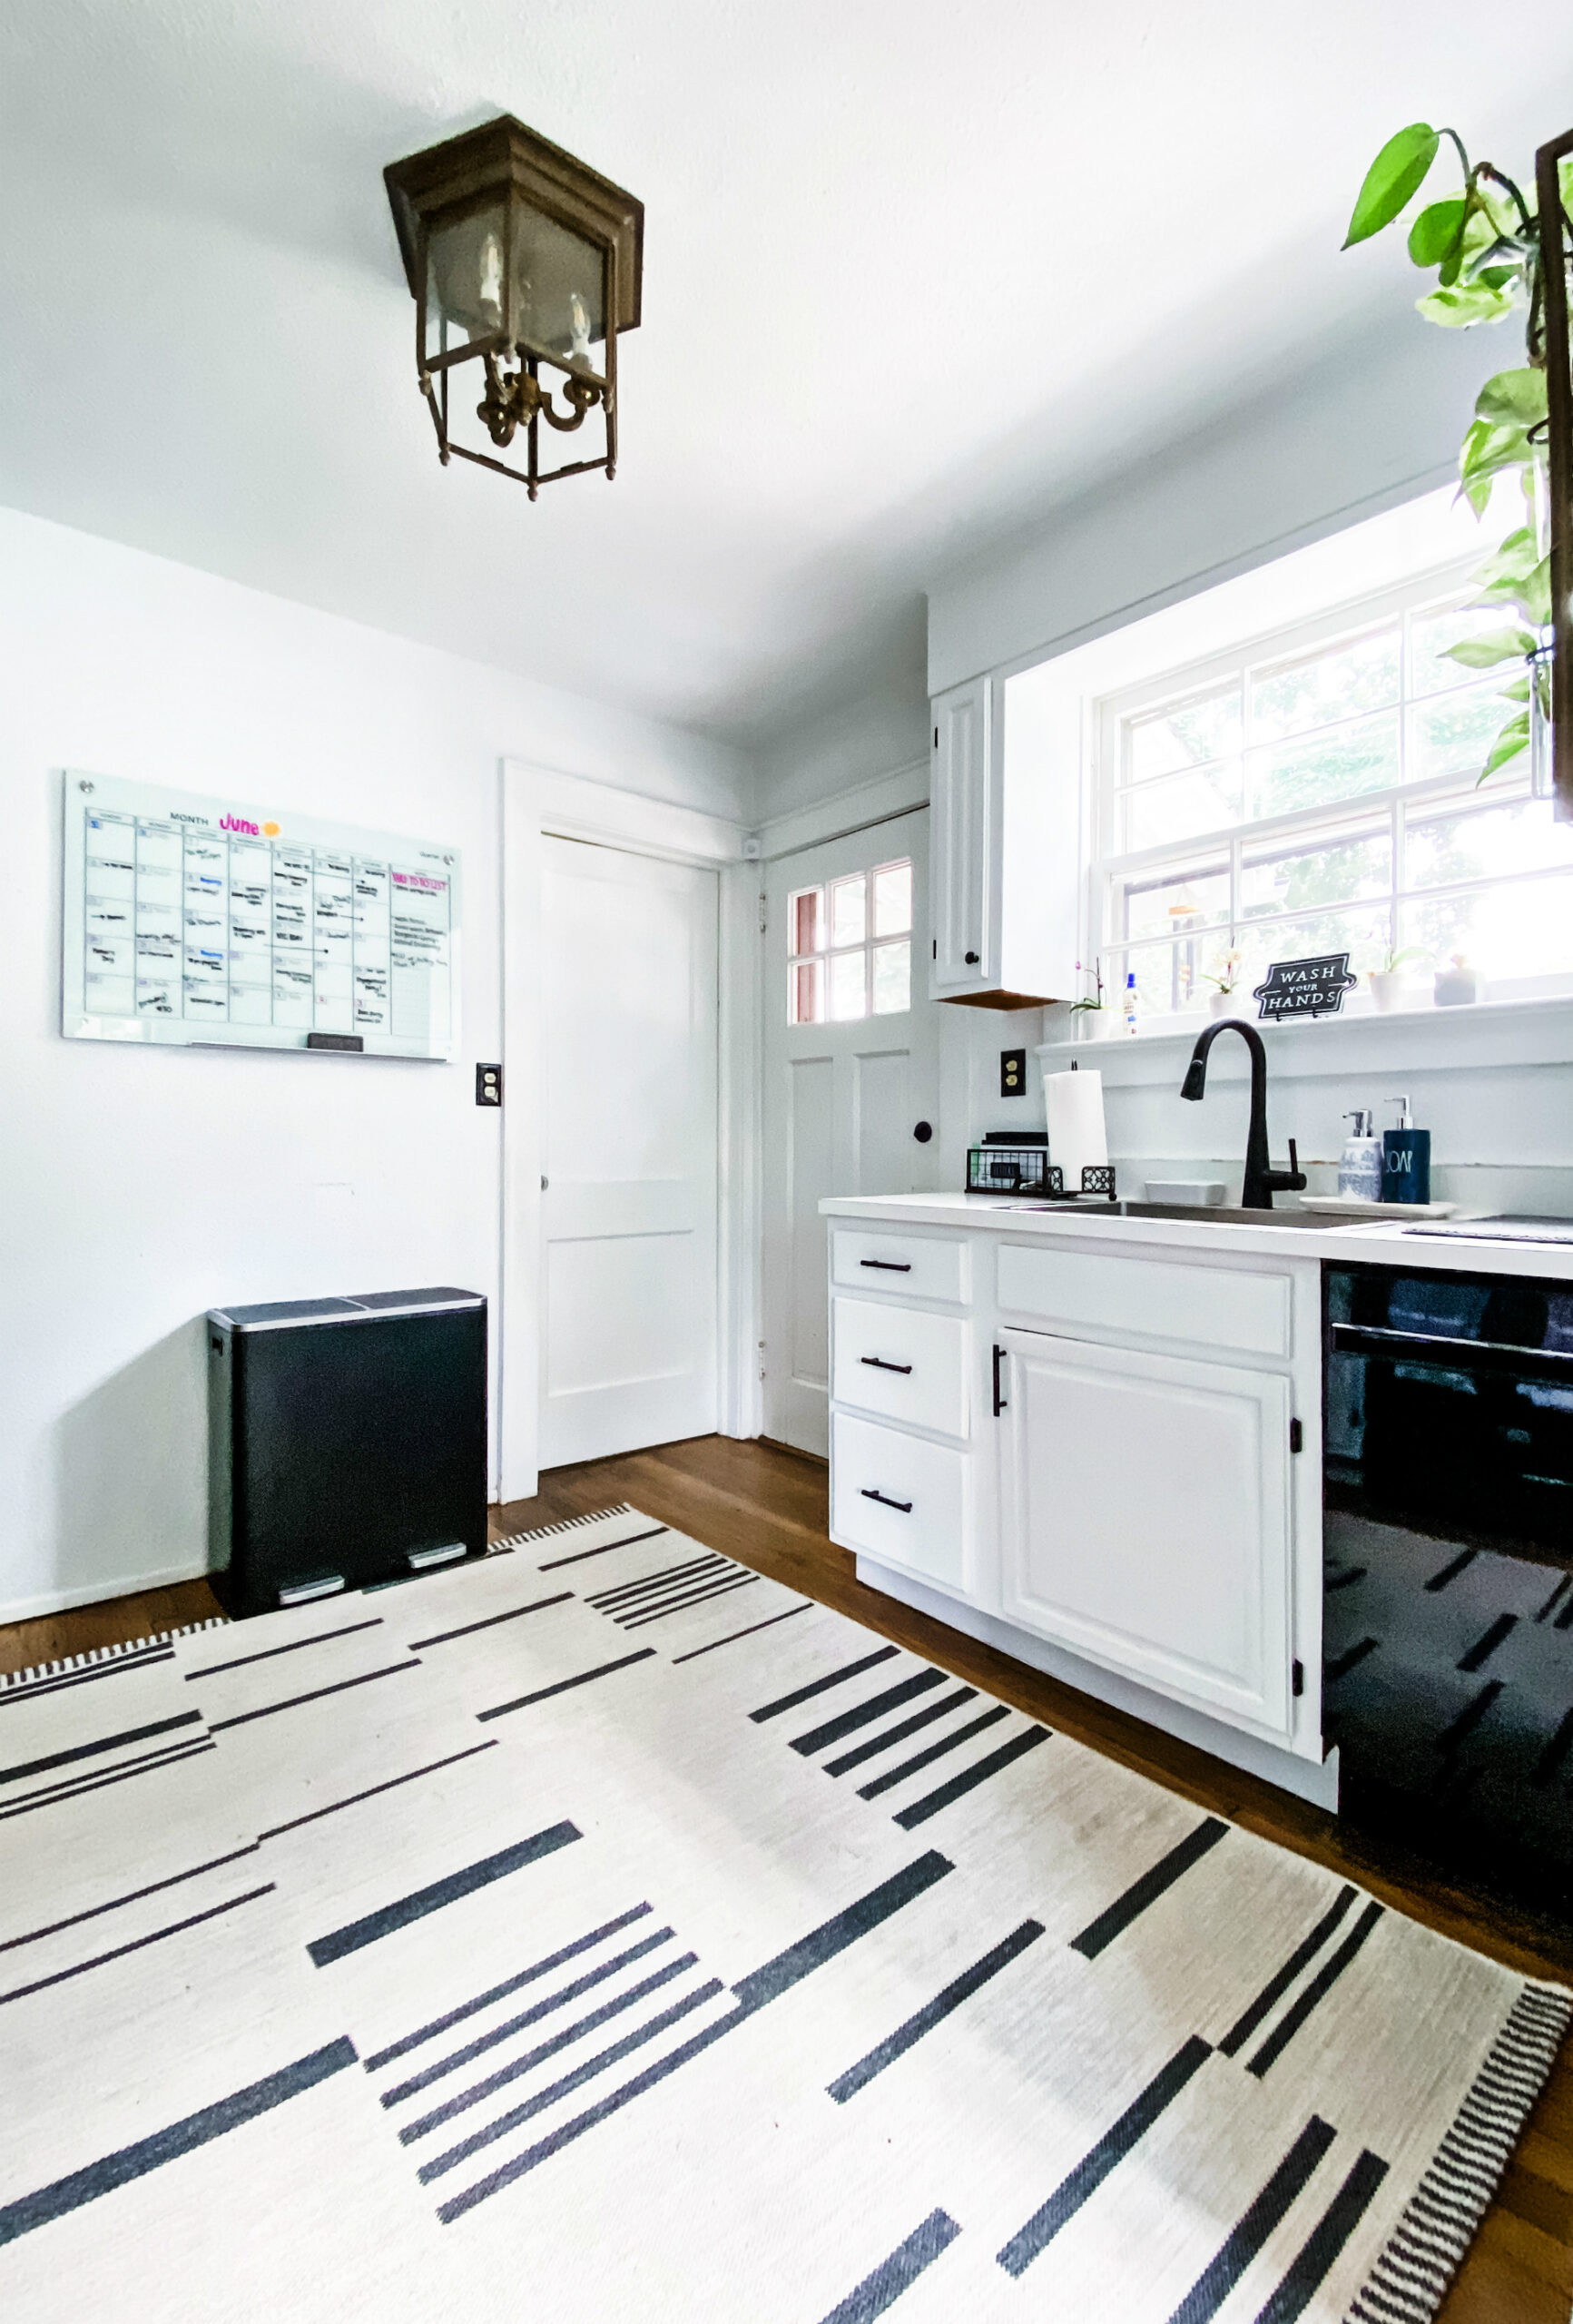
Remember those installations I mentioned earlier? Both had to do with the dreaded dish washing set-up I simply refused to deal with long-term. I can handle most inconveniences BUT a broken-beyond-repair, half-size dishwasher & the world’s most shallow sink is an absolutely NOT for me. A dishwasher I could live without, but not having a substantial sink to wash something larger than a cereal bowl without soaking yourself, the floor & surrounding area is something that I deemed a necessity to update.
Below are the befores of the shallow sink + leaky faucet and the awesome-looking, but broken, retro dishwasher that sat unusable while taking up what could have been more cabinet storage space. Despite having a new amazing deep sink & faucet system, the out-of-commission dishwasher began to annoy me as it would be so nice to have a way to clean our glasses in a more hygenic way (I hate HATE cleaning them with sponges – so gross.)
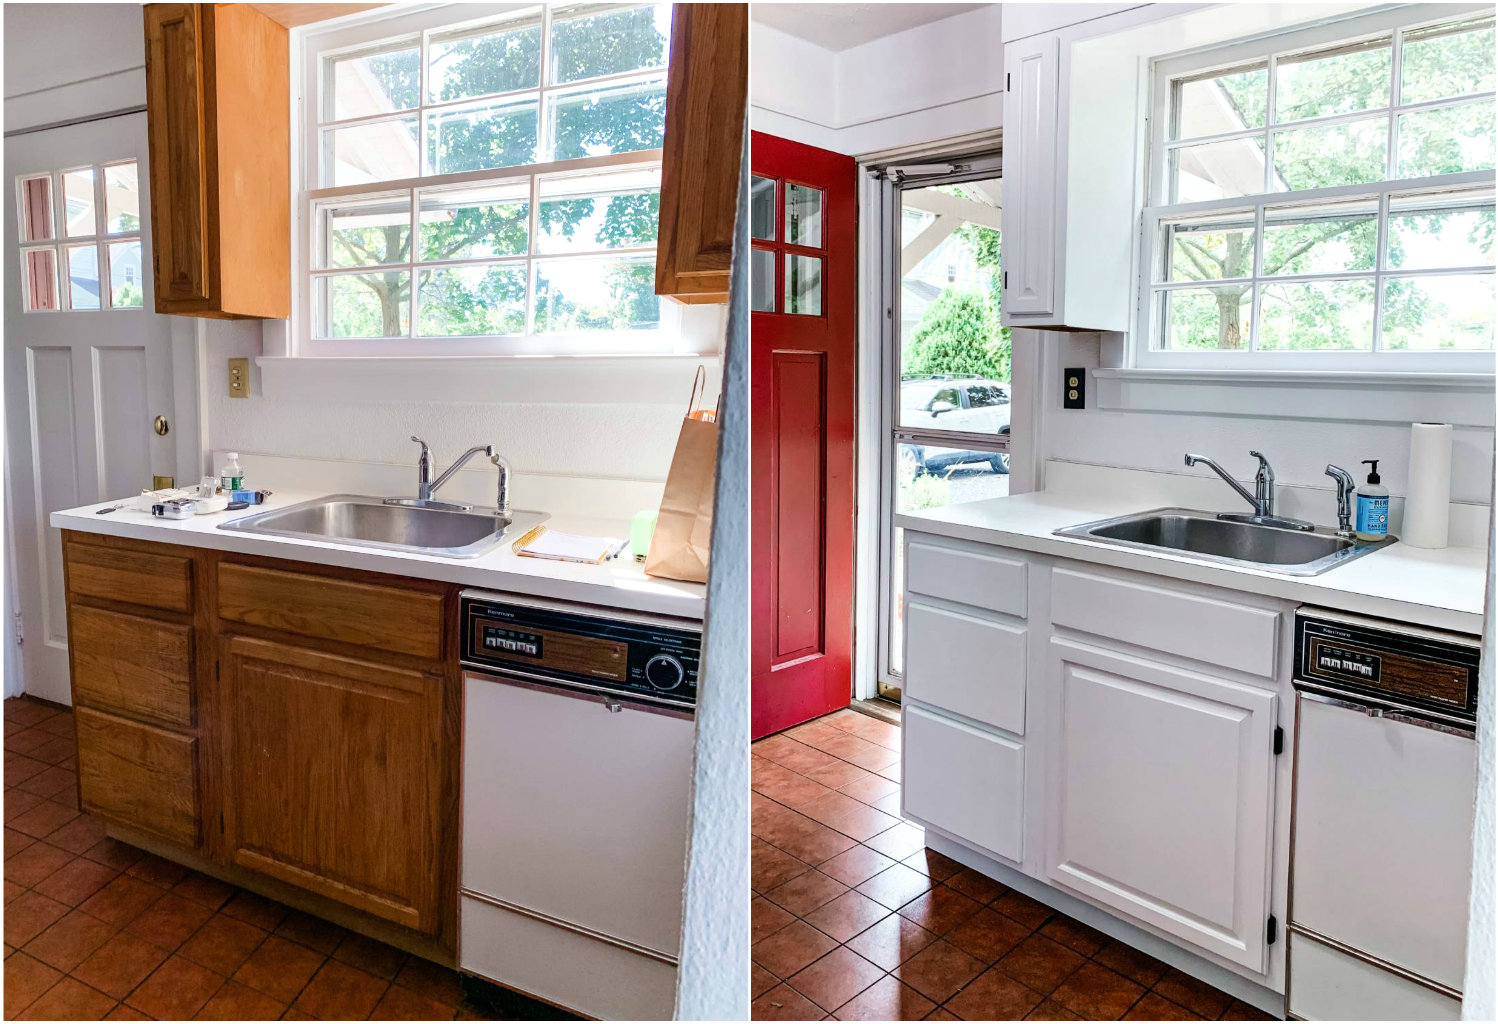
Then around Christmas, my incredible (soon-to-be) In-Laws got us a brand new half-size dishwasher as a gift that would match the rest of our appliances & most importantly, WORK! But like all things you look forward to, we had several hiccups with its installation… long story short, the one you see here is our THIRD model because the first one had a dent in the electrical panel & the second one chose to leak during its first cycle and rain on Thomas’s desk in the basement…no bueno.
Happy to report that the 3rd installation was & continues to be successful (knock on wood.)
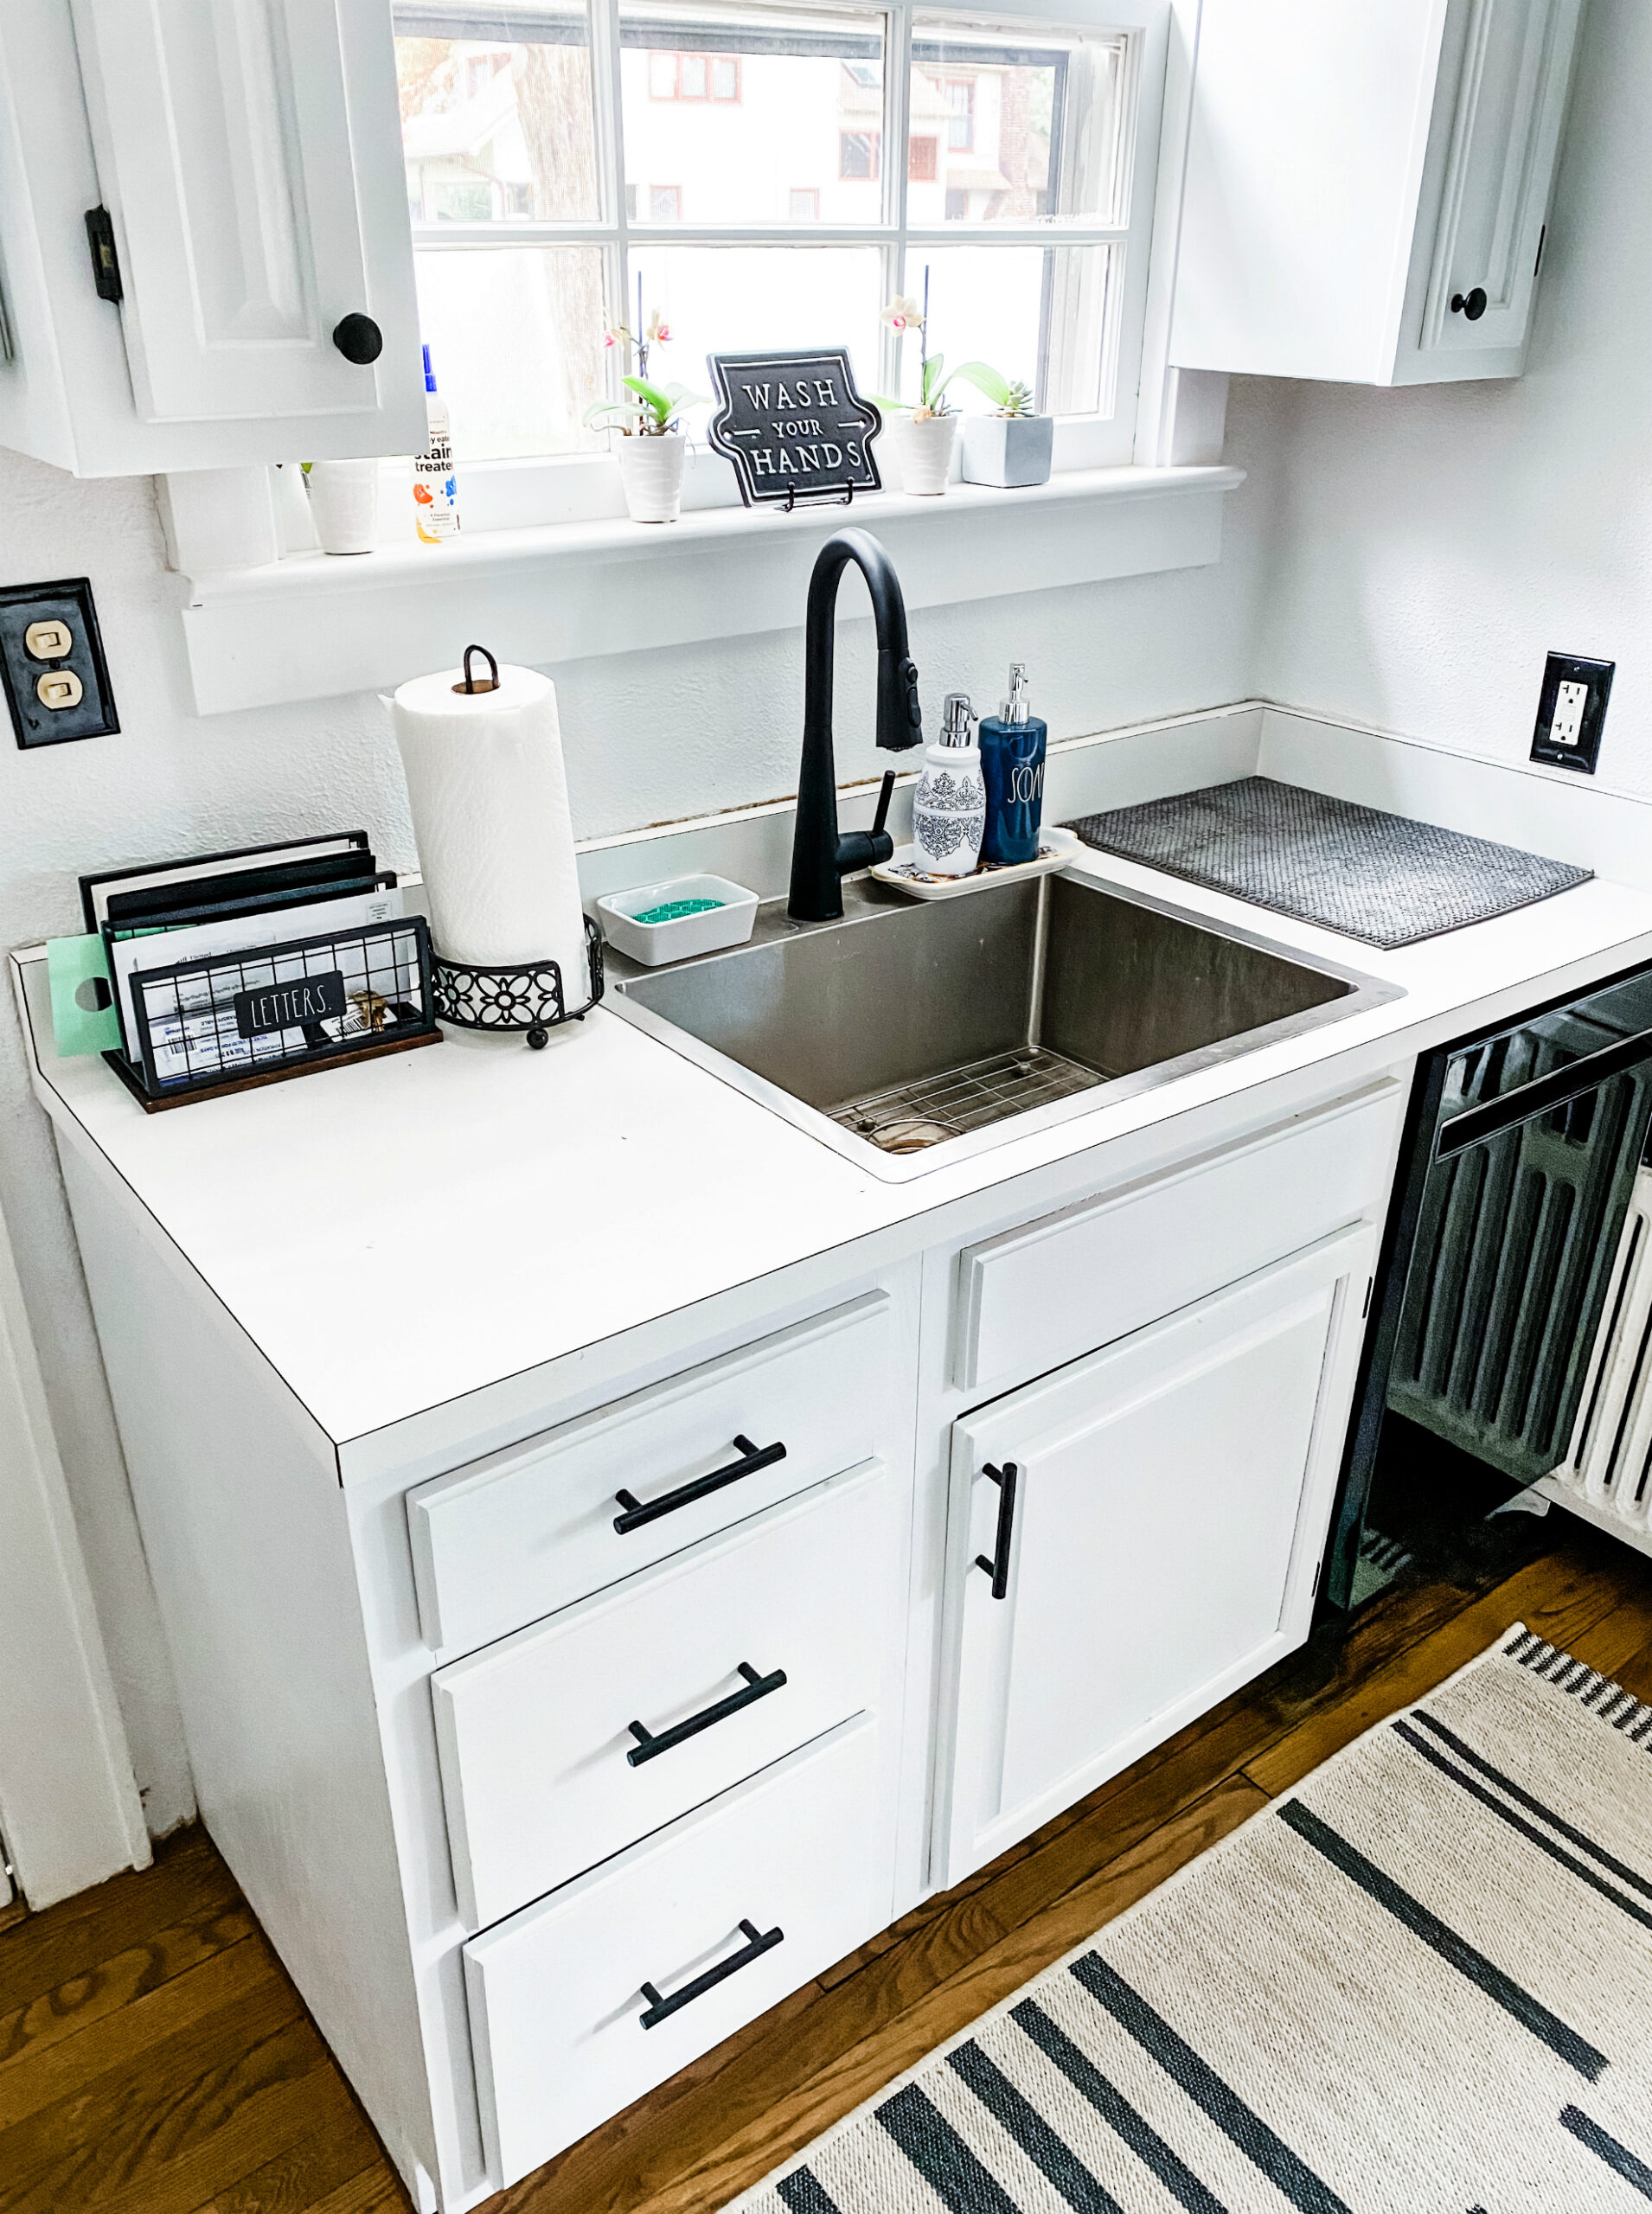
Elkay Stainless Steel Sink | Moen Arbor Pulldown Faucet | GE Profile 18″ Dishwasher | Black Electrical Panel Cover | ‘Wash Your Hands’ Sign | ‘Letters’ Mail Storage | Decorative Dish Soap Dispensers
—
Looking for housewarming gifts for a friend or yourself? Lots of great decorative gift ideas here.
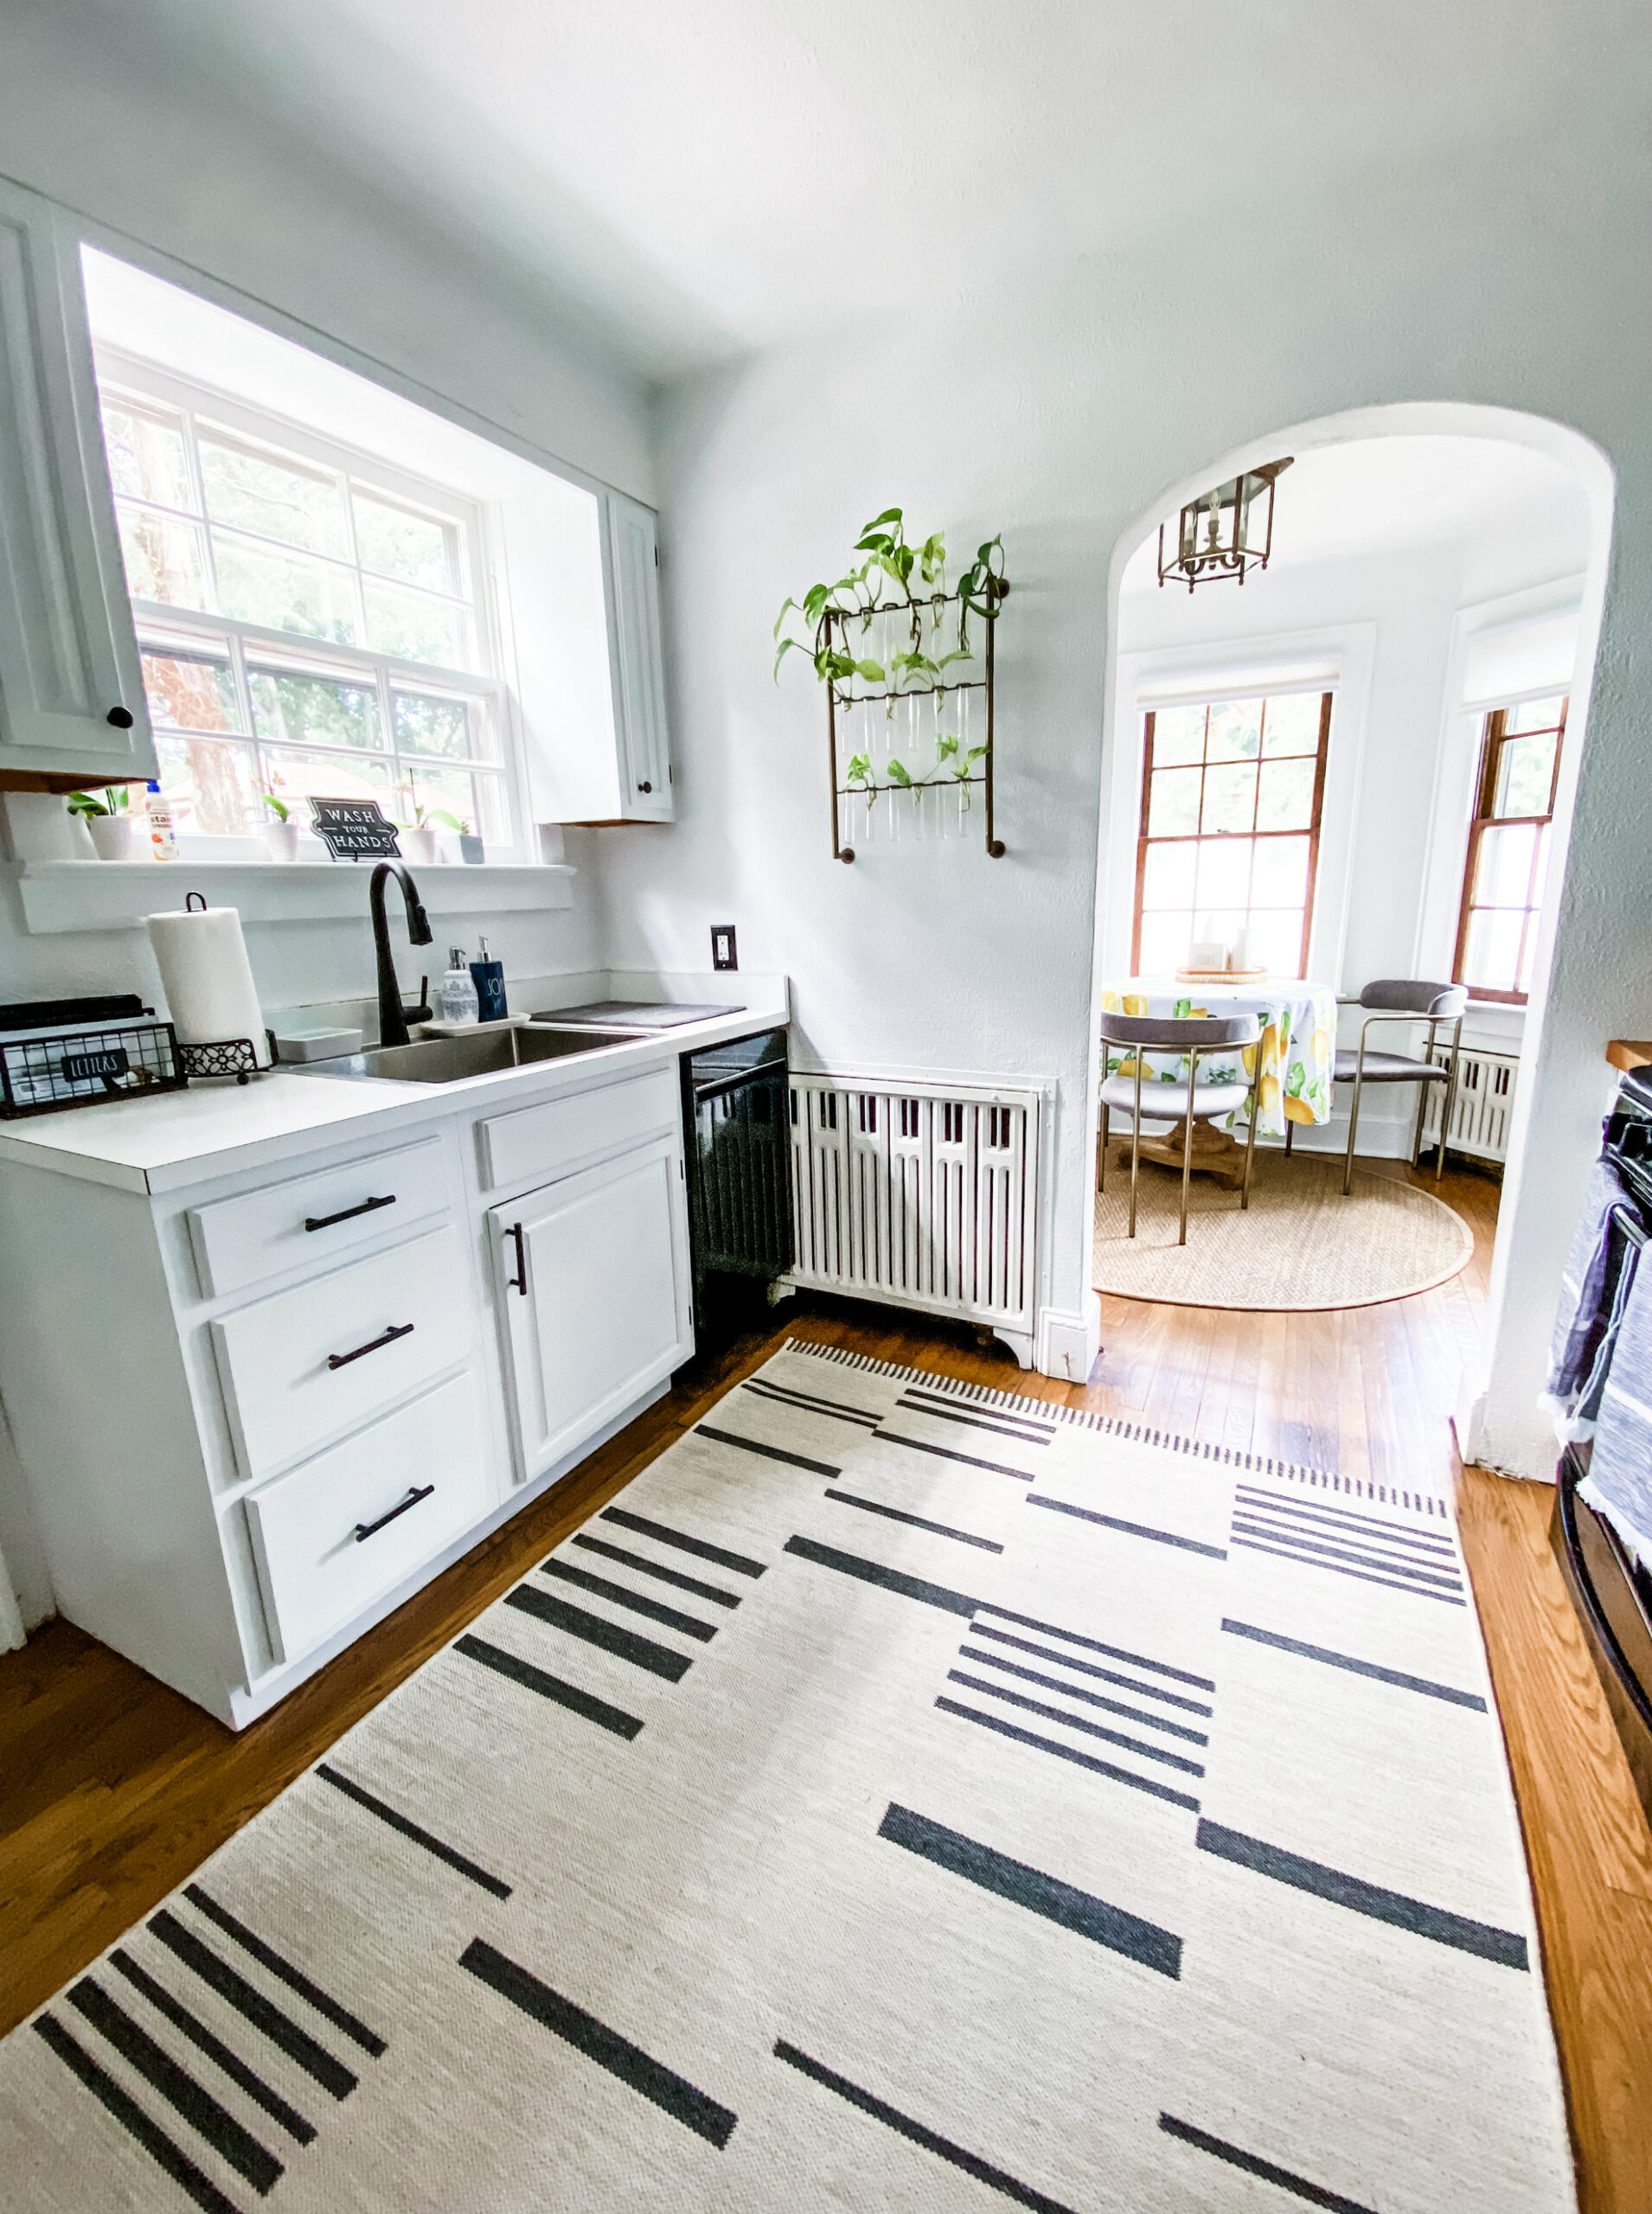
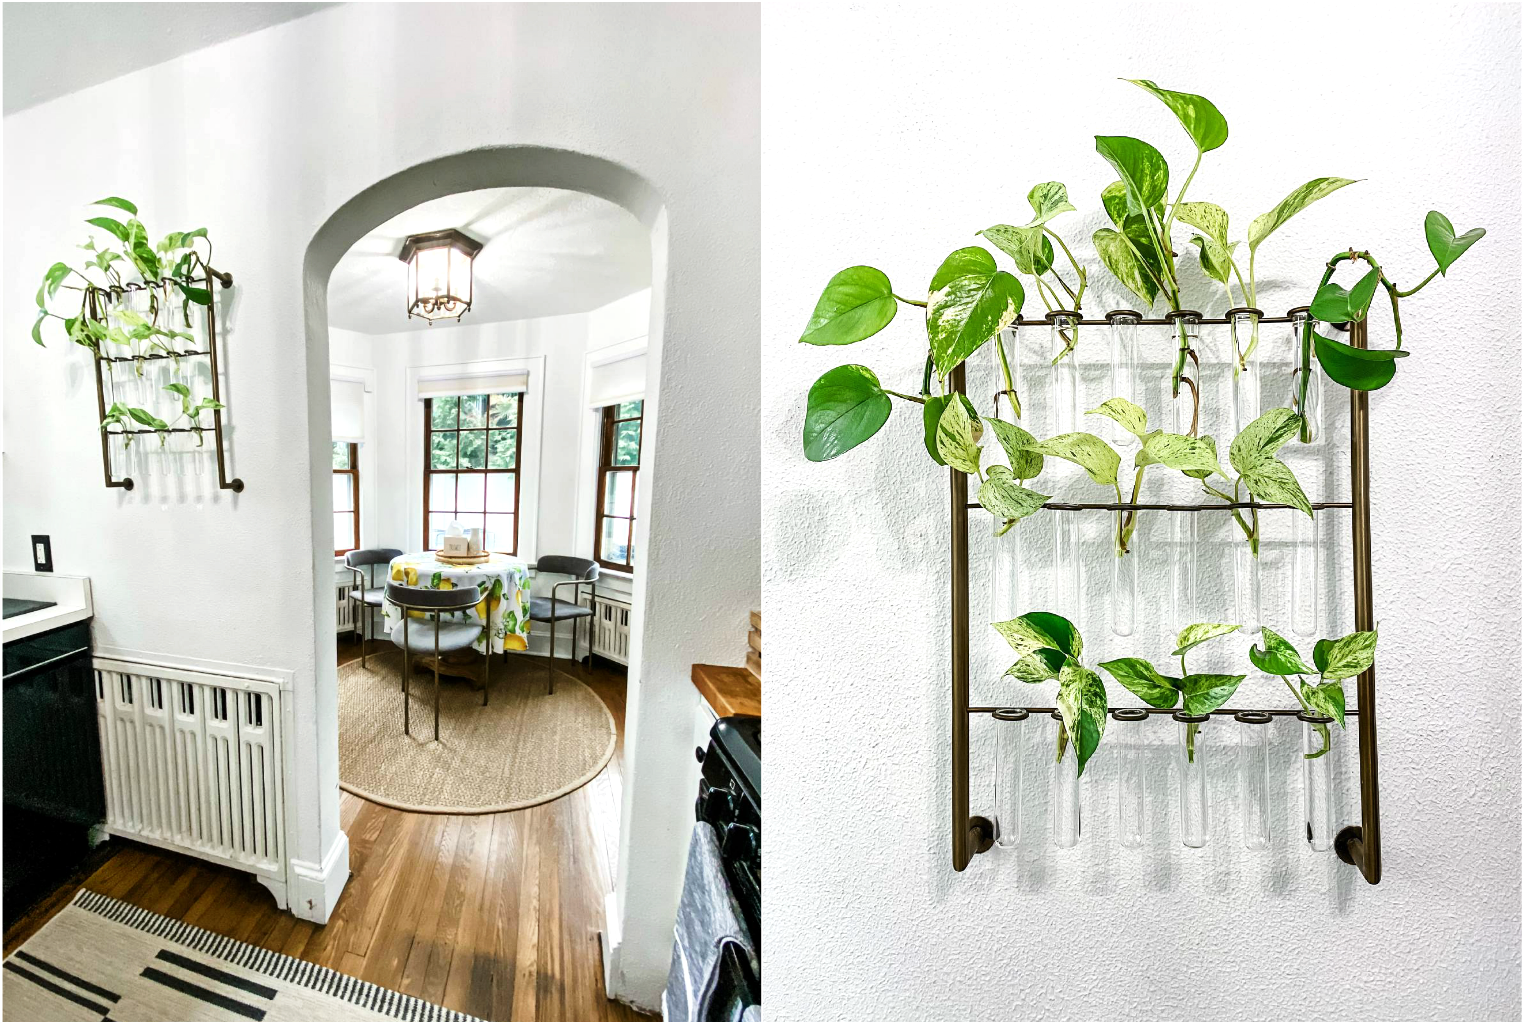
Mounted Plant Propagation Station (s/o but you can shop similar styles linked to my LiketoKnow.it page here)
Side Note: For anyone interested, I’ve shared steps on how to easily propagate a Pothos houseplant & saved them to my ‘Plants Part 4′ IG Highlight
—
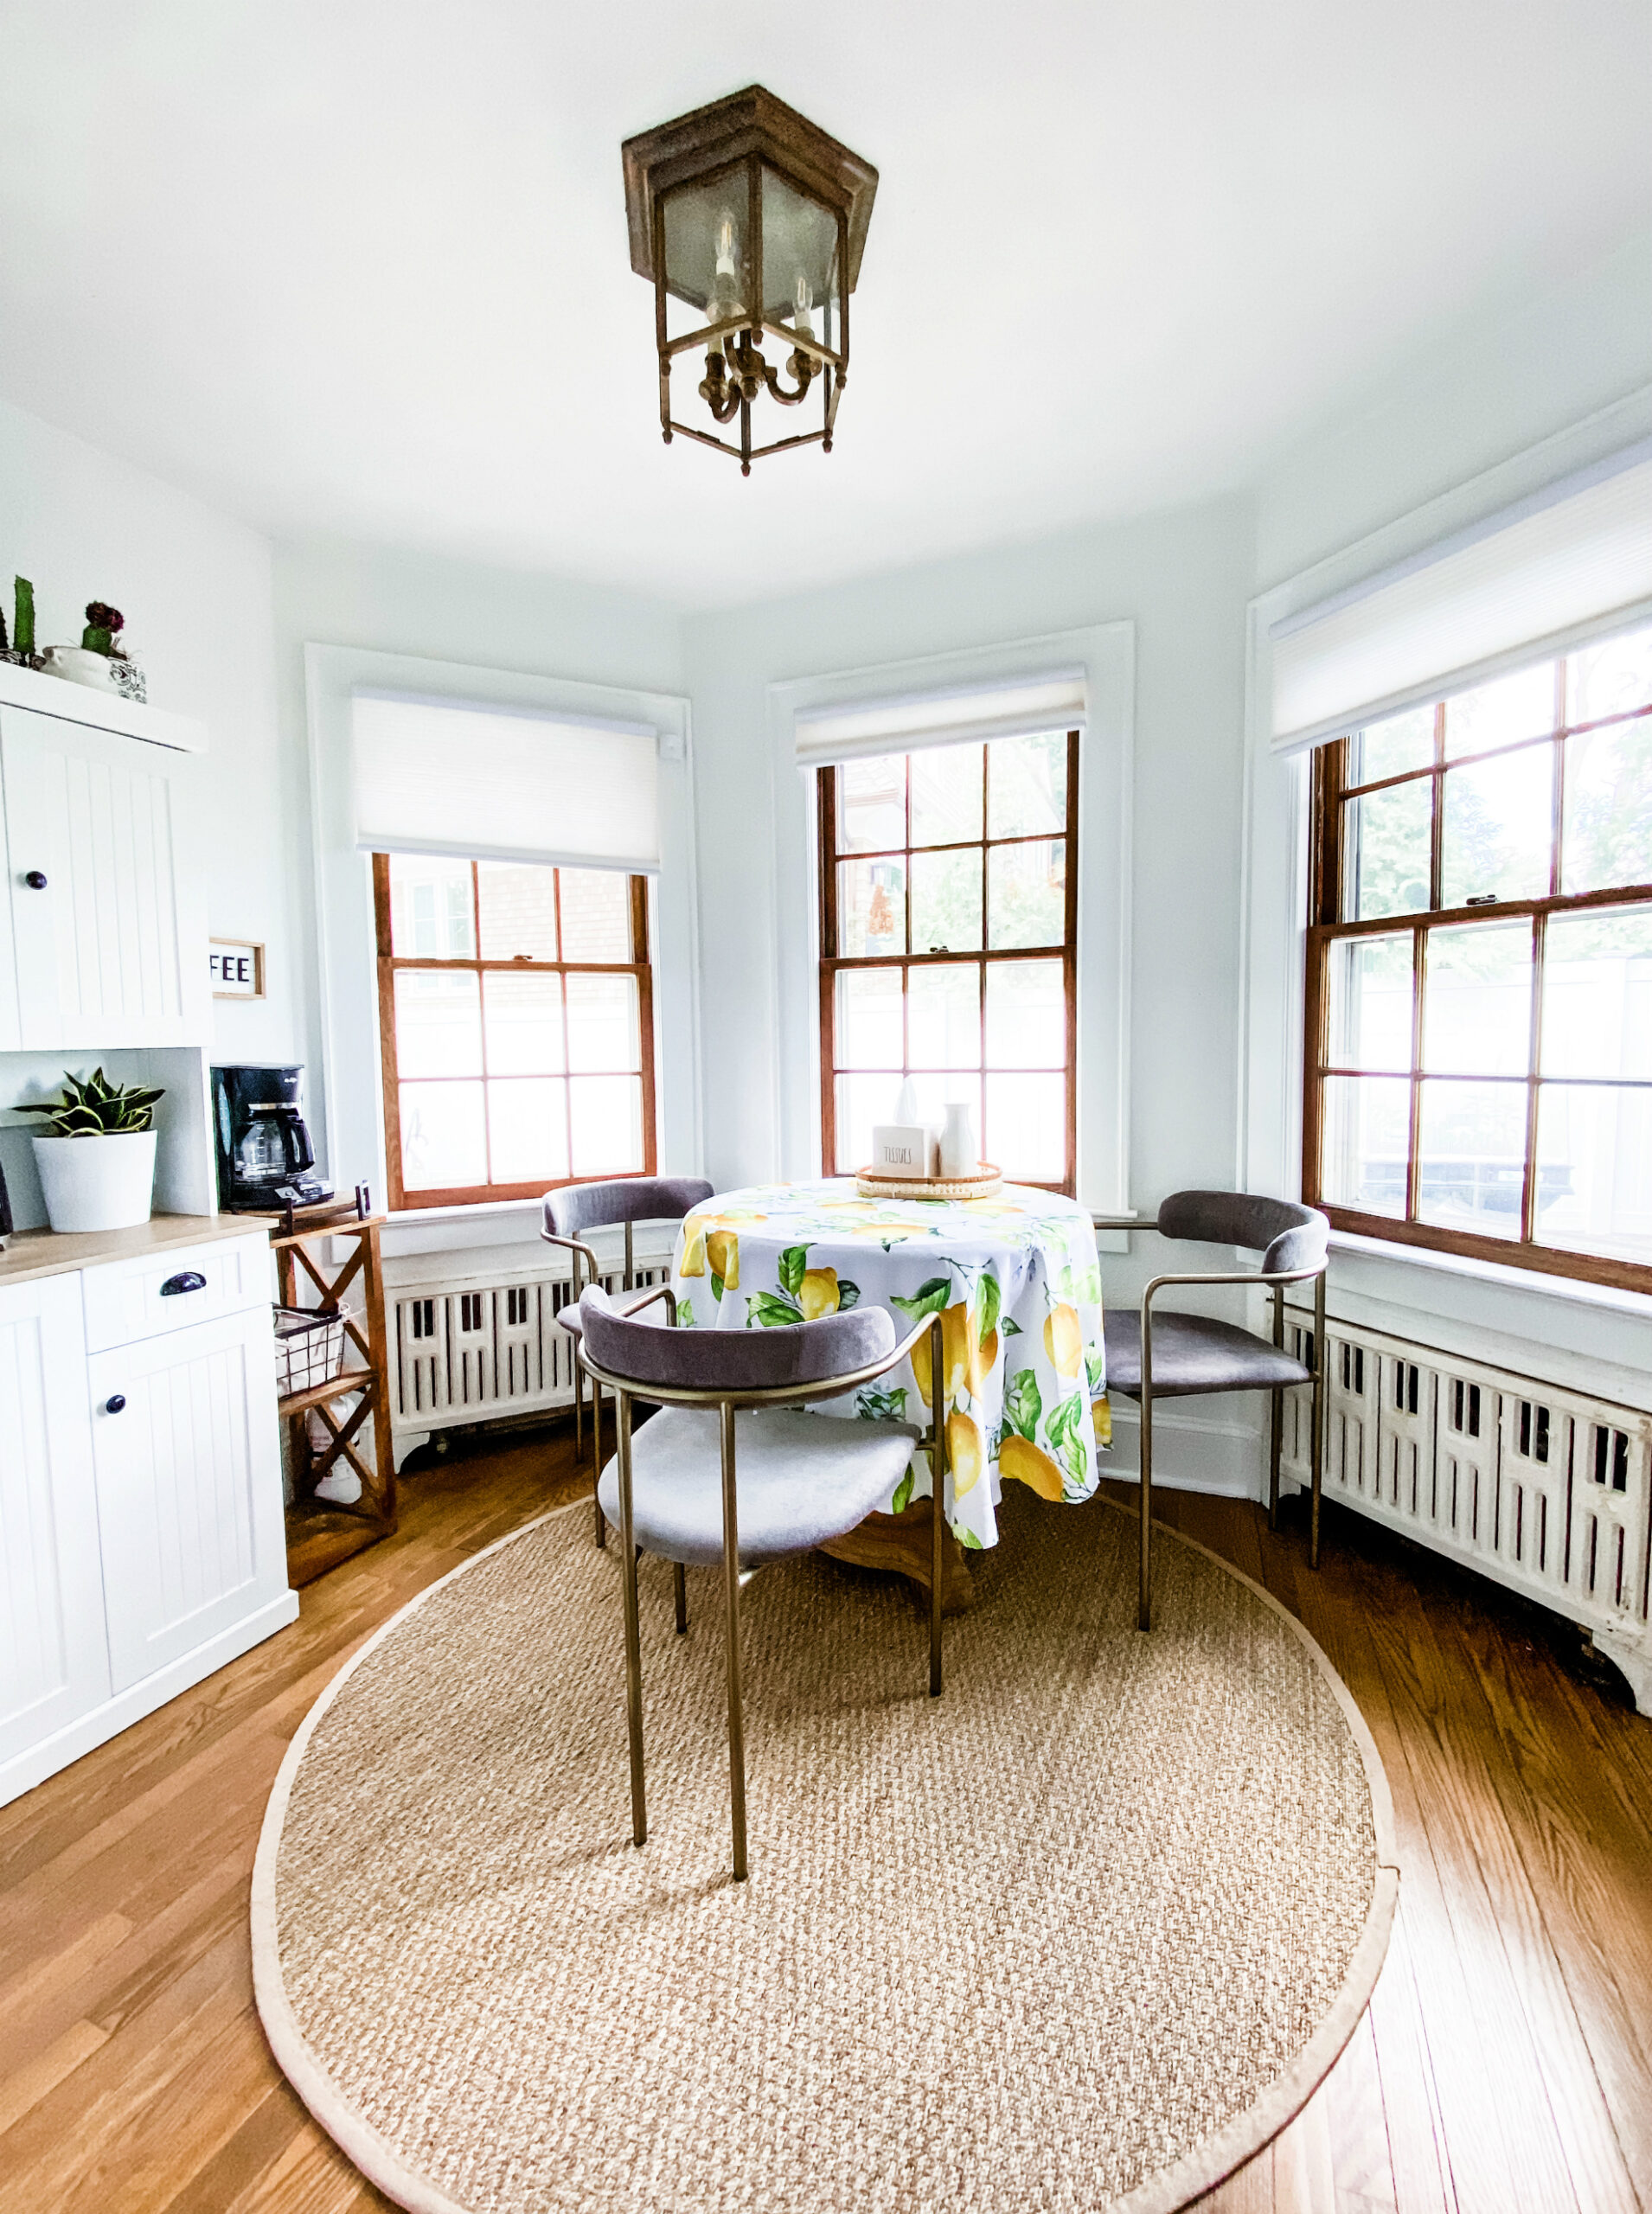
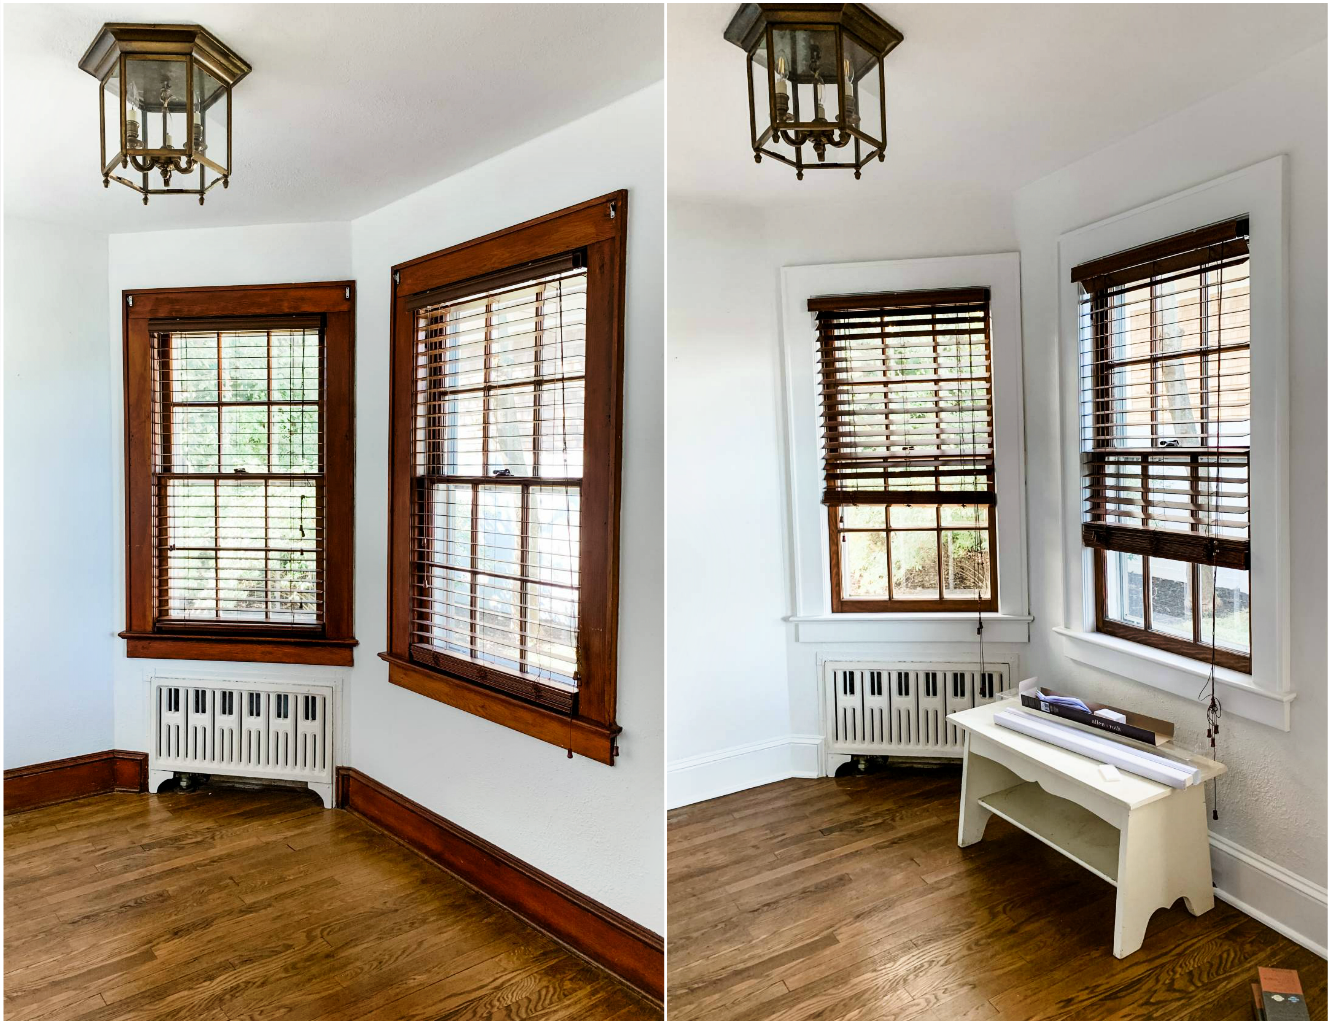
Off the main kitchen space is this delightful sunny room we call the Breakfast Nook. My favorite feature(s) are clearly the three bay windows that pour in sunlight all day long. We rarely turn the lights on in here unless it’s dreadfully overcast or pitch black outside. Like the kitchen cabinets, these windows & surrounding floor trim were chestnut brown wood and made this already small area feel even tinier. By painting it all white, it truly makes the whole room open up as it uses all that refracted sunlight bouncing off the white walls & trim to its advantage.
The Breakfast Nook space feels like it was made for a round table like this one. We had it in our apartment in Hoboken and so happy with how it looks in here now. One of Thomas and my favorite things to do is sit here at the table each morning with our coffee while watching the birds at the feeders right outside the window. There’s something so peaceful about this early routine & I feel like a lot of it has to do with the setup of this room. It’s not ideal (space-wise) for entertaining friends & family, but maybe that’s a good thing..? Lol.
6′ Round Natural Area Rug | Similar Dining Chairs | Round Lemon Print Tablecloth
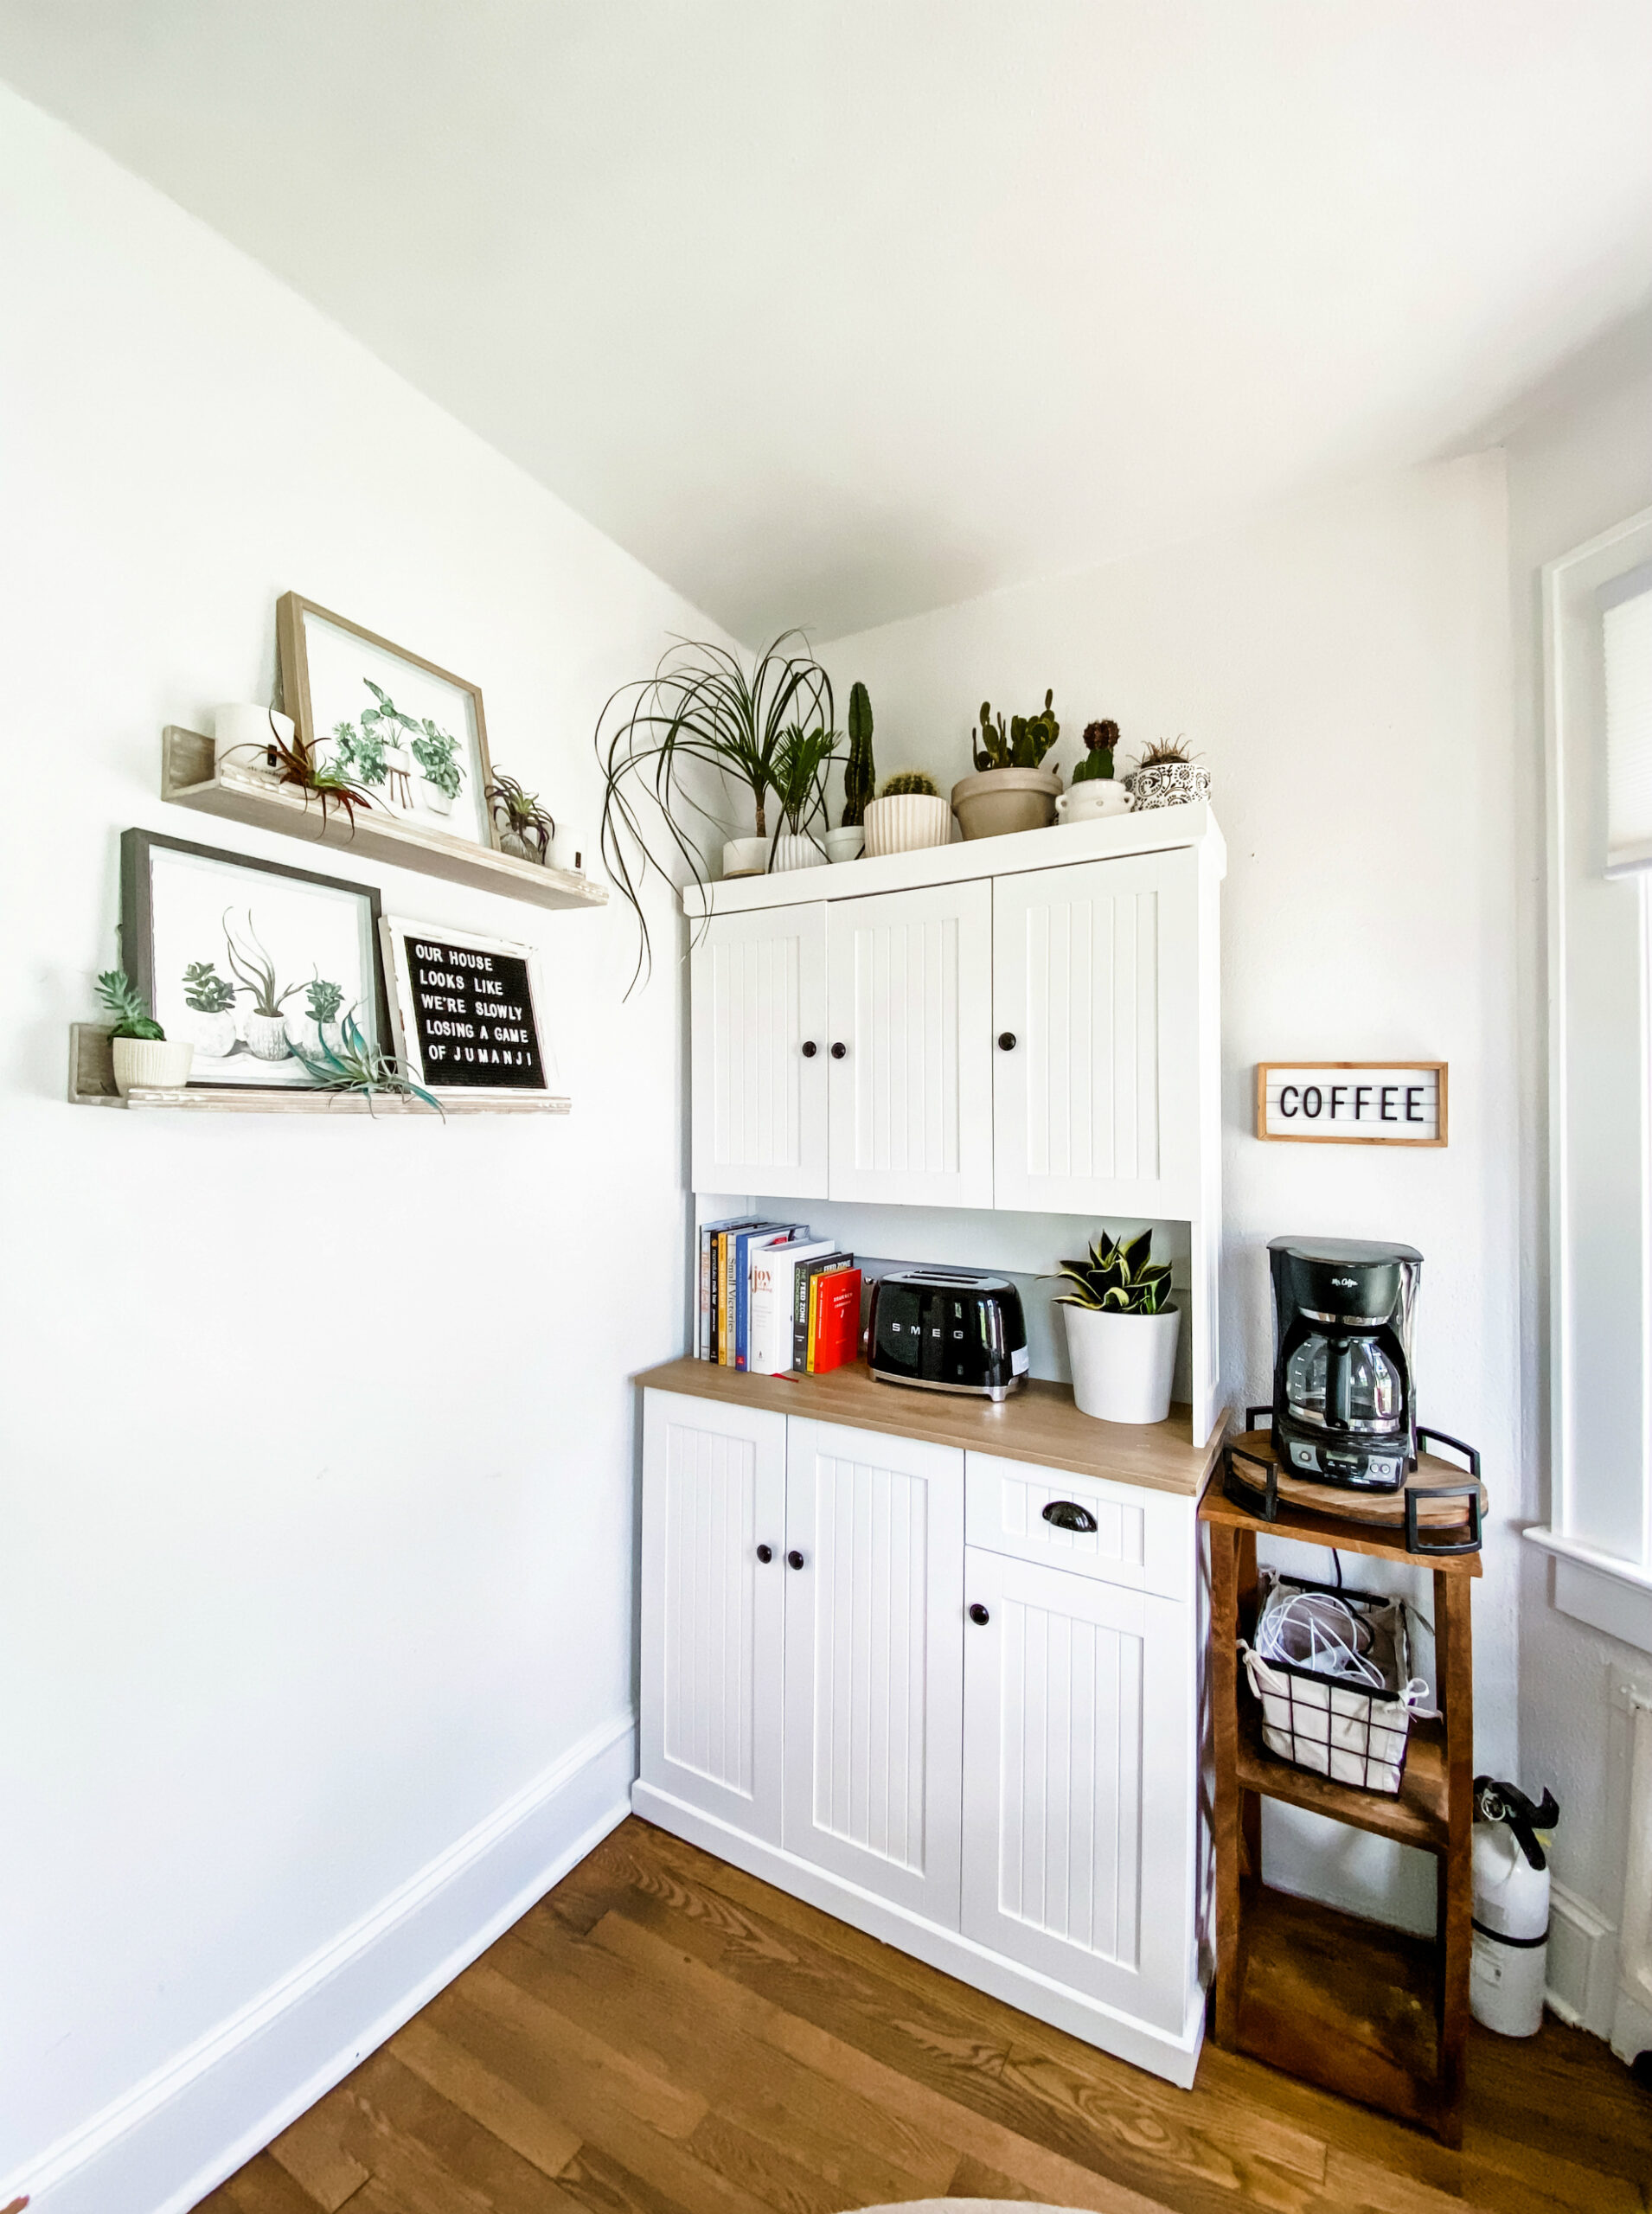
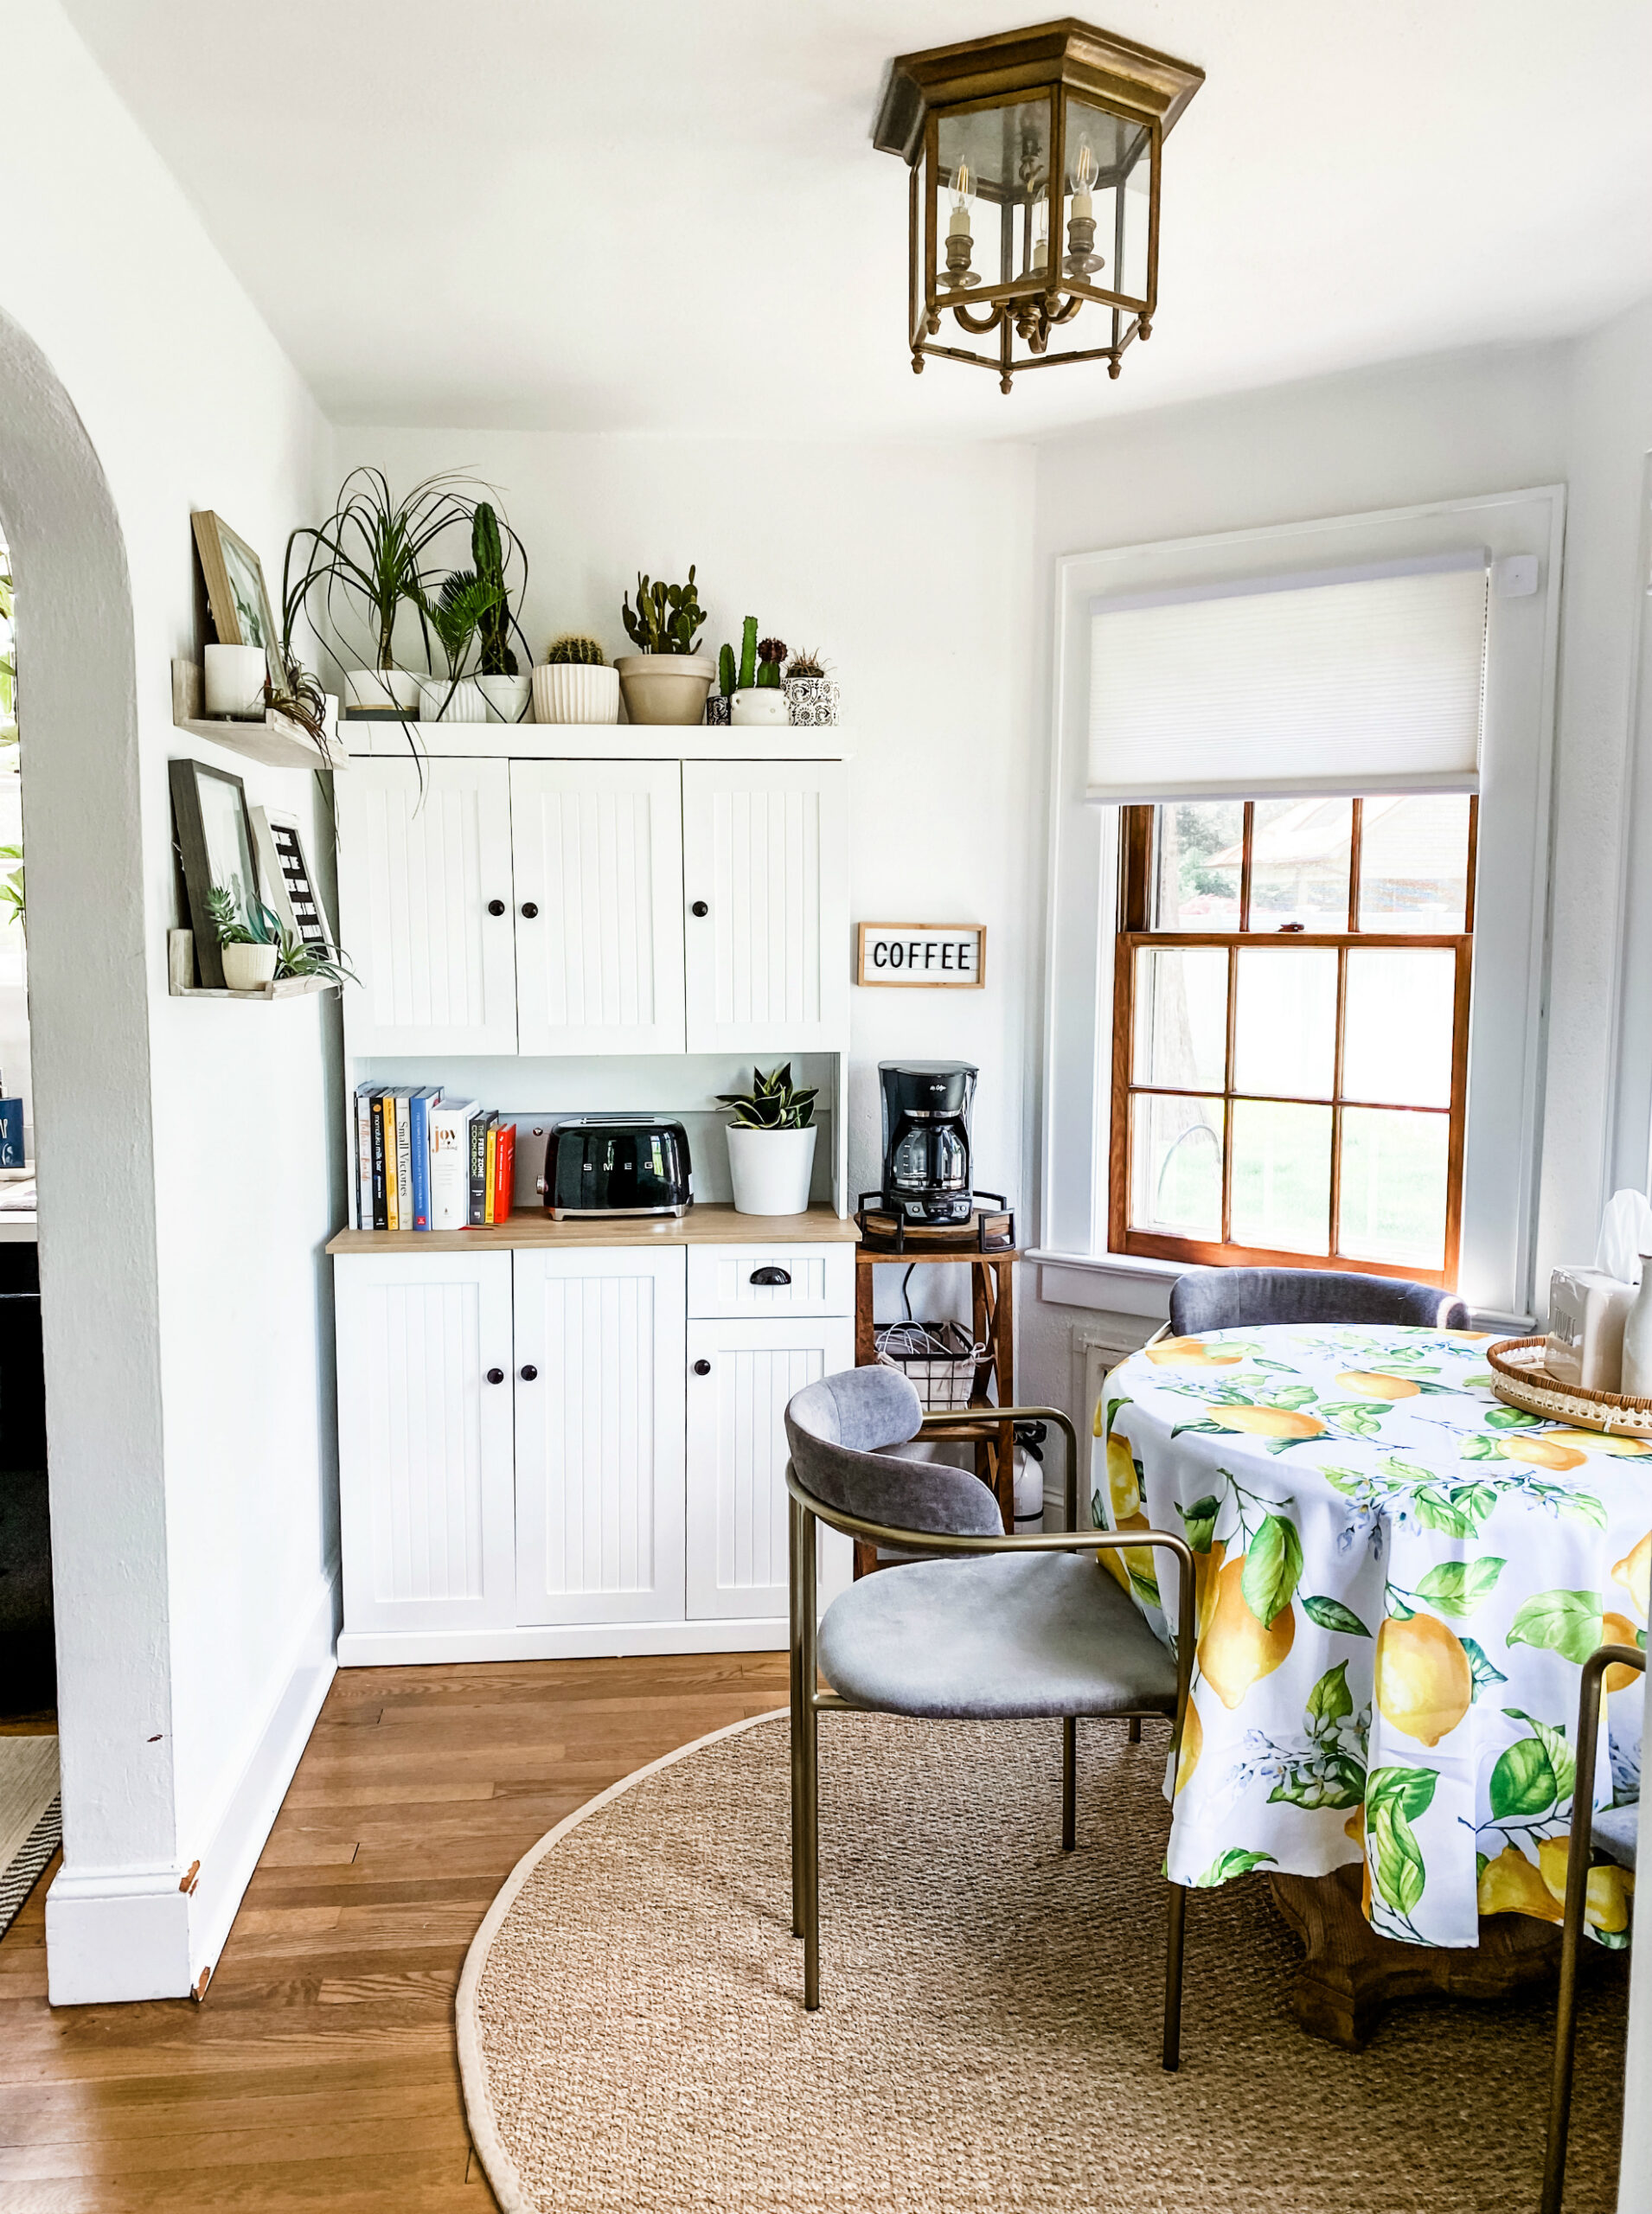
As I mentioned before that due to limited cabinet storage, we had to get creative with where to put our drinkware, plates, bowls, pots & pans etc. So when I came across this tall kitchen hutch with solid doors to hide everything inside, it was instant love – especially when I measured the dimensions and found it would be a PERFECT fit for this particular spot in the Breakfast Nook. There’s also a cutout for the toaster’s electrical to pass through the back – genius!
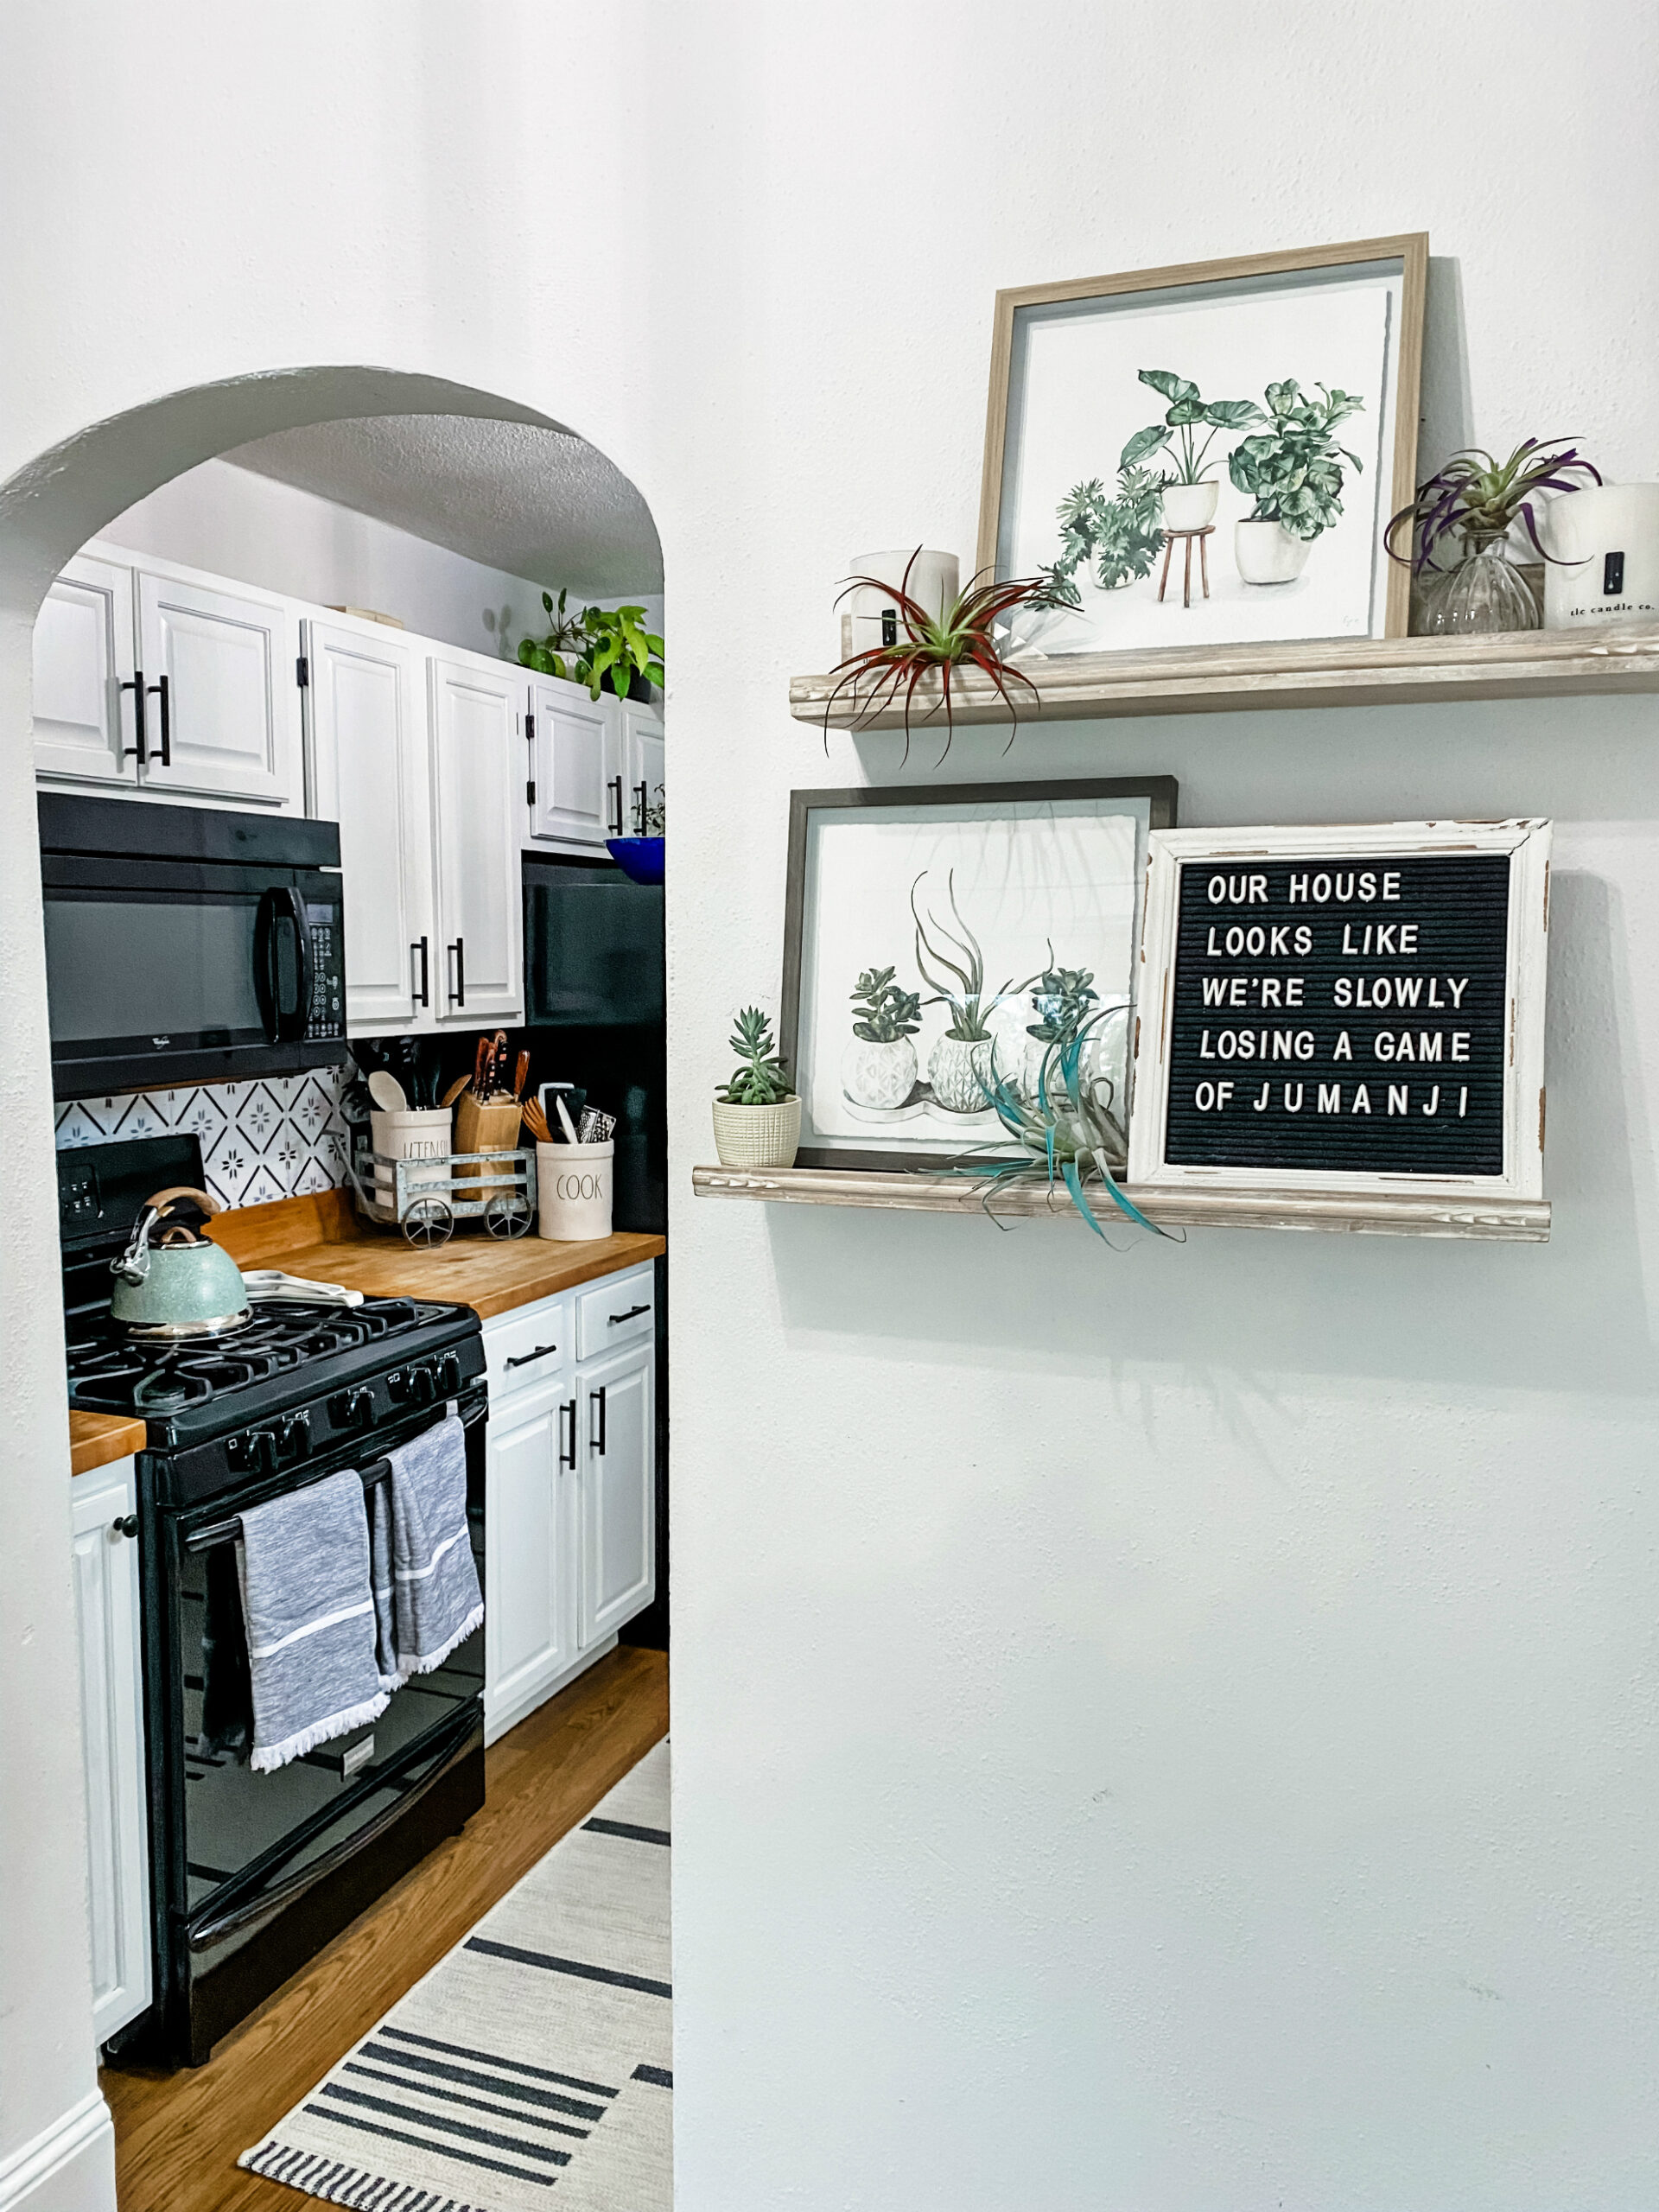
Similar Wood Buffet Storage Hutch | SMEG Toaster | Similar Floating Wood Shelves | Similar ‘Coffee’ Sign
I hope you enjoyed seeing the progress of our kitchen space! There’s more home tour content to be revealed in the near future (i.e. bedroom, living room, & my office) so stay tuned for more on that in the upcoming weeks ahead.

Oh wow, Tilden, this looks amazing! You guys did such a greta job. The white definitely brightens things up a bit! We have a very tiny but mighty kitchen space as well which is due for a renovation, so I really appreciate your ideas! Right now our kitchen is tangerine orange with old awful brown wood cabinets. A good bright fresh coat of paint across the whole thing will do it wonders!
Shelbee
http://www.shelbeeontheedge.com
Modern and classy! You have such a beautiful kitchen! Keep sharing and updating further!
You are lucky to have such a spacious, bright, and beautiful kitchen! Just like a dream!