HELLO PLANT FRIENDS!
WELCOME TO PART ONE OF A TWO-PART POST ABOUT PLANT PROPAGATION
..
Back in March, when things were looking ever so bleak & depressing, I directed all my remaining energy into my houseplants and really began focusing on how to grow them on my own – i.e. propagation. It’s something I’ve always wanted to try but felt incredibly nervous about starting, especially because most of my existing plants were on the “younger” side. But if I’m being honest, my fears came from simply not knowing ANYTHING about how to grow roots from a cutting and the question of “would I kill my mother plant in the process?” really deterred me on doing it until I knew a bit more about what I was about to get into.
But here’s the thing – you can still learn to propagate without taking a cutting from your own plant. I know it sounds like cheating the system but hear me out – it’s a great stepping stone to take if you want to be serious about it but would like to ease your anxieties about it. Knowing what I know now, from purchasing cuttings from online plant people & taking Hilton Carter’s ever-so-incredible live online course on Plant Propagation (HIGHLY RECOMMEND!), I feel much more confident in my desires to propagate from my own plant family.
After taking a poll on IG, it appeared that most of my readers following me (@tobebright if ya wanna join in on the fun!) wanted to see this plant propagation post split into two parts. Honestly, I think there’s a lot of useful information here that will encourage anyone to try propagating on their own. Even those who don’t have a suitable mature plant to propagate from can still exercise this remarkable hobby, which truly marks one as an experienced plant person – in all seriousness! Plant Propagation isn’t the easiest thing to do but it’s definitely more approachable with an understanding behind it; and the reward that comes with it is undeniably special.
..
So in this post, you’ll be getting a glimpse of a beginner’s knowledge when it comes to successful plant propagation through purchased cuttings. In Part Two, I’ll be doing more in-depth on how to properly take a cutting from a variety of plants (because not all plants are propagated the same) and discussing my personal experience in doing so for the first time.
WHY PROPAGATE?
It’s The Most Inexpensive Way To Grow Your Plant Family
Think of cuttings as offspring of your mature plants – they expand the family. Instead of purchasing another plant of the same variety/species, why not try growing a “baby” plant from one of your more adult plants. It’s completely free to do & honestly, substituting your “time” over your “dollar” is a much more rewarding way to “spend” currency, especially during these times. Plus, you have a ready-made gift idea for any upcoming occasion – I personally would LOVE to receive a cutting from someone’s plant to grow on my own. And if you’re reading this post, you probably would too 😀
It Promotes Growth!
By taking cuttings from your mature plants, you’ve not only expanded your existing plant family but you’ve also encouraged your mature plant to continue growing. My biggest fear is that I’d take a cutting from a more temperamental plant (i.e. Fiddle Leaf Fig) and it would go berserk as a result (i.e. decide to die.) But it’s actually the opposite! Like pruning dead/yellow leaves, taking a cutting from your plants encourages it to produce more leaves in its place. In fact, you’re more likely to see a dramatic foliage change in your mature plant like you’ve given it shampoo for extra volume.
It’s A Rewarding Experience
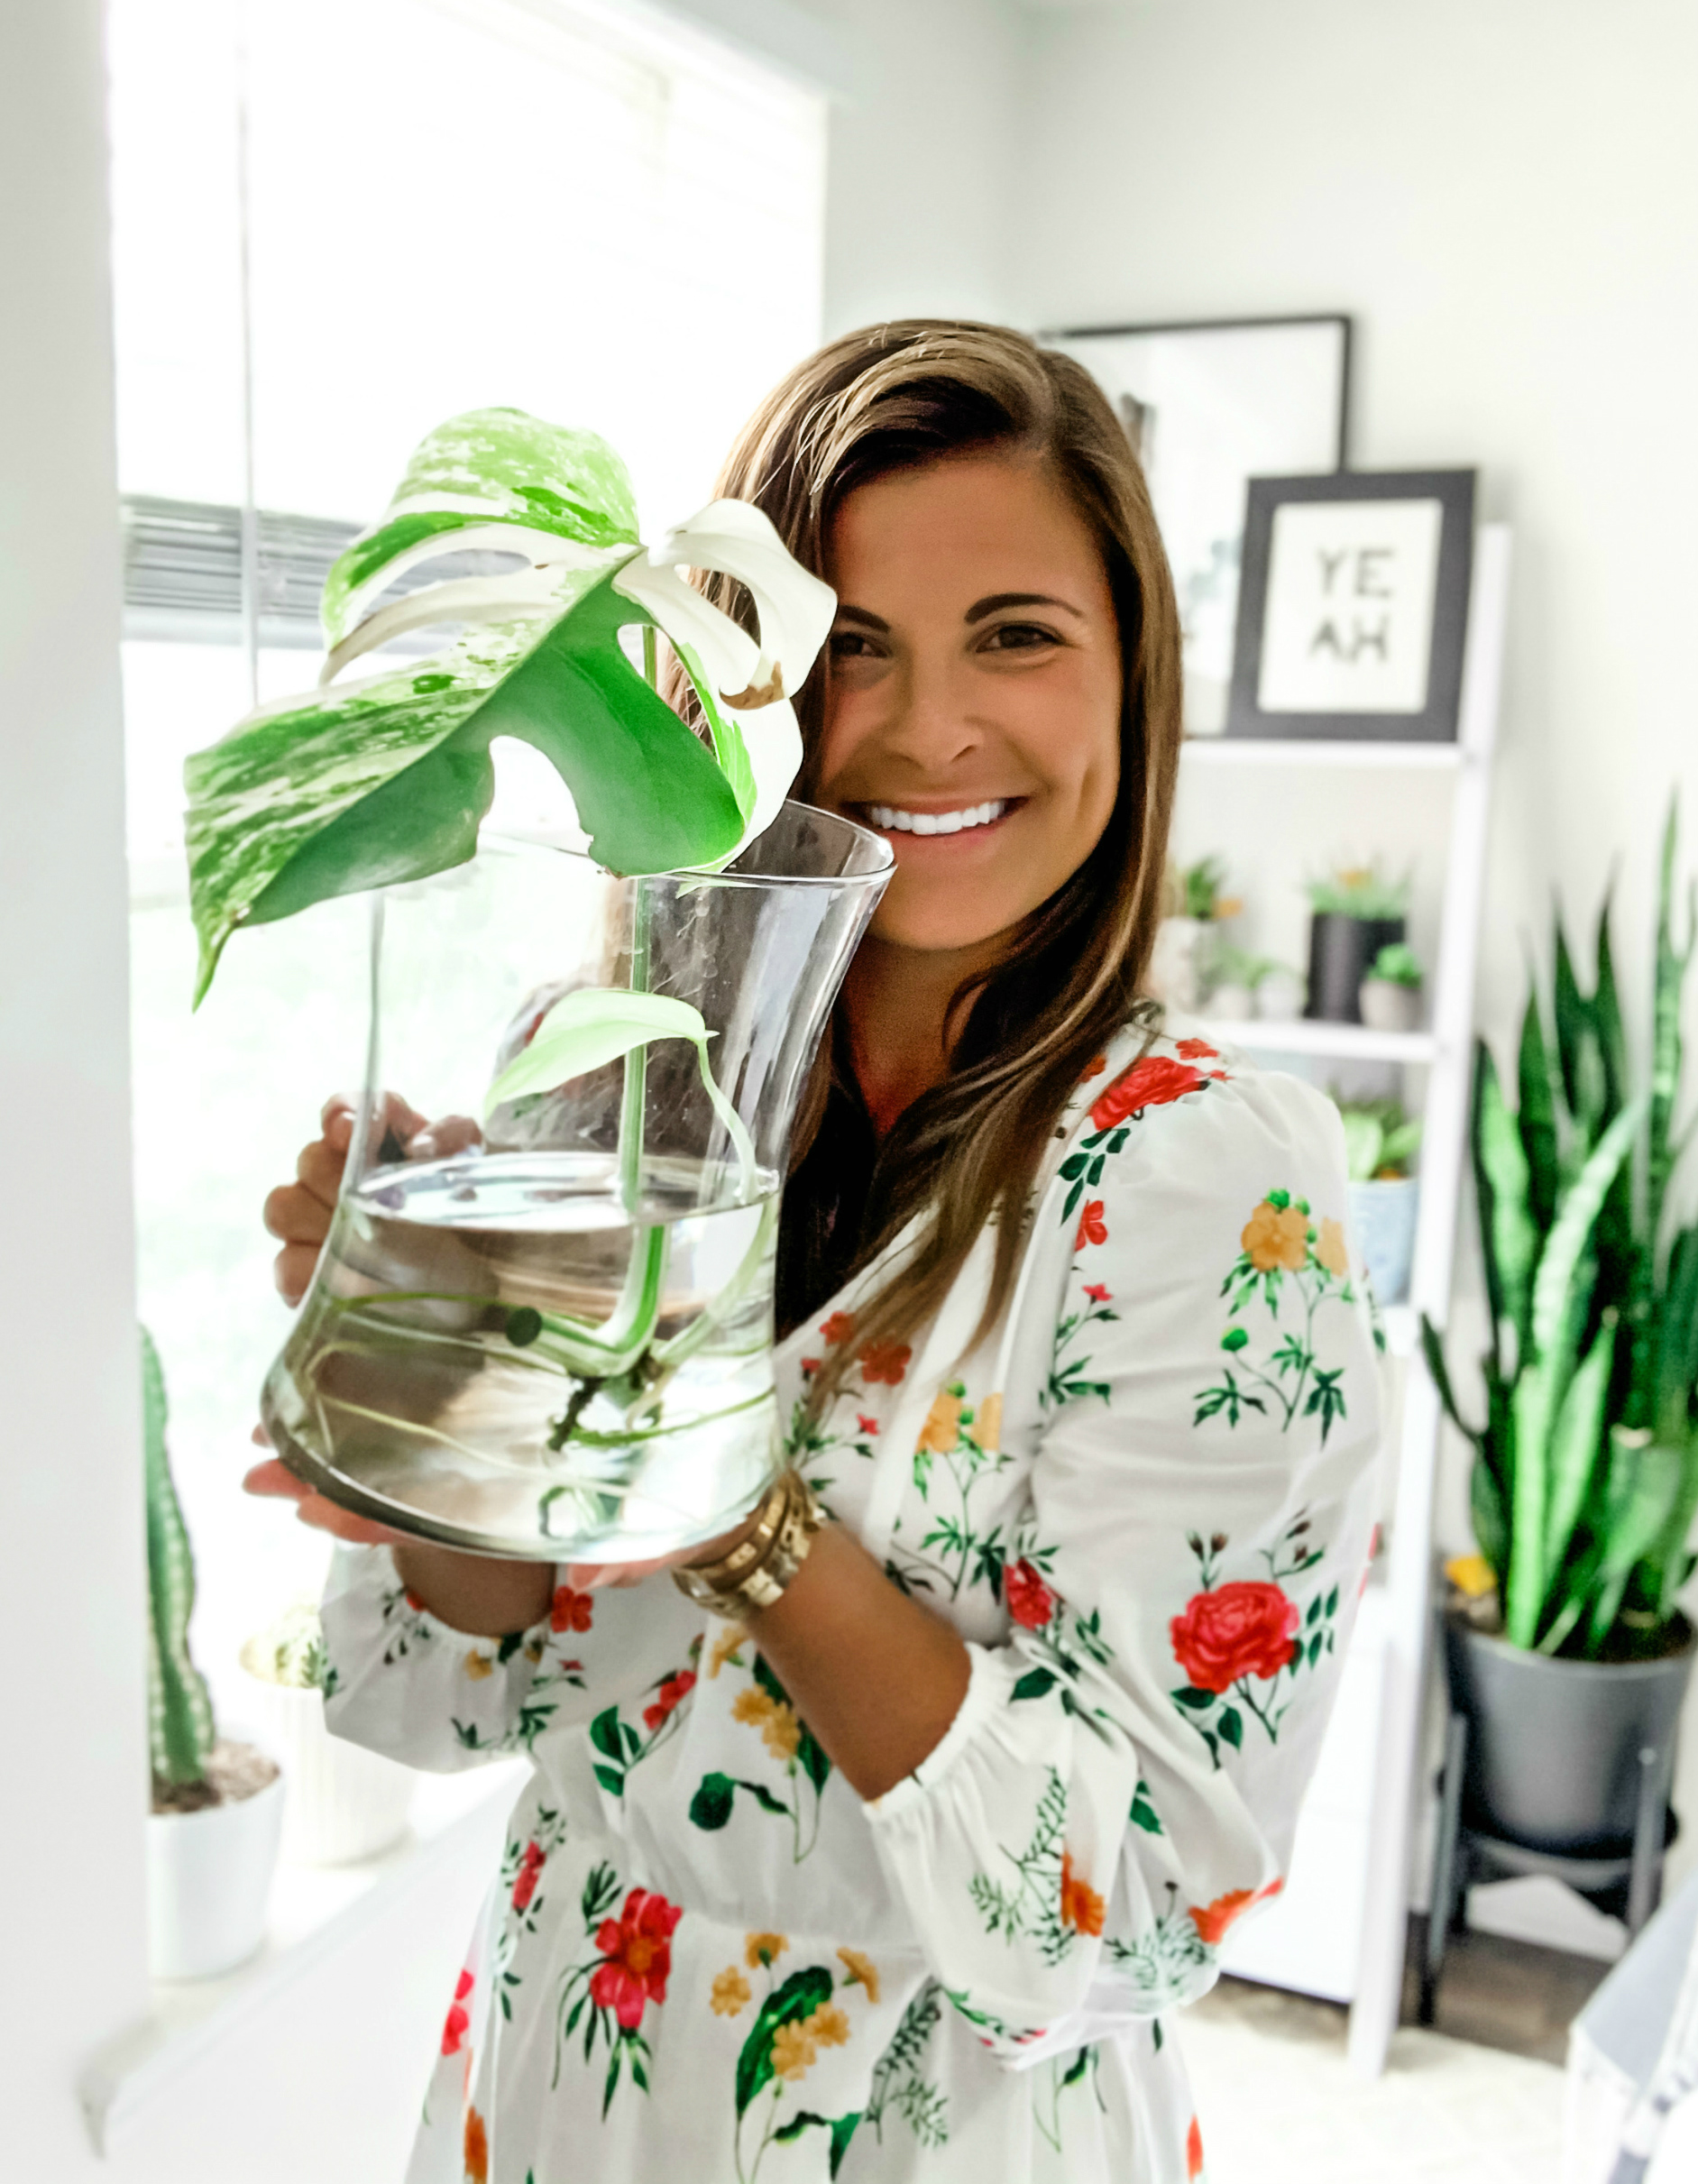
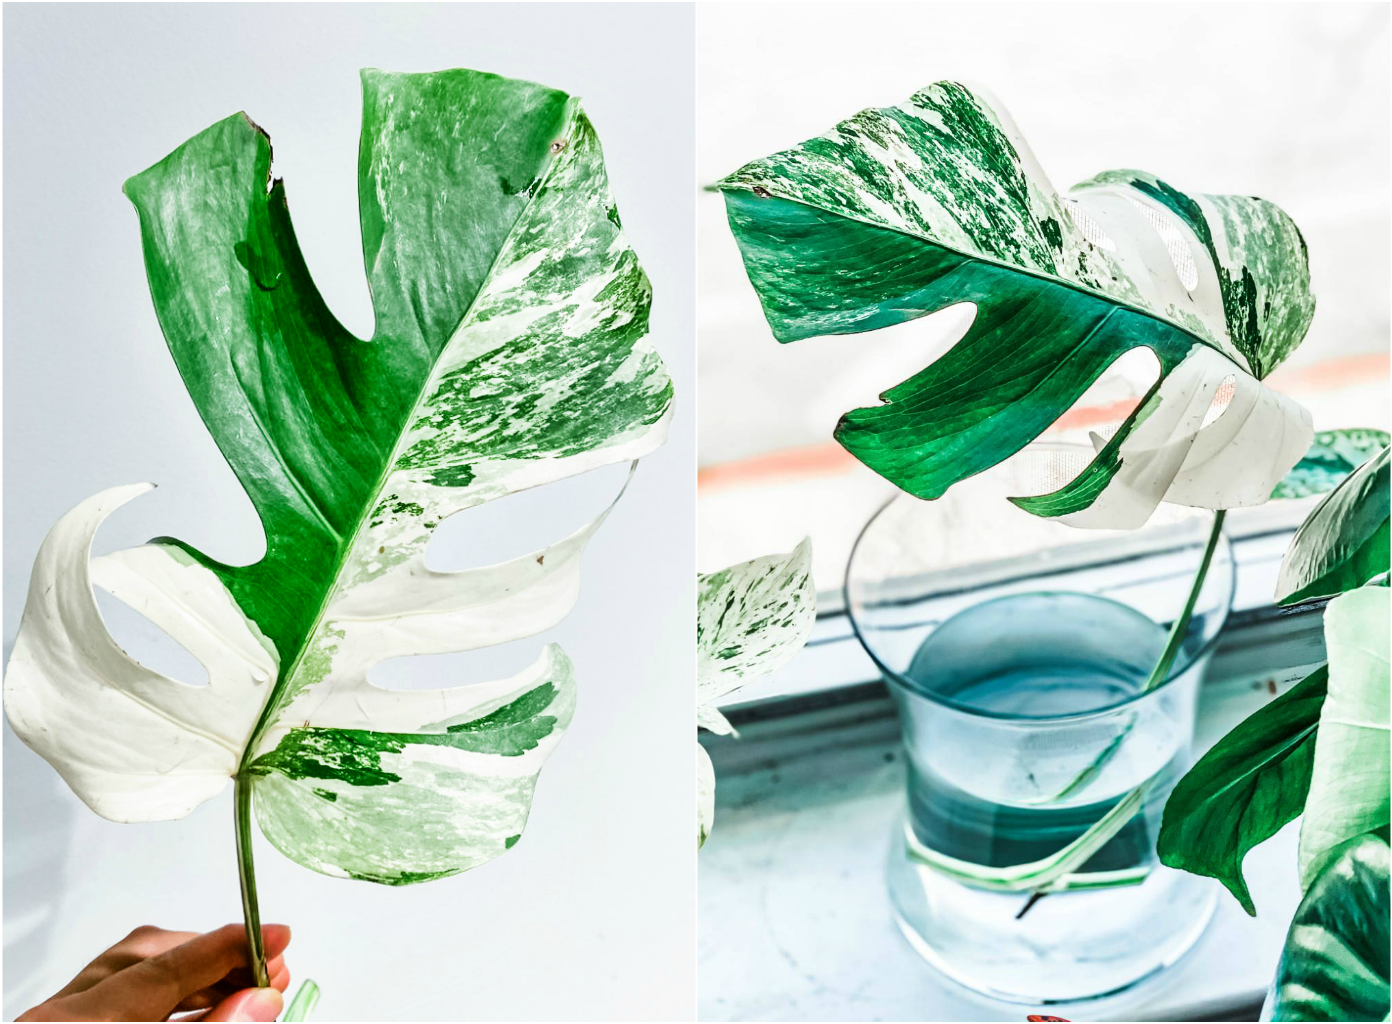
I was told that you’re not a true plant parent until you’ve successfully propagated a cutting from root to soil; when it grows that first leaf in its pot, that’s when you know you’ve made it. I finally got to that place this past month with my Monstera Albo cutting and holy moly I didn’t expect to feel so much emotional joy because of it. It not only grew a new leaf while in the water, but that new leaf started growing an even newer leaf 1.5 weeks after going into soil. Seeing its progress from beginning to end gave me the confidence boost I needed; there’s honestly nothing like that moment as a plant parent. I strongly hope to encourage you to capture the same feeling for yourself through the propagating experience.
GETTING STARTED: WHAT YOU’LL NEED
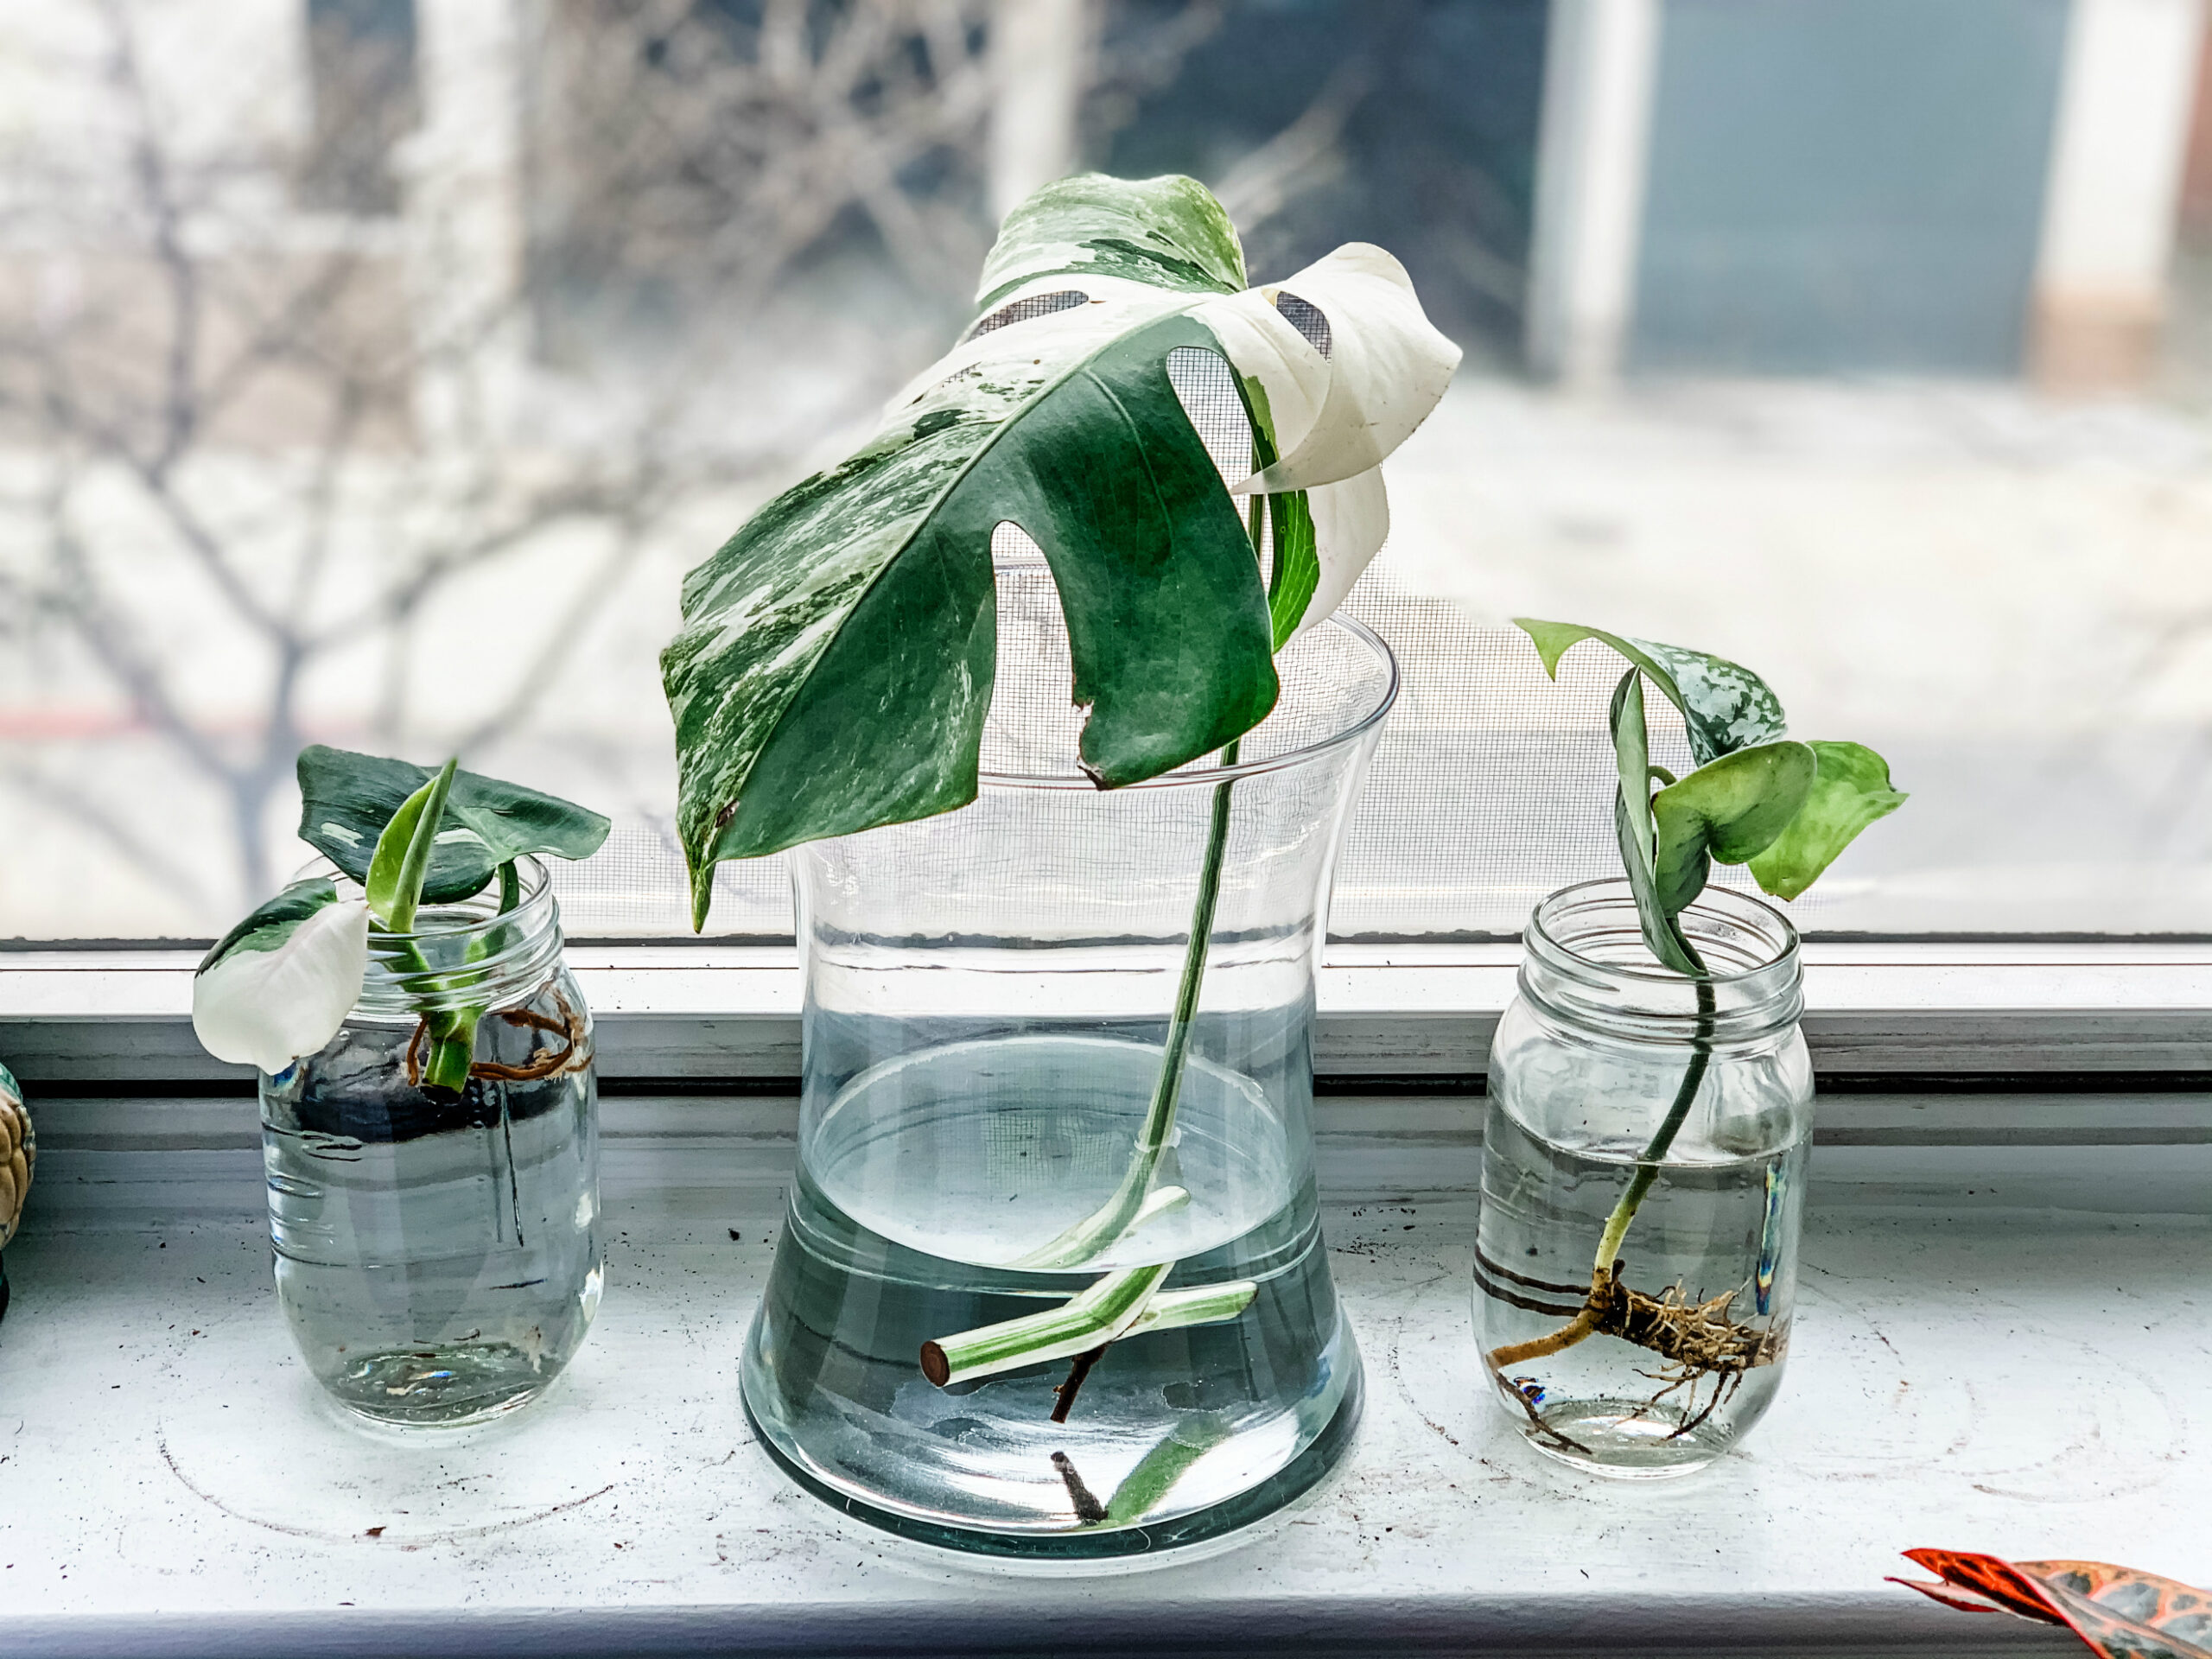
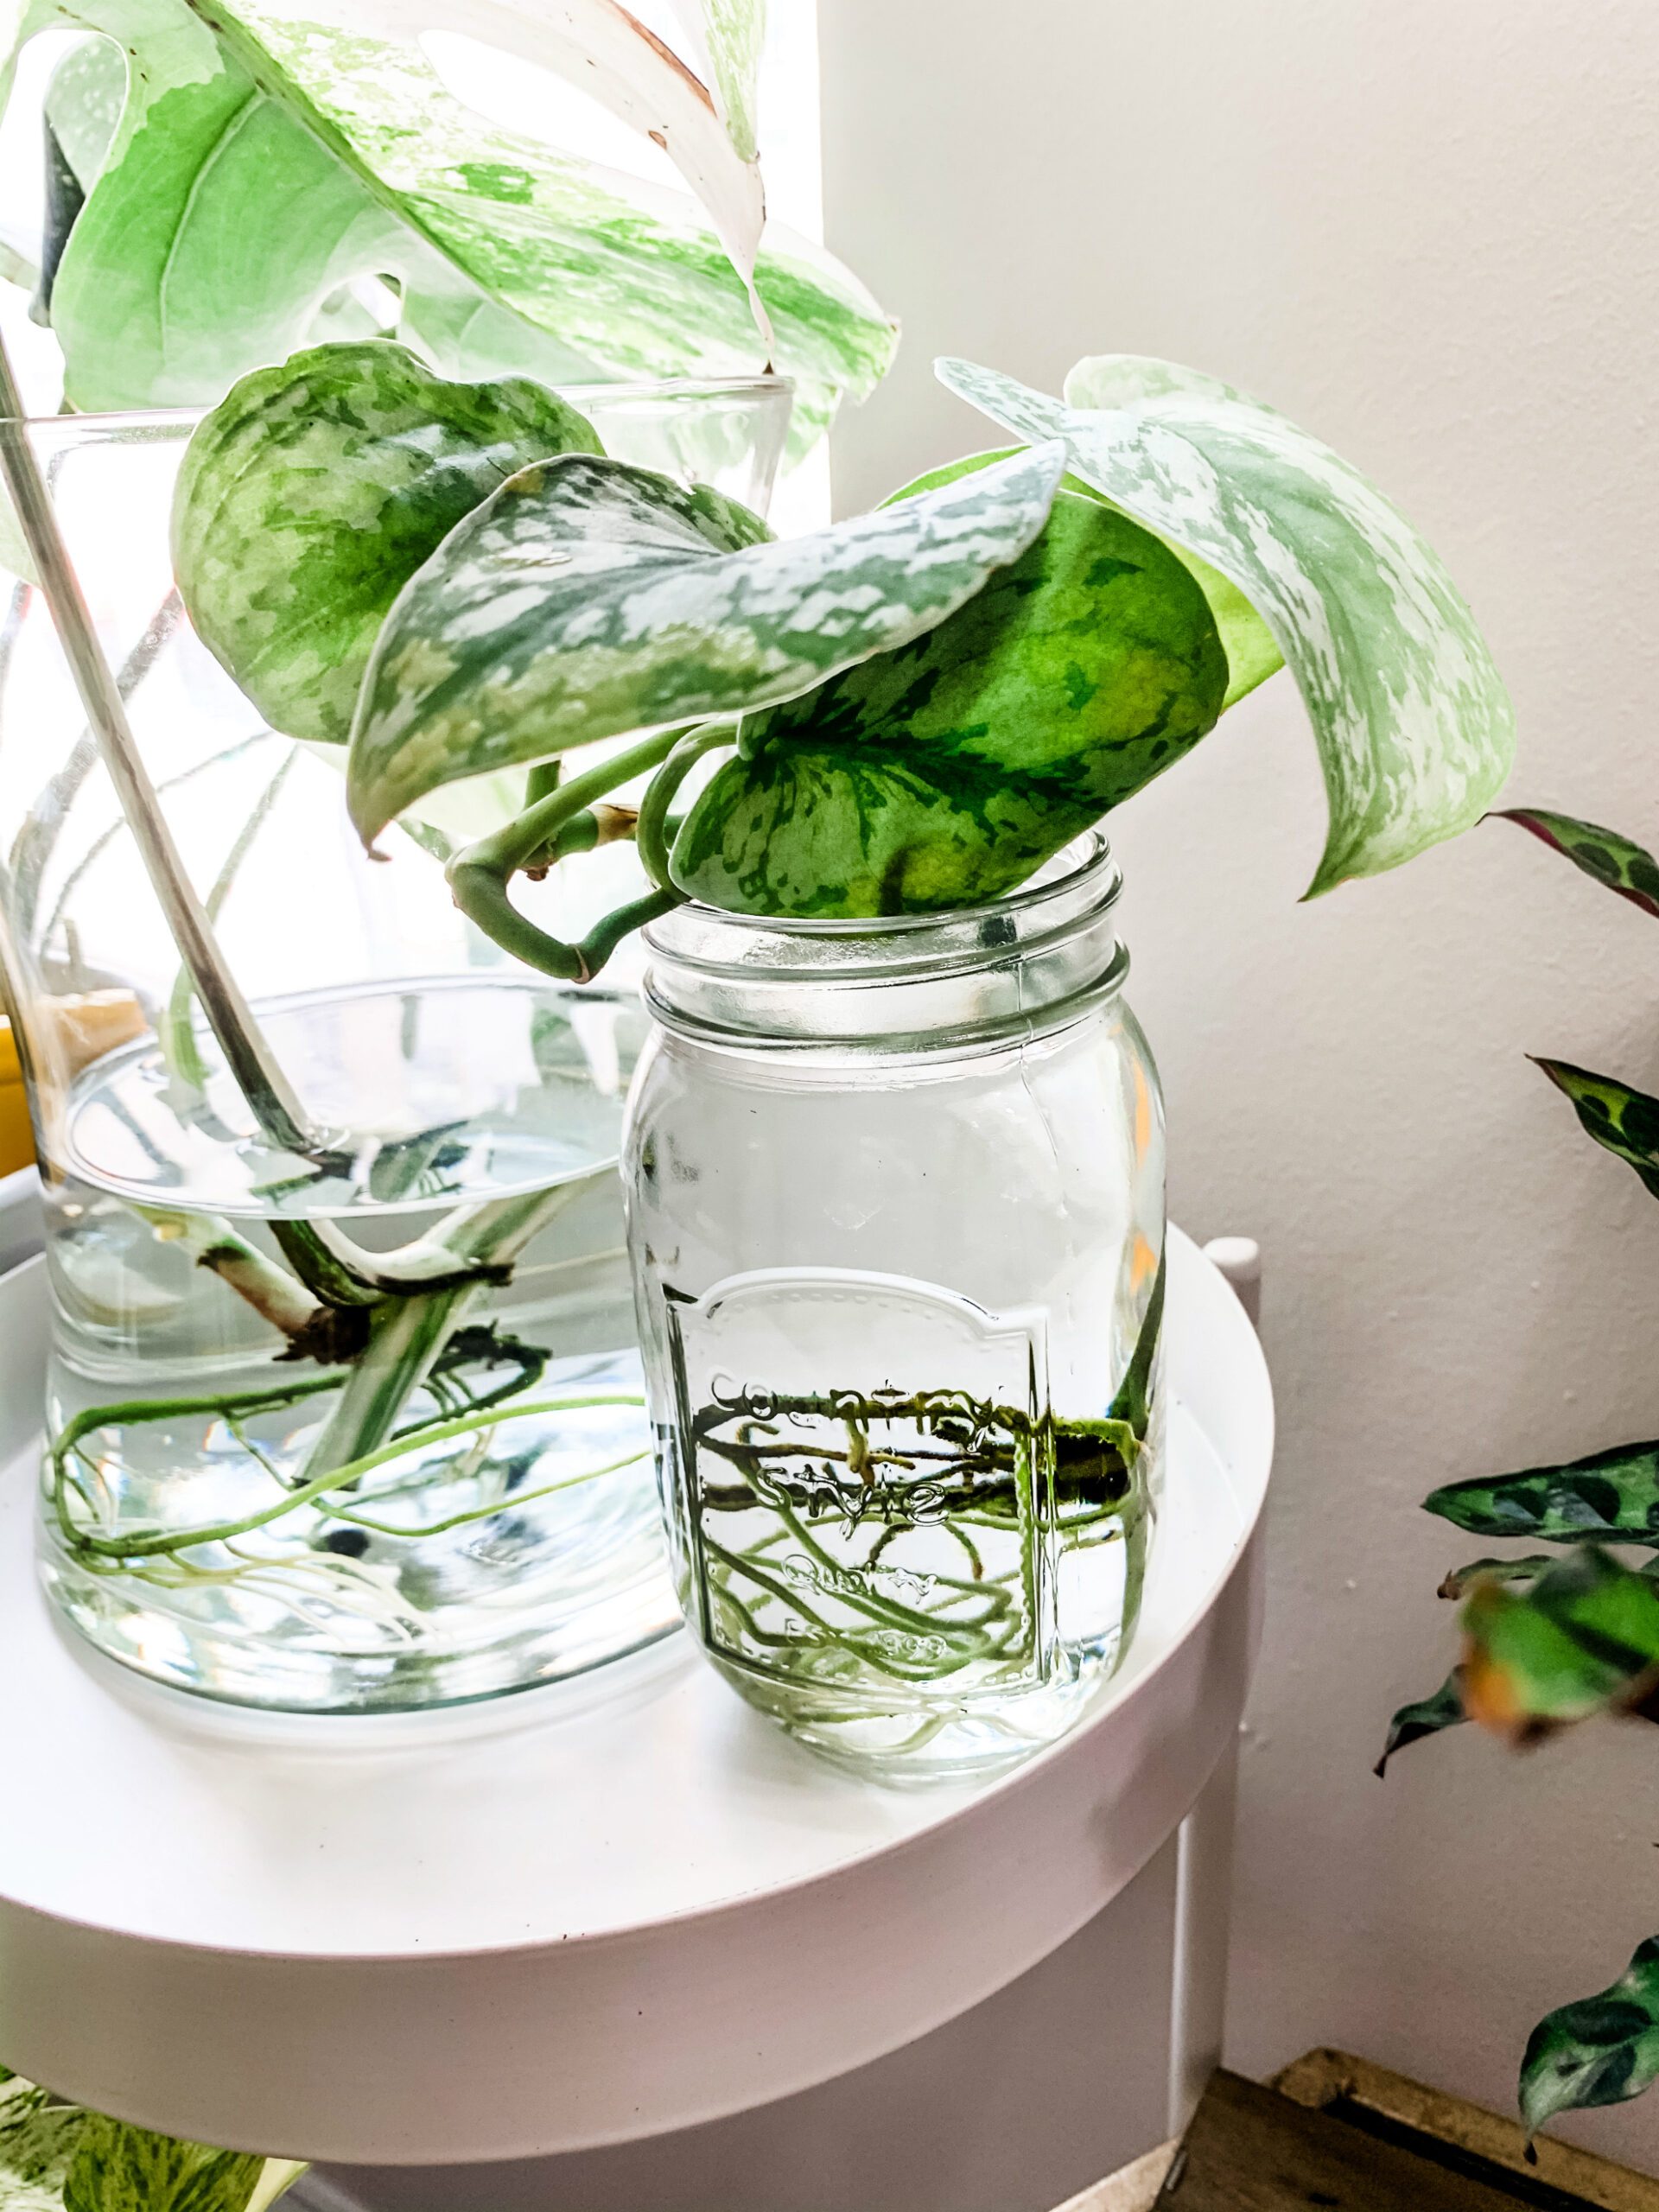
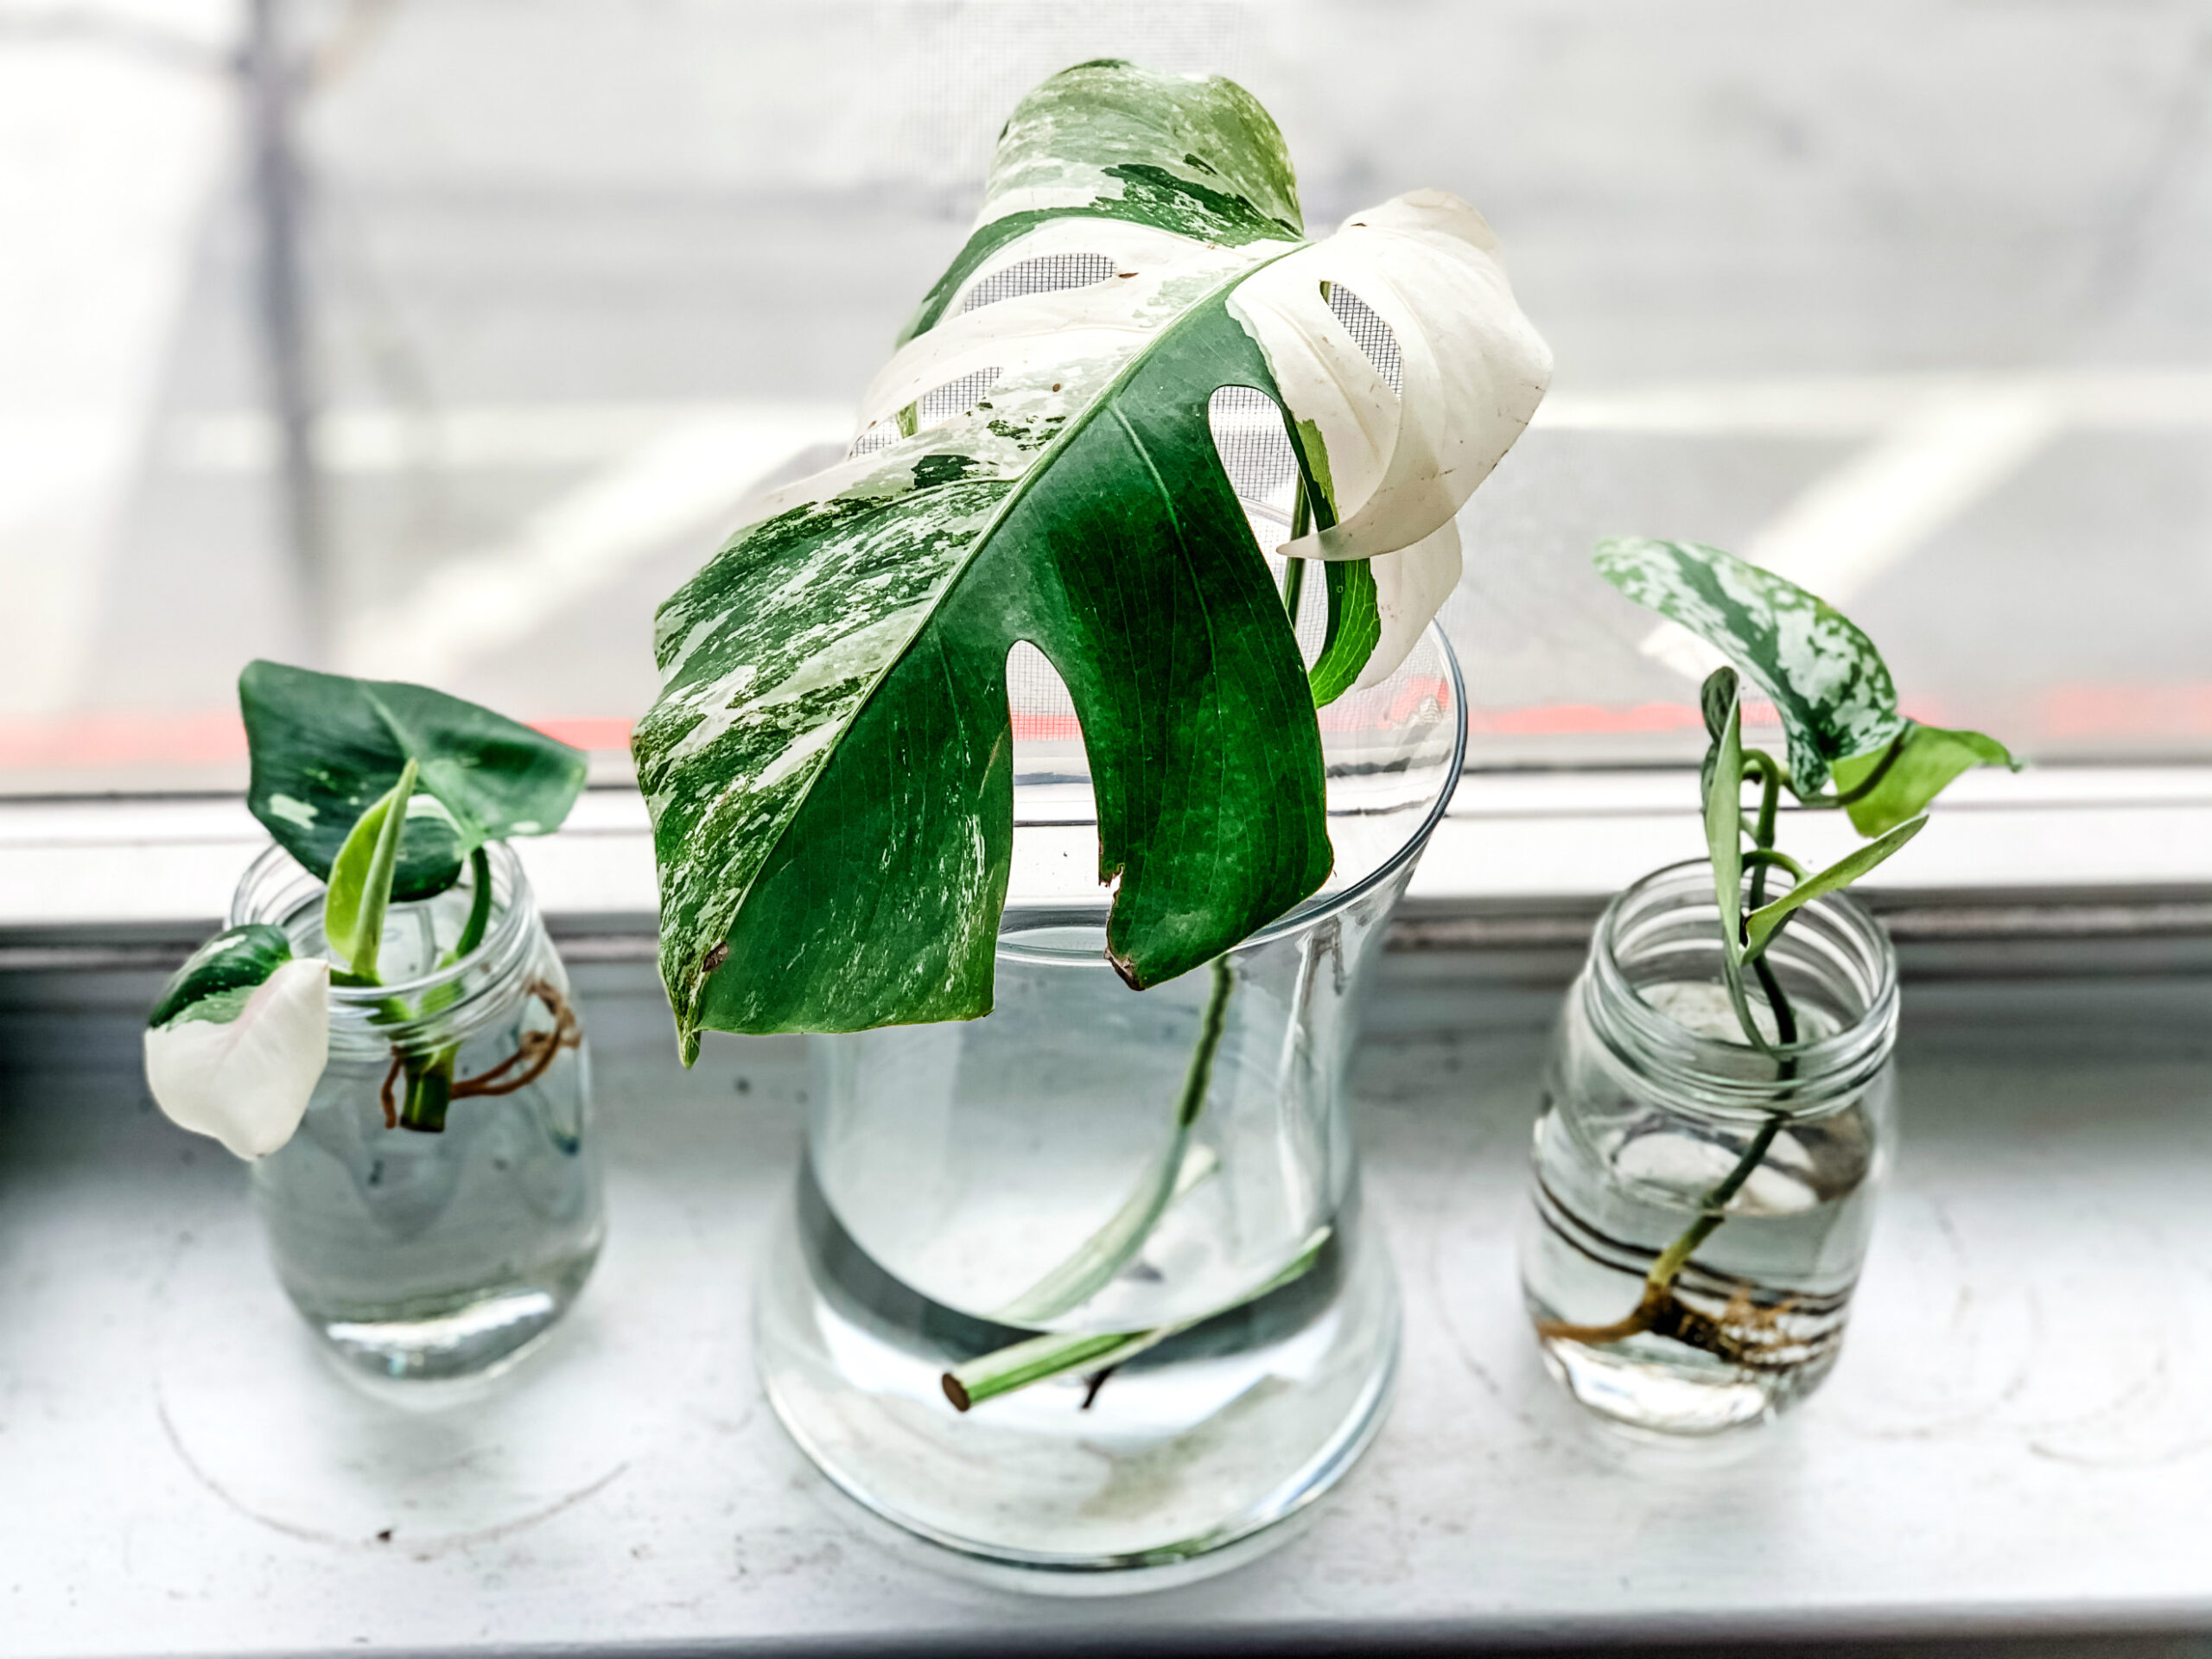
Clear Glass Container
You want to ONLY use clear glass containers for two important reasons: 1) clear glass helps you to track the progress of your cutting as it forms roots & when the water should be changed, and 2) clear glass allows for more light to penetrate the cutting & its roots. Any other color glass vessel will block the max sun exposure the cutting needs and therefore, will discourage root growth. You also won’t have any idea what the health of your cutting’s roots are if you can’t see the proper color through the glass. Once you have your cuttings in their vessels, you don’t want to move them unless it’s time for a water change. Trust me, you want to just leave them alone to grow – having a clear glass container to monitor them without needing to disrupt is the best way to go.
In terms of vessels, you can get pretty creative with these but ideally, you want something that will allow for the roots to grow without space limitations. I’ve used mostly mason jars because that’s what I had in the apartment when I realized I accidentally bought my first cutting unknowingly (a satin pothos – more about that guy in a bit.) For my Monstera Albo, I found a larger, wide vase because its stem wouldn’t have fit in anything else. Hilton Carter is known for his incredible wall of glass test tubes that hold all of his propagated cuttings. I have another friend who uses old science beakers to grow cuttings. Heck, you can find some awesome-looking thing at HomeGoods to hold your cutting. As long as it’s clear glass with a long or spacious volume.
— BUYER BEWARE —
There are plenty of DIY Propagation Stations you can come up with or purchase on Etsy, just be sure that they aren’t restrictive like this cute, but useless bulb stand I got (see below.) Not only did it have the most shallow depth, but I couldn’t fit a cutting in there without the rod suspending the bulb interfering with its shape. Plus, the water couldn’t be poured high enough to cover all of the cutting’s node, which is where the roots grow from. Before asking about how this cutting is now, don’t bother because it died & I’m very sad about it still. Yet it was such a great learning lesson because it opened my eyes to not only faulty propagation stands being sold online, but also faulty cuttings that can be price gauged to unknowing buyers (like myself – more on that later as well.) Lesson learned on both fronts.

Indirect, Bright Light Source
DO NOT (I repeat, DO NOT) place a cutting in a bright, sunny window. Only indirect, bright light is your friend. You’d think giving it the most light, especially at these early stages, is helpful but nope. Indirect & Bright ONLY. There can be some confusion about what is considered “x type of light” and thanks to Hilton Carter, I can now easily explain to you all what this means better than any other comparison out there:
From your plant’s point-of-view:
If it can see the sun = Bright Light
If it can see the sky, but NOT the sun = Bright, Indirect Light
I’ve also learned from Hilton that there’s no such thing as a low light plant! Instead, there are plants that can TOLERATE low light. Ultimately, every plant needs access to a light source but when nurseries refer to “Low Light Plants”, they really mean these are varieties that can handle being farther away from the window/light source than most others (i.e. Pothos, Snake Plants.) If you have any of those, be sure to thank them for being the hardy plants they are & making space for those more light-dependent varieties you also own.
CARE TIPS WHILE ROOTING
Use Tepid, Filtered Water
Tepid water is 1/4 boiled water mixed with 3/4 room temp water. In other words, it’s lukewarm to the touch. Think about how you get into the shower (on a normal occasion) – you don’t jump right in when it’s freezing cold because yikes, that’s aggressive. Same with plants – they don’t like to be shocked with freezing cold (or burning hot) water either.
Filtered water sounds extreme but you want to give your cuttings the best fighting chance right out of the gate, especially pre-root development. Tap water, no matter how clean & drinkable it is out of the faucet, still has levels of calcium & other things that indoor plants cannot handle as well as humans (I know, crazy right..?) We luckily have a water filter built-in our apartment fridge (sooo boujee) but a Brita or any sort of water filtering device works fine.
What I do is boil water in one of our medium sized pots with a side-spout (similar to this one) so it makes pouring flaming hot water into a small measuring cup or watering can less dangerous for my exposed skin’s concern. I use the remainder (mixed with cold) for the rest of my adult plants when I need to water them as well (I try to schedule all plant care tasks on the same day so it’s done with at once.)
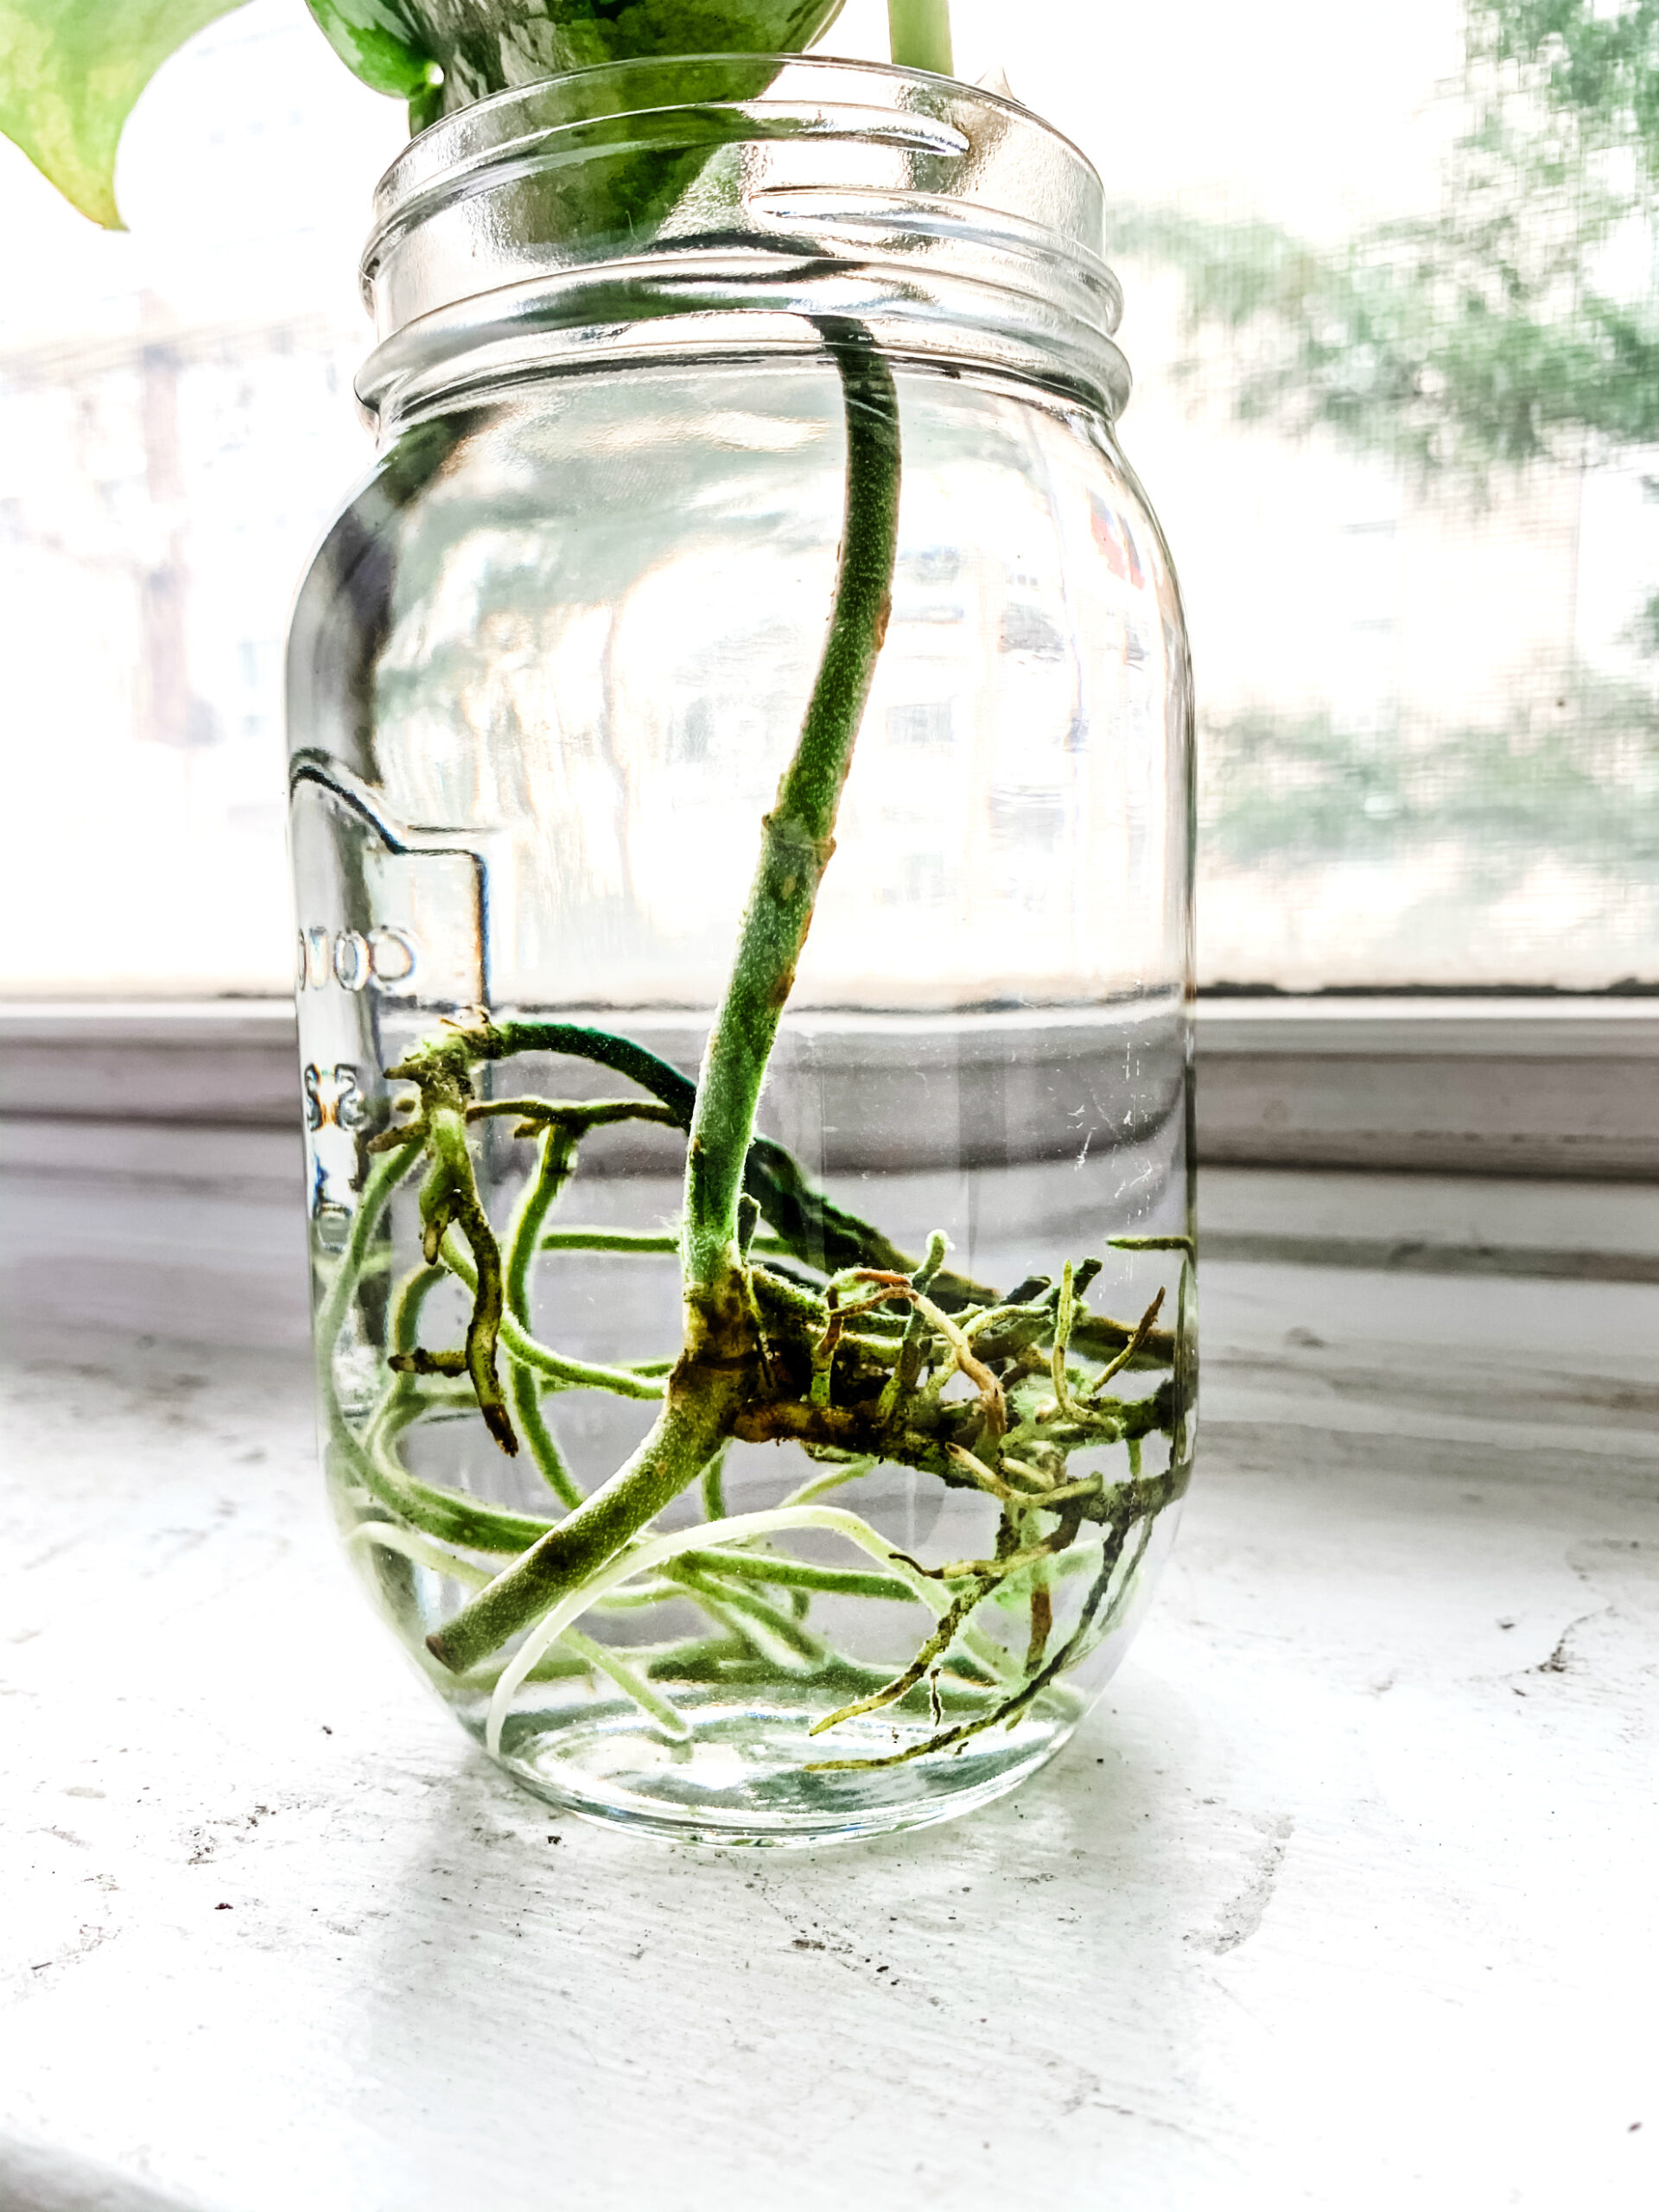
Change Water 1-2x/Week
You’ll want to change your cuttings water as often as 1x a week, maybe more if you see murky water appear sooner than 7 days or if it begins to smell like gross, moldy water does. Clean water = healthy roots, so you want to try to stay on top of it in terms of routine changing. If you’re not certain if its dirty enough, ask yourself if you’d take a sip – obv you wouldn’t anyway but if it grosses you out more to think about doing in that moment, it’s probably a good idea to change it.
While you’re at it, be sure to rinse and clean the algae out of the glass vessel container too. The cutting & roots will be ok outside of its water source for a few minutes, which is all you need to clean out the container anyway. DO NOT USE SOAP! Just filtered water and a paper towel/bottle brush to scrub away the hard-to-reach algae from the bottom and sides.
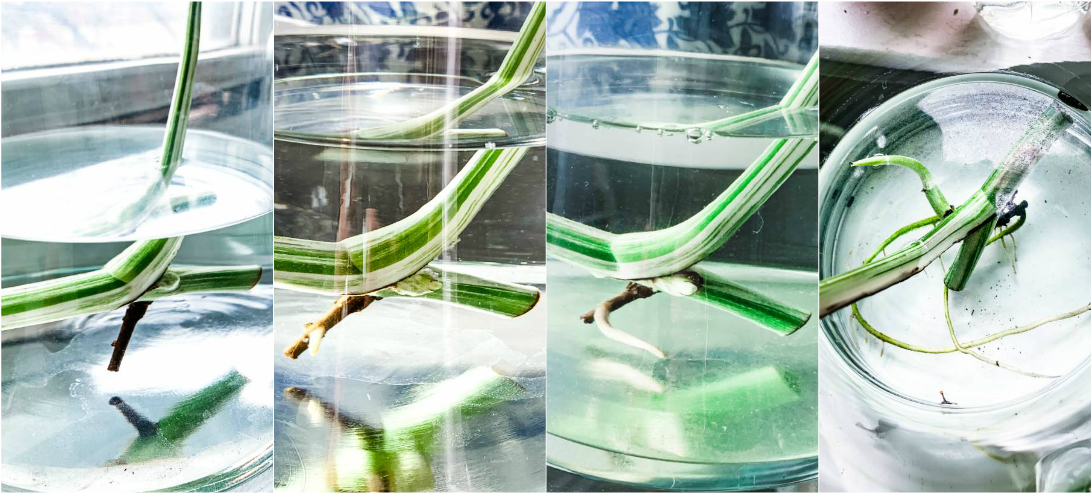
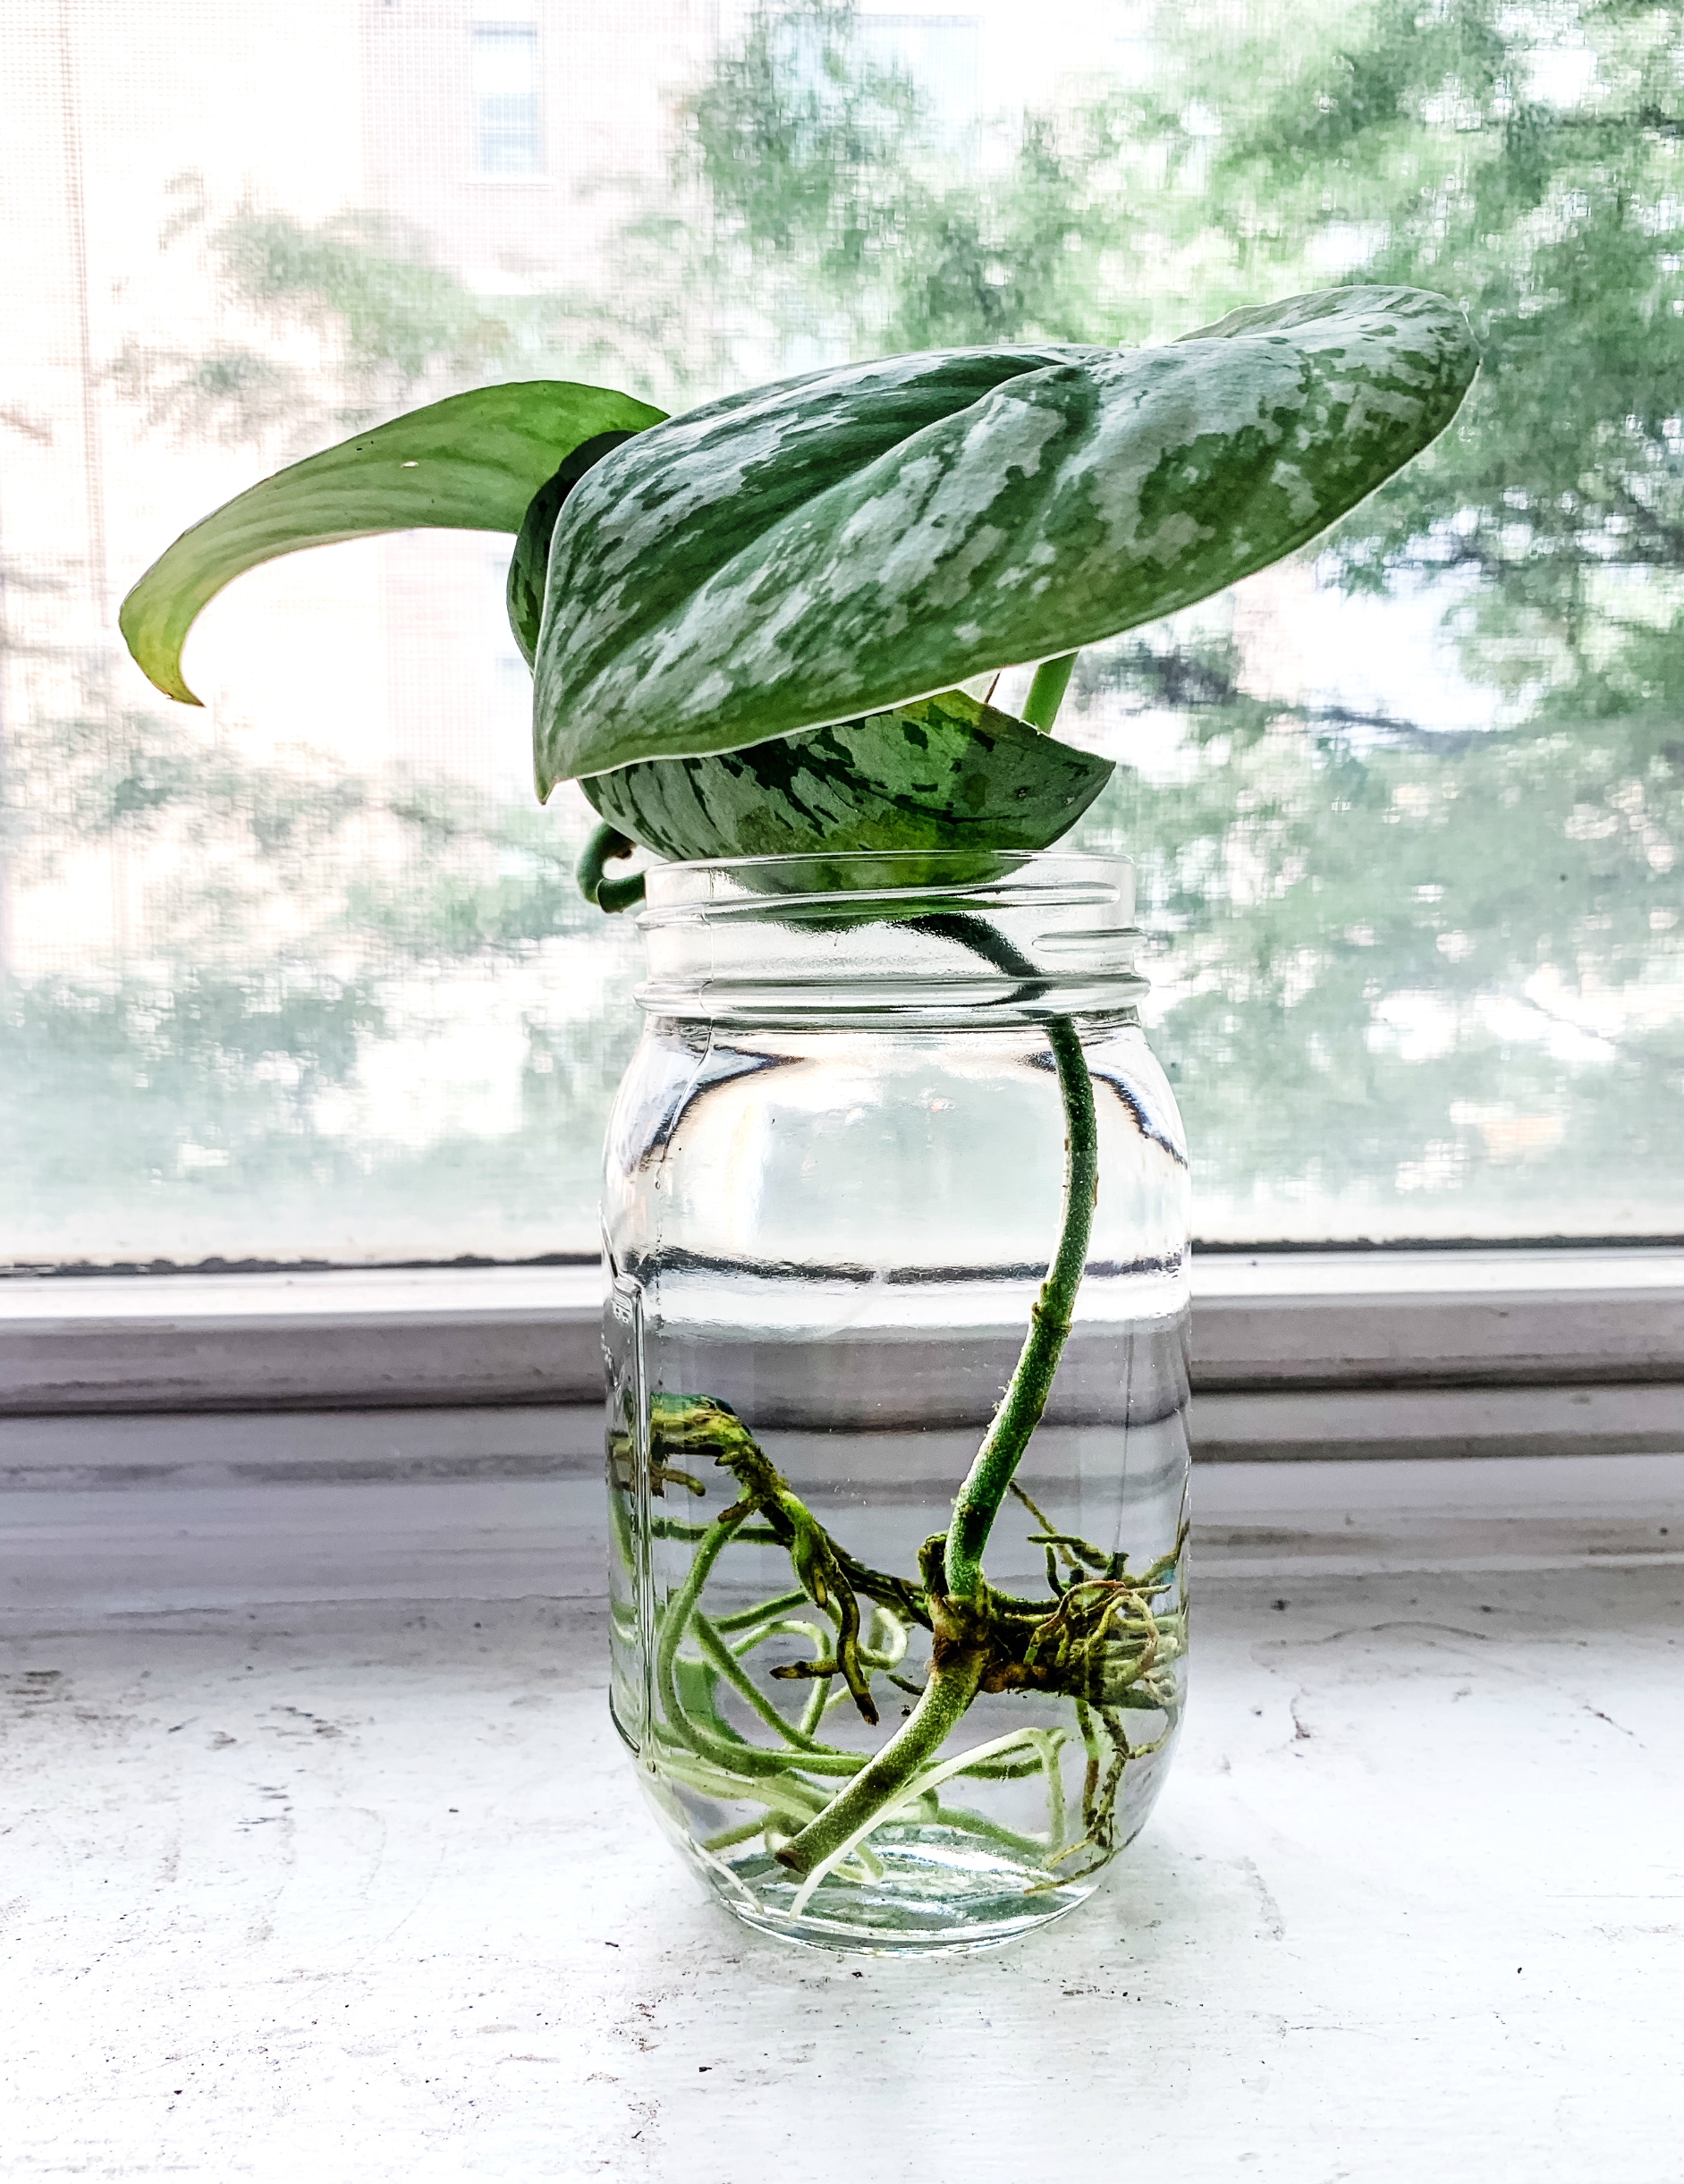
Gently Rinse Excess Algae From Roots
A way to control that moldy smell & more than 1x weekly water changes is to try to remove excess algae from the roots. NOTE: The roots. node and the stem of the plant cutting will grow algae regardless & that’s ok/normal. You just want to try to remove any of it that’s gathering in clumps or floating into the water to assist the roots with more productive growth & you’ll have cleaner, less smelly water to deal with.
When rinsing the roots, try to rinse with filtered water again if you can help it. Obviously you want to handle the cutting & its roots with care, but you don’t have to treat them like delicate glass. To remove excess algae, I found using a Q-tip to be the most gentle & effective tool.
When Not Changing Water, LEAVE THEM ALONE!
I know it sounds easy but you’d be surprised how tempting it can be to touch/fiddle around with your cutting, especially if all you have is one and your attention is dedicated to its growth. If you don’t trust yourself to leave it alone at first, I suggest placing it somewhere out of easy reach that still allows you to monitor it / allows for bright, indirect light access. Over time, you’ll outgrow the need to helicopter parent, especially when you see how much growth can happen while it remains uninterrupted.
Have Patience (like 3+ months worth)
Roots don’t grow overnight; in fact, they can take months especially outside of the summer reason. I got both my Satin Pothos and Monstera Albo cuttings in early Spring and they didn’t start to root like crazy until late June/July. Something to keep in mind if you choose to propagate this fall/winter – it can easily be done but just might take the plant a little longer due to decreased intensity of the window sunshine. But all great things come with time, trust me.
TROUBLESHOOTING
If you see rot developing on the cutting’s stem or node, that’s ok & normal!
But if the roots themselves are rotting, that’s not ok…
Signs of root rot: if they’re brown and squishy to the touch. If other healthier roots are present, you can remove the rotting ones from the cutting. However, if all the roots are rotting then you’re most likely SOL. This happened with my Variegated White Wizard cutting (the one I deemed “faulty”) – all the roots rotted within a week of receiving it in the mail, which arrived in a timely manner btw. After showing it to Hilton Carter during his virtual propagation class, it was determined to my unfortunate luck that this cutting didn’t have a node present…like at all. Without a node, the cutting CANNOT produce roots. Therefore, the cutting wouldn’t survive much longer.
There are two scenarios of what I think happened here: 1) this seller had no idea what s/he was doing and accidentally snipped off the node while propagating this cutting, or 2) this seller knew exactly what s/he was doing and purposely sold me a cutting without its own node. How these roots grew from the cutting I’m not sure, but it was probably once part of a bigger cutting and was snipped prematurely (aka these roots weren’t a product of this stem from the start..)
I mention this because there are plenty of people out there that will try to get a stupid amount of money out of “suckers” that will do anything for a priceless “variegated plant.” Although I didn’t spend a fortune, I definitely fell victim to the price gauging strategy and should’ve done my research before buying such a “rare” cutting, especially as my 3rd cutting attempt in life.
Learn from me and follow these tips on how to be smart about buying your next cutting online
DO YOUR RESEARCH ON THE SELLER
How many sales has this seller made? How long has the seller been selling [on Etsy]? Where is the seller located?
All these questions should be answered before you think about purchasing a cutting online. Otherwise, you might be in for a rude awakening when it shows up on your doorstep. Be sure to read as many posted reviews as you can on the seller as well, which can normally be found listed below the cutting being offered for sale.
GET A SHIPPING GUARANTEE
I’ll tell you right now, there’s no chance a plant (especially a cutting) will travel well overseas and I strongly suggest you avoid any sort of international purchase unless you crave disappointment. I didn’t need to experience such torment at my own expense; watching the countless heartbreaking videos of unboxing fails in the plant FB groups made me aware on their own.
If you buy any plant/cutting online, you want to ensure it will sent with expedited shipping (i.e. 1-3 days of travel from door to door.) The younger the plant, as well as the more variegated (white) it is, the lower the chances it’ll arrive in good condition after 3 days. That’s why it’s super important you take the seller’s location into account before deciding to buy. If the seller has a note that guarantees next business day shipping or anything of the sort, that’s more promising. Just be sure that even with such measures, shipping delays can still happen that’s not under the seller’s control. Once the plant is dropped off, it’s in the mail carrier’s hands… Buy at your own risk.
MAKE SURE YOU’RE BUYING THE EXACT CUTTING LISTED
Ensure the photograph of the cutting you see listed is the exact one you’ll be getting in the mail. If you’re not sure, ask the seller directly. Also make sure you see various images of the cutting, including shots of the NODE – without it, your plant won’t produce roots so it’s crucial you see an image of it to determine if its in good shape. If you ask the seller and s’he pushes back on any of the above, move on and consider yourself spared from disappointment or bamboozlement.
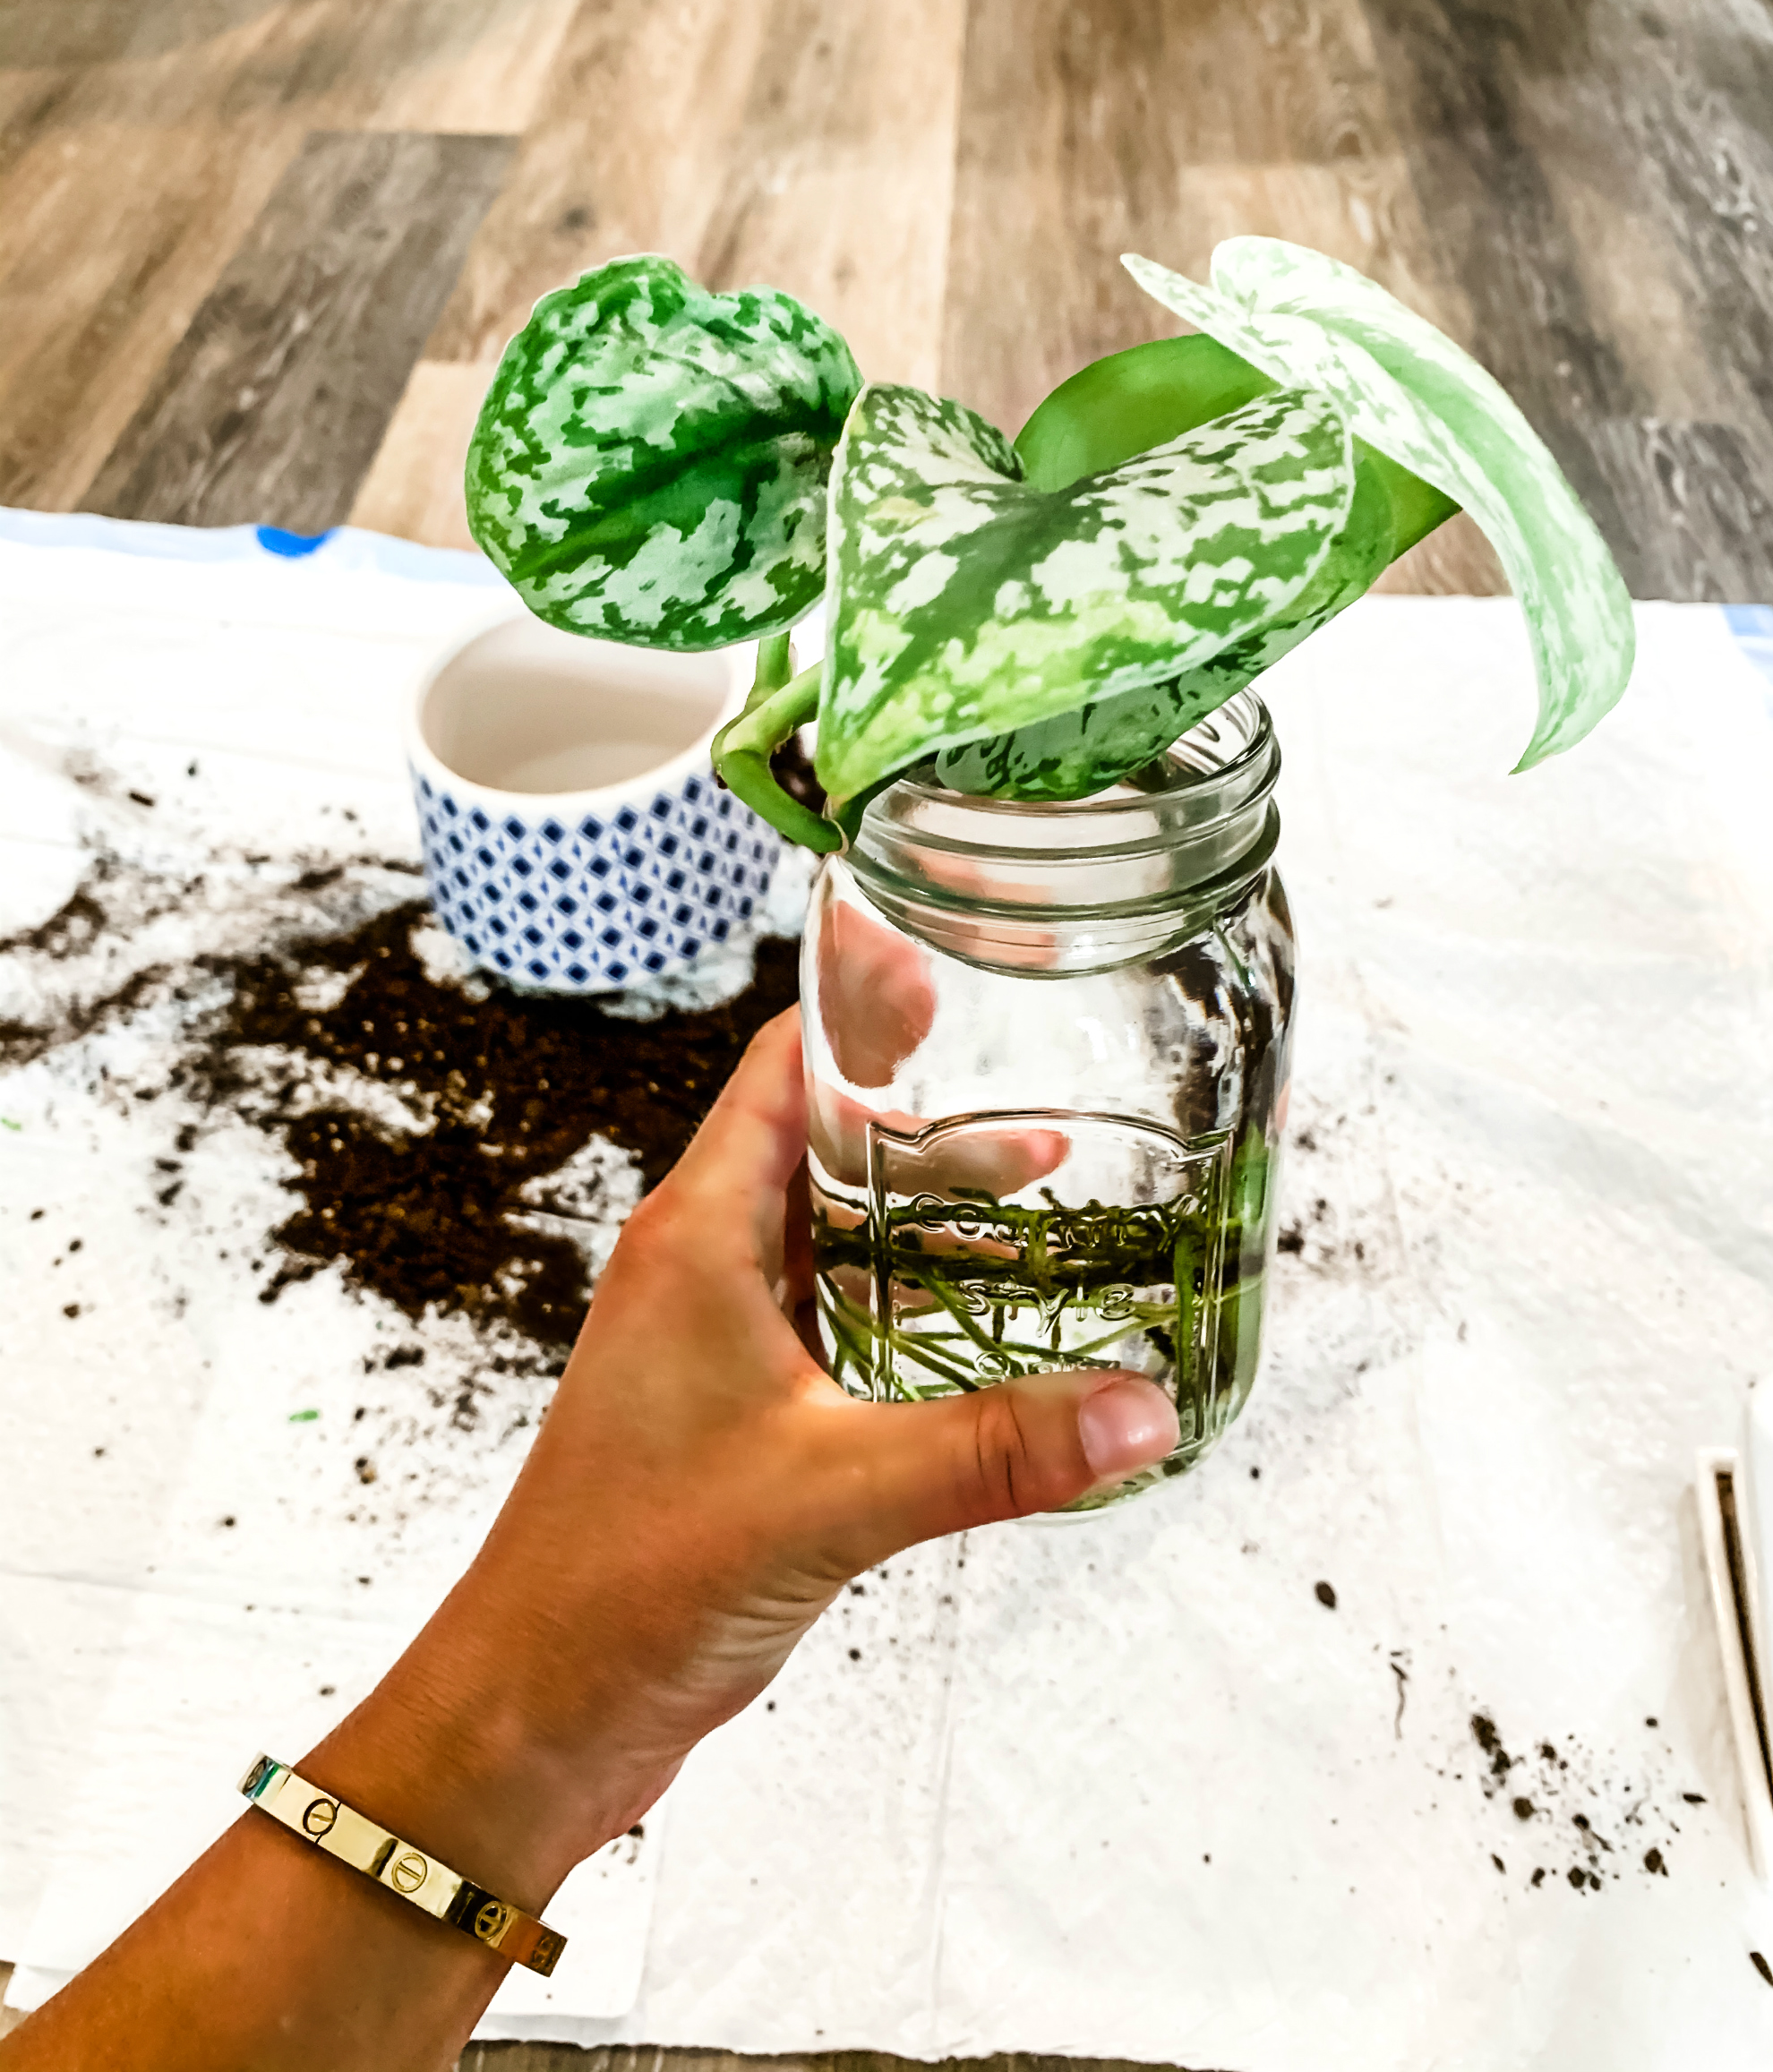
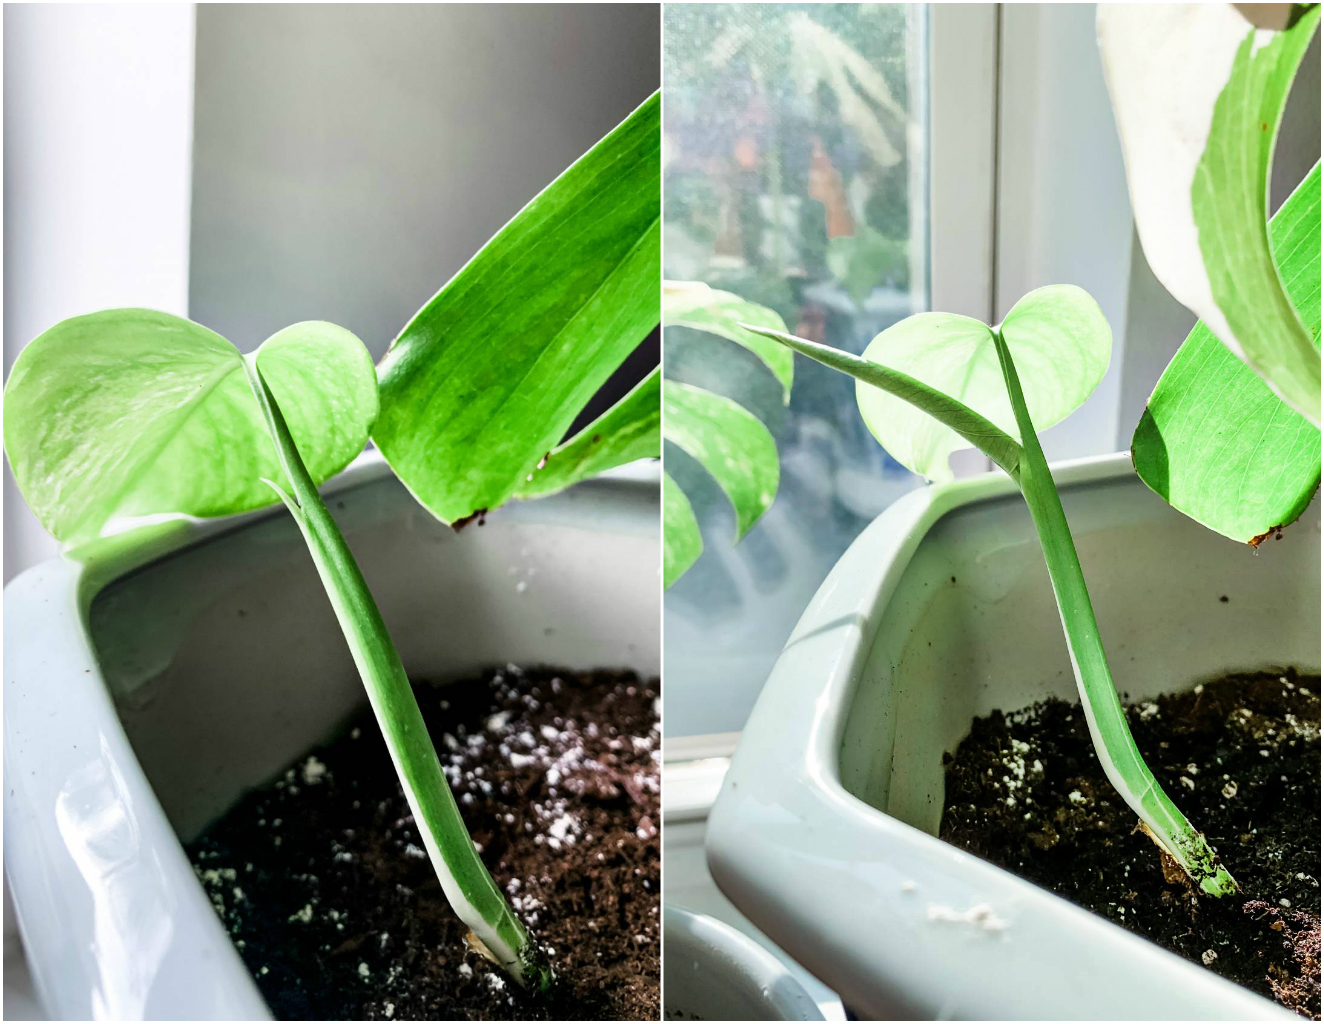
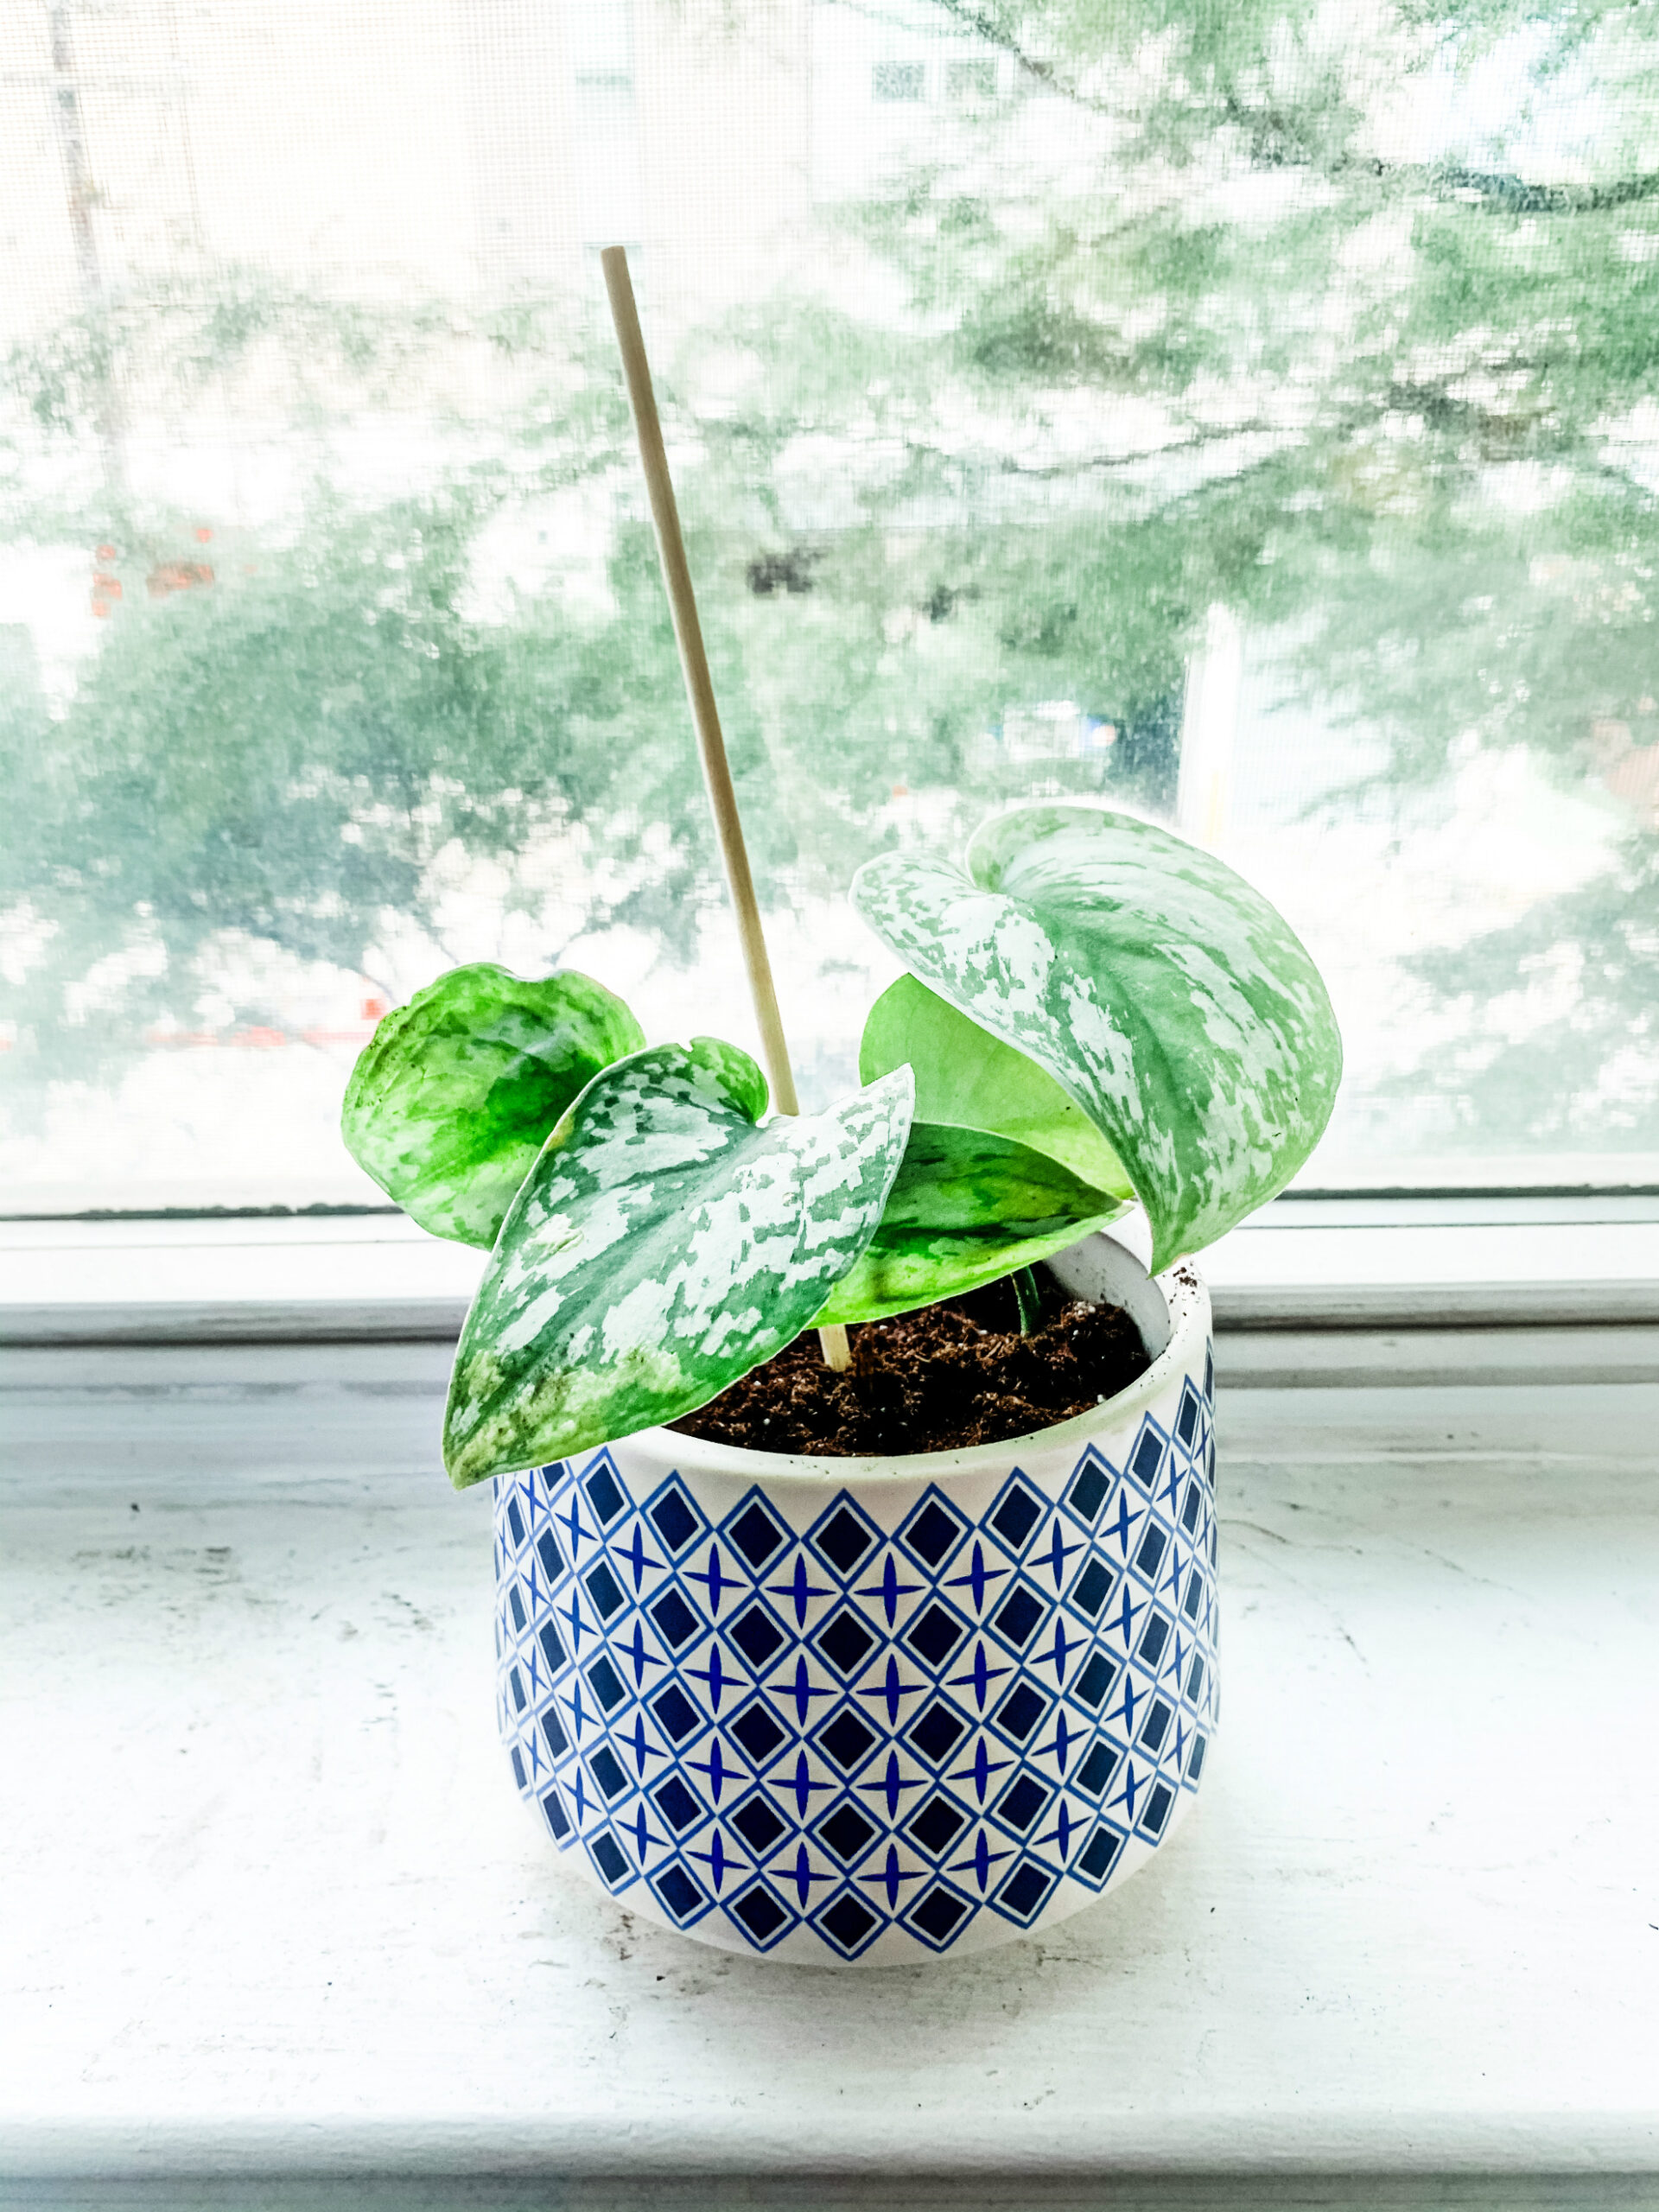
WHEN IT’S TIME TO POT
When your cutting has roots 4-6″ in length, it’s time to move it to soil! This is a big deal when your cutting gets to this stage because it will ultimately determine if you’ve been successful at propagating once in the soil.
To help ensure the best transition from water to pot, here’s what to do:
..
Find The Perfect Pot
Finding the perfect pot for your cutting is so important when it comes to the success & longevity of your cutting. I’m definitely guilty of purchasing pots solely based on the look of them, without having a plant in mind for them. It’s ok to do that from time-to-time, but there are a few things you should make sure the chosen pot for your cutting has before placing:
– Pot should have a draining hole; if not, drill one in & place on a catch tray for excess water
– Pot should be 2″ bigger than the diameter of the cutting’s roots in a bundle; allows for best growth above & below the soil
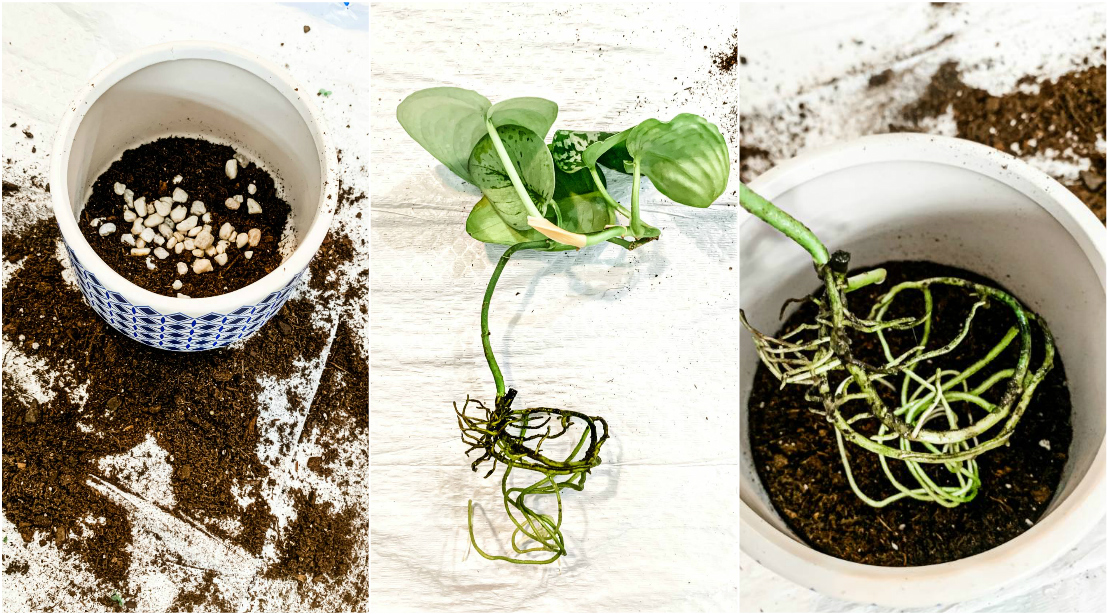
Use The Right Soil
Like pots, not all soil is created equal. Depending on the type of cutting you’ve propagated, its soil has to be reflective of its needs (like a Cactus vs green leaf Monstera.) For anything that’s not a cactus or succulent, strive for an organic perlite soil that’s 20% natural and 80% potting mix. I personally have used Epsoma Organic for all my greeny plants (mature & cutting) and they’ve adapted tremendously to it, as well as have grown exponentially since.
When adding soil to the pot, do it in layers: bottom layer 2-3″ soil, add several pebbles in the center to help draw water down towards roots, another 2″ soil layer, then suspend the roots in center of pot by holding in one hand and using the other to surround the rest of the plant with soil until completely covered.
Water It Normally
However the mature/mother plant or variety likes its water is the same way/amount you should provide for your cutting. There’s no special treatment or small, gradual increments you need to hold it to; just water it as you would if it were a normal-sized plant. Of course, don’t drown it and keep the size of the pot in mind; and when in doubt, do less and add more later should the plant seem thirstier.

RESOURCES
Propagating Plants with Hilton Carter [Zoom]
As I’ve mentioned above several times, I cannot recommend Hilton Carter’s online workshop on plant propagation enough. This is no pre-recorded situation; Hilton HIMSELF comes on LIVE to teach a small group of 10-15 at a time, for only $35! The amount of information I received & learned in 1.5 hours, not to mention the “exclusive yet approachable while personal” setting Hilton provides his guests virtually, could be compared to a semester lecture at a private university. I seriously SERIOUSLY suggest signing up while he’s still hosting these incredible classes. You should also purchase his two books – Wild At Home + Wild Interiors – because they’re also filled with knowledge and his experiences growing plants in his Baltimore apartment; they’re also just beautiful to look at & display as well.
Root Nurture Grow: The Essential Guide to Propagating & Sharing Houseplants [Book]
Along with Hilton’s books, this one is a great reference for when you make the decision to start propagating from your existing plant family at home. I like knowing this tangible item is nearby to take a look at for when the time comes, instead of trying to read over my scribbled notes and referencing an online article I can’t remember exactly where I found it to begin with lol. It’s easy to read and follow, making the propagation process much more approachable in the written word.
Plant Propagation Articles [The Sill]
My #1 online plant resource – The Sill – steps up to the propagation challenge with a handful of articles written by its plant care experts to reference on your downtime. Here are two previously published I recommend taking a look at:
Plant Propagation For Beginners
The Best Plant For Propagation
Thank you so much for taking the time to read this first part of my Plant Propagation Post Series!
I hope my experience in growing my first cuttings has helped to inspire you to do the same. Be sure to check out Part Two of this series as you continue on your journey to expanding your indoor plant family.
More Plant Care Posts You May Also Like:
Beginner’s Guide To Plant Parenthood
Best Care Tips For Cactus + Succulent Plants
Green Thumb 101
Meet Our Indoor Plants
The Importance Of Indoor Plants In An Apartment

OMG, I need to try this, but I have killed every living plant that I have ever had in my home… This post is motivating me though!
Thanks!
Lisa
http://www.occasionallyluxe.com
I have always admired and probably envied people with a knack for plants and growing and propagating. I have tried and tried over the years and I literally kill everything! It is a wonder I have managed to keep my children alive this long! Thanks so much for sharing this super informative and helpful post and linking it up with me!
Shelbee
http://www.shelbeeontheedge.com
wow thank you for all the great tips! it really helps!
Still learning how to be “good” with plants. With me they survive but I’m pretty sure that’s all they do. With all of your helpful tips, maybe I’ll try again & it will thrive! Thanks so much!